How to generate Lego toys using ComfyUI?
LEGO, a toy we've been familiar with since childhood, has always symbolized the endless possibilities of inspiring creativity. Now, we can apply this creativity to image processing, making every photo full of fun and artistic flair.
1. Download and Install
First, you need to download and install the plugins and models. You can download ComfyUI_Noise-master (opens in a new tab) and comfy-image-saver-main (opens in a new tab) from GitHub, and place them in ComfyUI\custom_nodes. If you are using them in Comflowy, you can refer to the previous installation tutorial: How to implement facial restoration using ComfyUI? (opens in a new tab)
Node Introduction
1 . end_at_step : When using ComfyUI to convert images into LEGO style, the process typically involves a series of steps such as adjusting colors, identifying edges, or adding noise. By setting the end_at_step node, we can specify at which step to terminate the conversion process. This setting might be used to stop once the desired effect is achieved or to preserve certain original features of the image at a specific stage. Utilizing this feature allows for more detailed control over the final image presentation, ensuring it matches our creative vision.
2 . Image scale to side : This node is used to adjust the size of the image to fit a specific width or height. It allows users to scale the image as needed to ensure that it maintains the appropriate proportions and size on different display devices or in various design layouts.
3 . Unsampler : The function of this node is to perform downsampling of the image, which means reducing the number of pixels in the image. This process is typically used to lower the resolution of the image while maintaining the visual quality as much as possible.
Model Download :
3D_Mix_Character (opens in a new tab) :This is a CheckPoint model, and it needs to be placed in ComfyUI\models\checkpoints.
LegoAI - konyconi (opens in a new tab):This is a Lora model that can be converted into Lego style. After trying out various models, I found this one to perform more stably. Download it and place it in ComfyUI\models\loras.
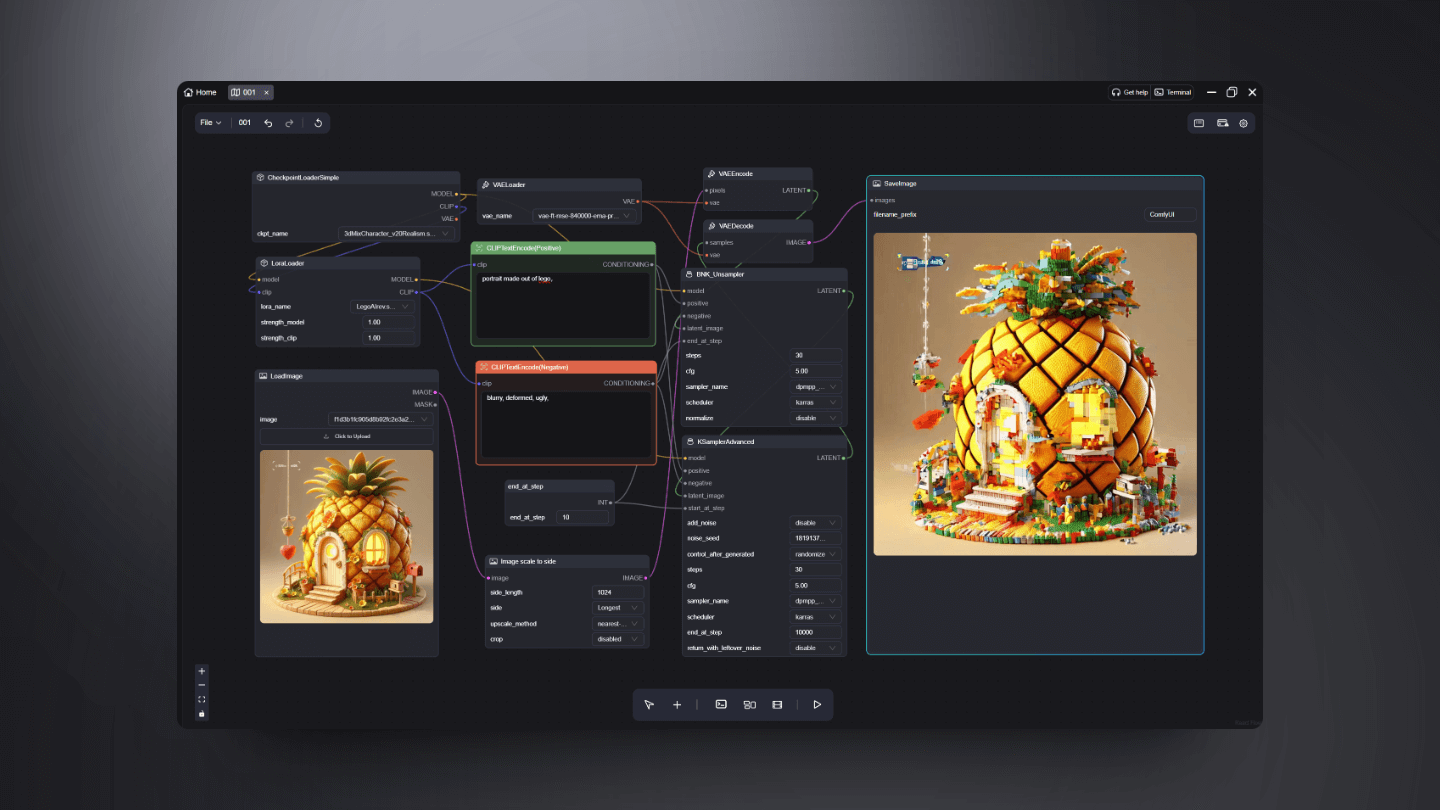
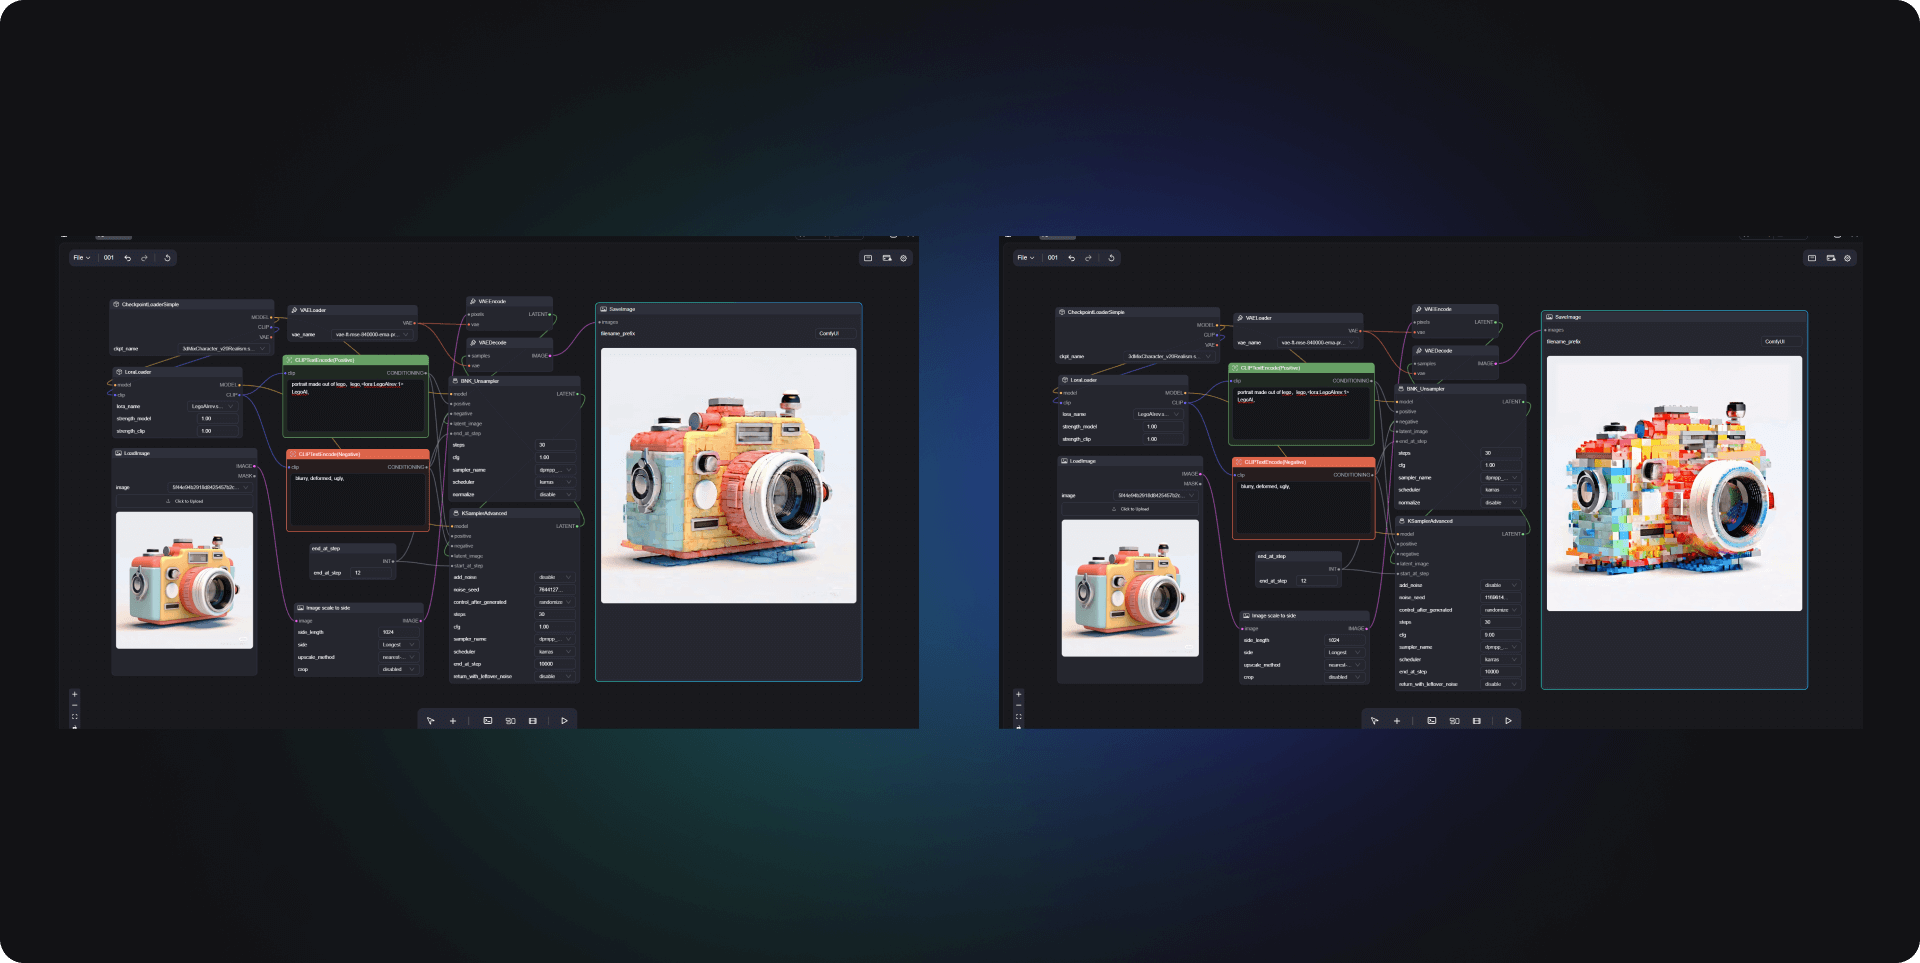
Finally, you could build a workflow like this:
2. Decode the elements affecting the effect
2.1 end_at_step
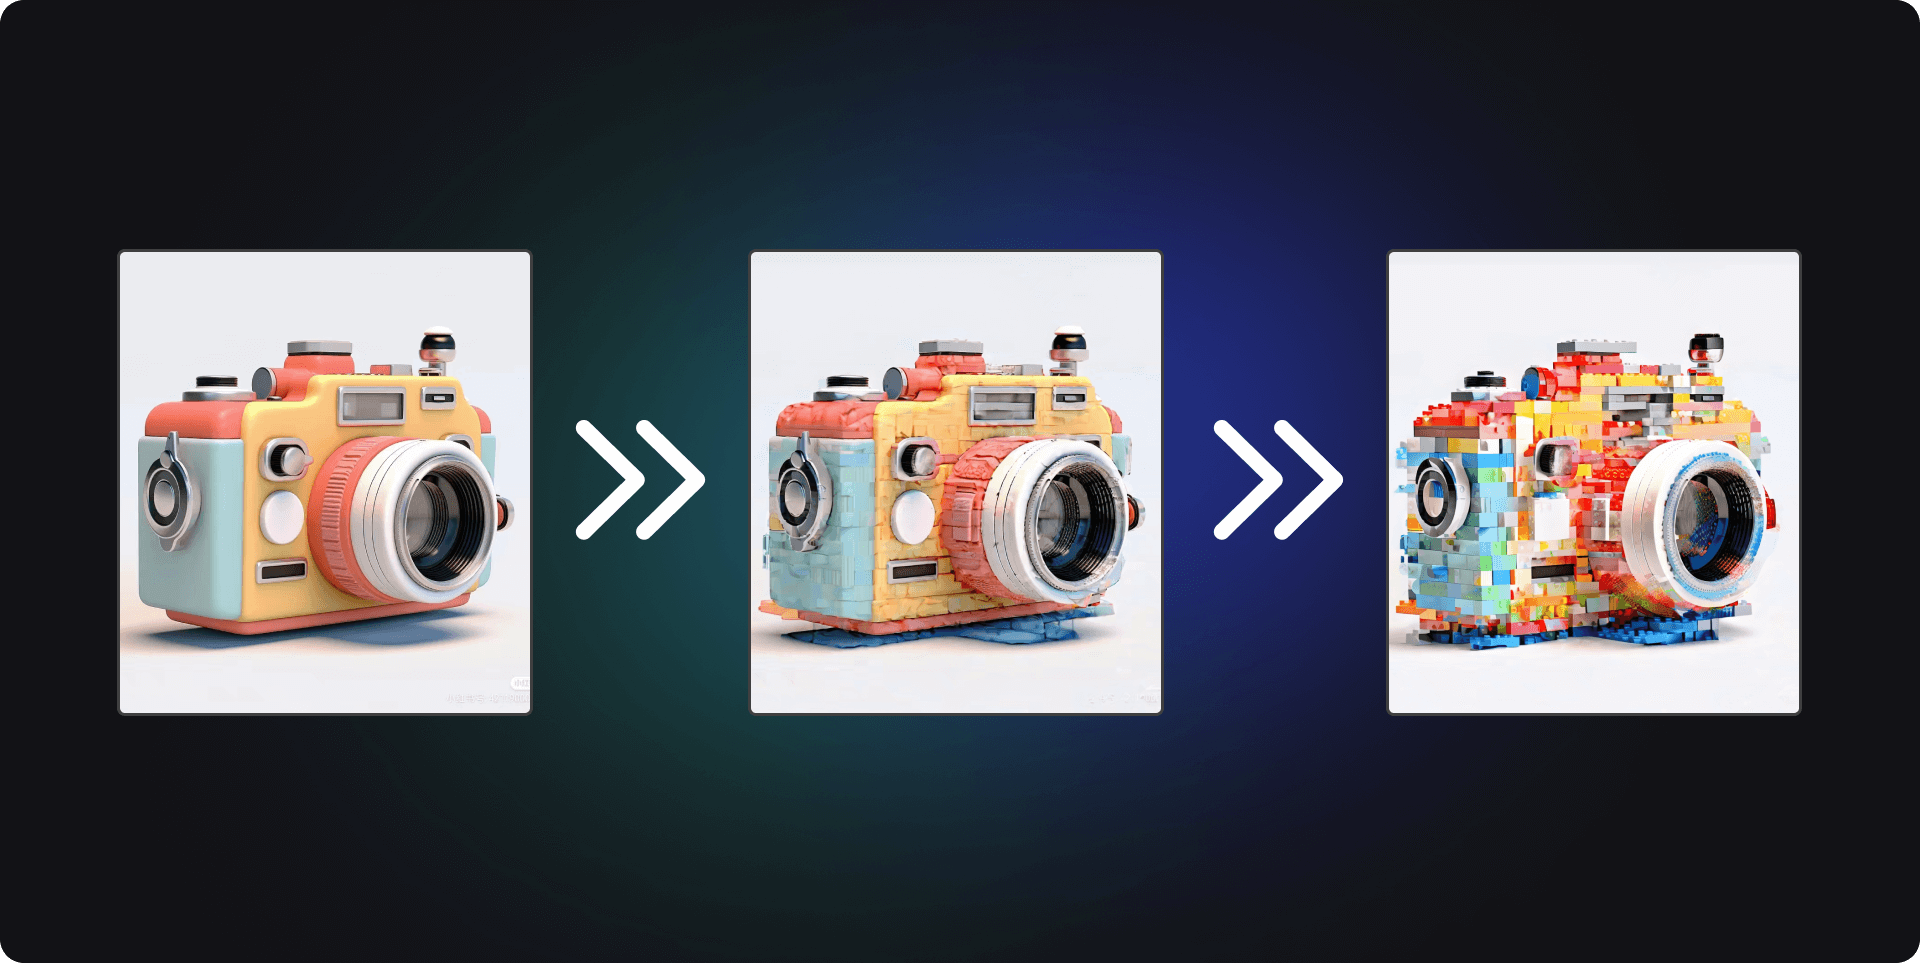
In exploring the impact of the end_at_step on image recognition effects, I conducted a series of experiments by adjusting the parameter values to observe their specific effects on recognition capabilities. When the end_at_step parameter is set to 5, the model's recognition ability is not ideal, and the accuracy of object recognition and feature capturing capabilities in the images are relatively weak. This may be due to the parameter value being too low, causing the model to not fully learn enough feature information during image processing, thereby affecting the final recognition results.
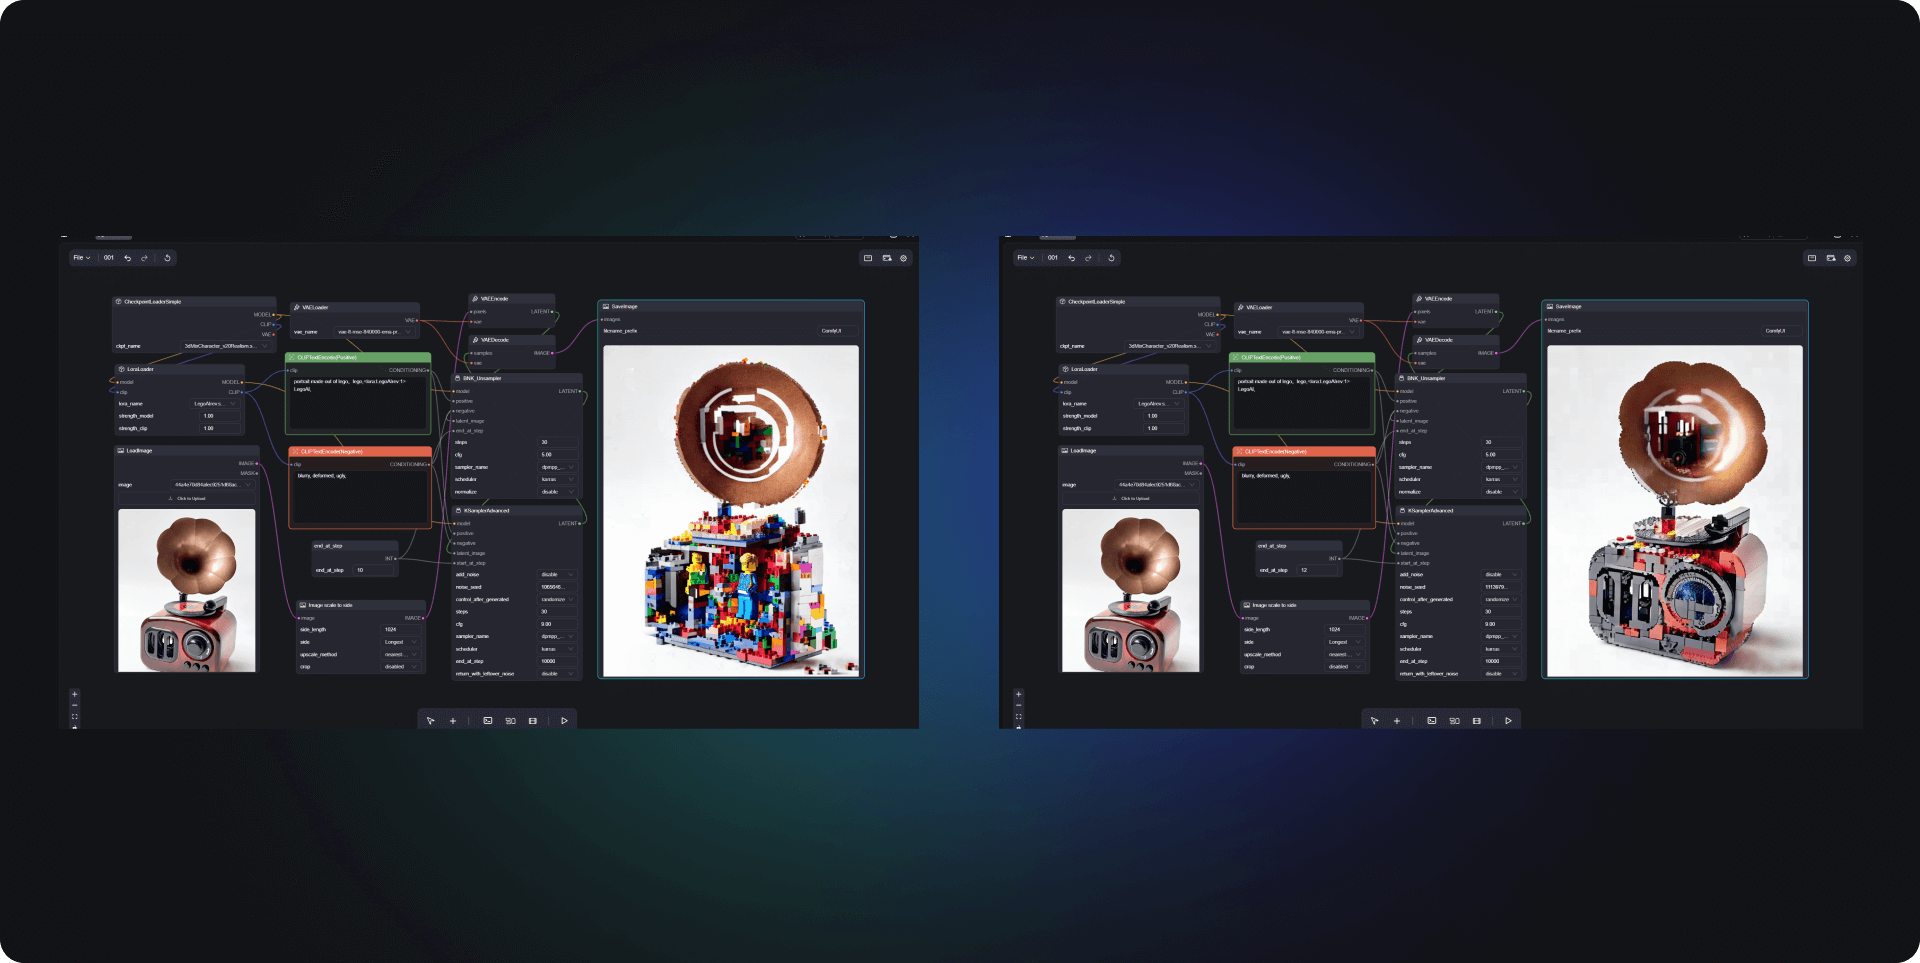
Conversely, when I increased the end_at_step parameter value to 12, there was a significant improvement in the model's object recognition capabilities. With this parameter setting, the model was not only able to more accurately identify objects in the images but also capture more detailed feature information. Therefore, appropriately increasing the parameter value helps the model to delve deeper into and learn from the image data, thereby enhancing the accuracy and reliability of recognition.
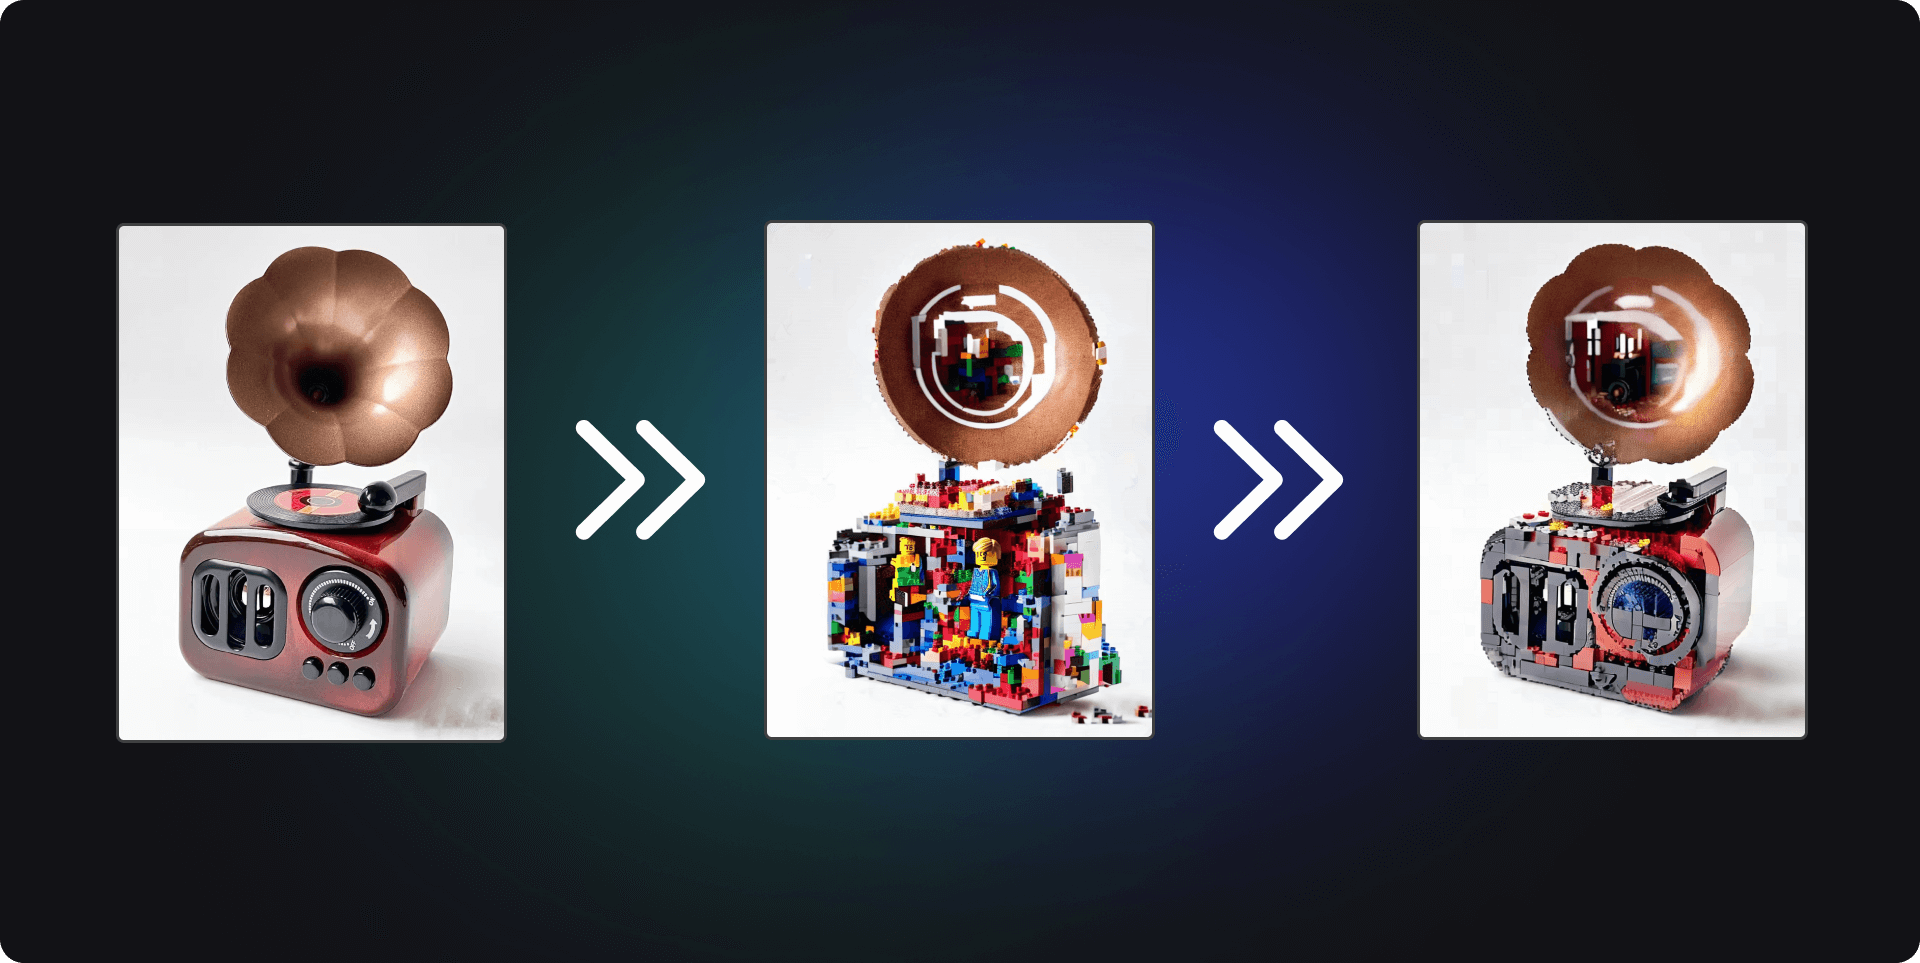
Taking everything into consideration, I recommend setting the end_at_step parameter value within the range of 10 to 15. Values in this range effectively balance the model's depth of learning and computational efficiency. They ensure that the model sufficiently learns image features without causing excessive computation or resource wastage. With such parameter adjustments, we can ensure the effectiveness of recognition while also considering the performance and practicality of the model's operation.
2.2 Unsampler
When we need to process images, the Unsampler can be used to increase the resolution of the image. The cfg can set the sampling rate for node processing data. This allows users to downsample (reduce sampling rate) or upsample (increase sampling rate) the input signal as needed.
In experiments, I found that setting a lower sampling rate, such as 1x, results in a significant loss of image detail, leading to poor recognition and processing effects. However, when we increase the sampling rate to 5x or higher, the clarity and detail of the image are significantly improved, making subsequent image recognition and analysis work more accurate and effective.
Recommended parameters:
- step : 30
- cfg : 5-9
3. Demonstration of Effects
3.1 LEGO Figures
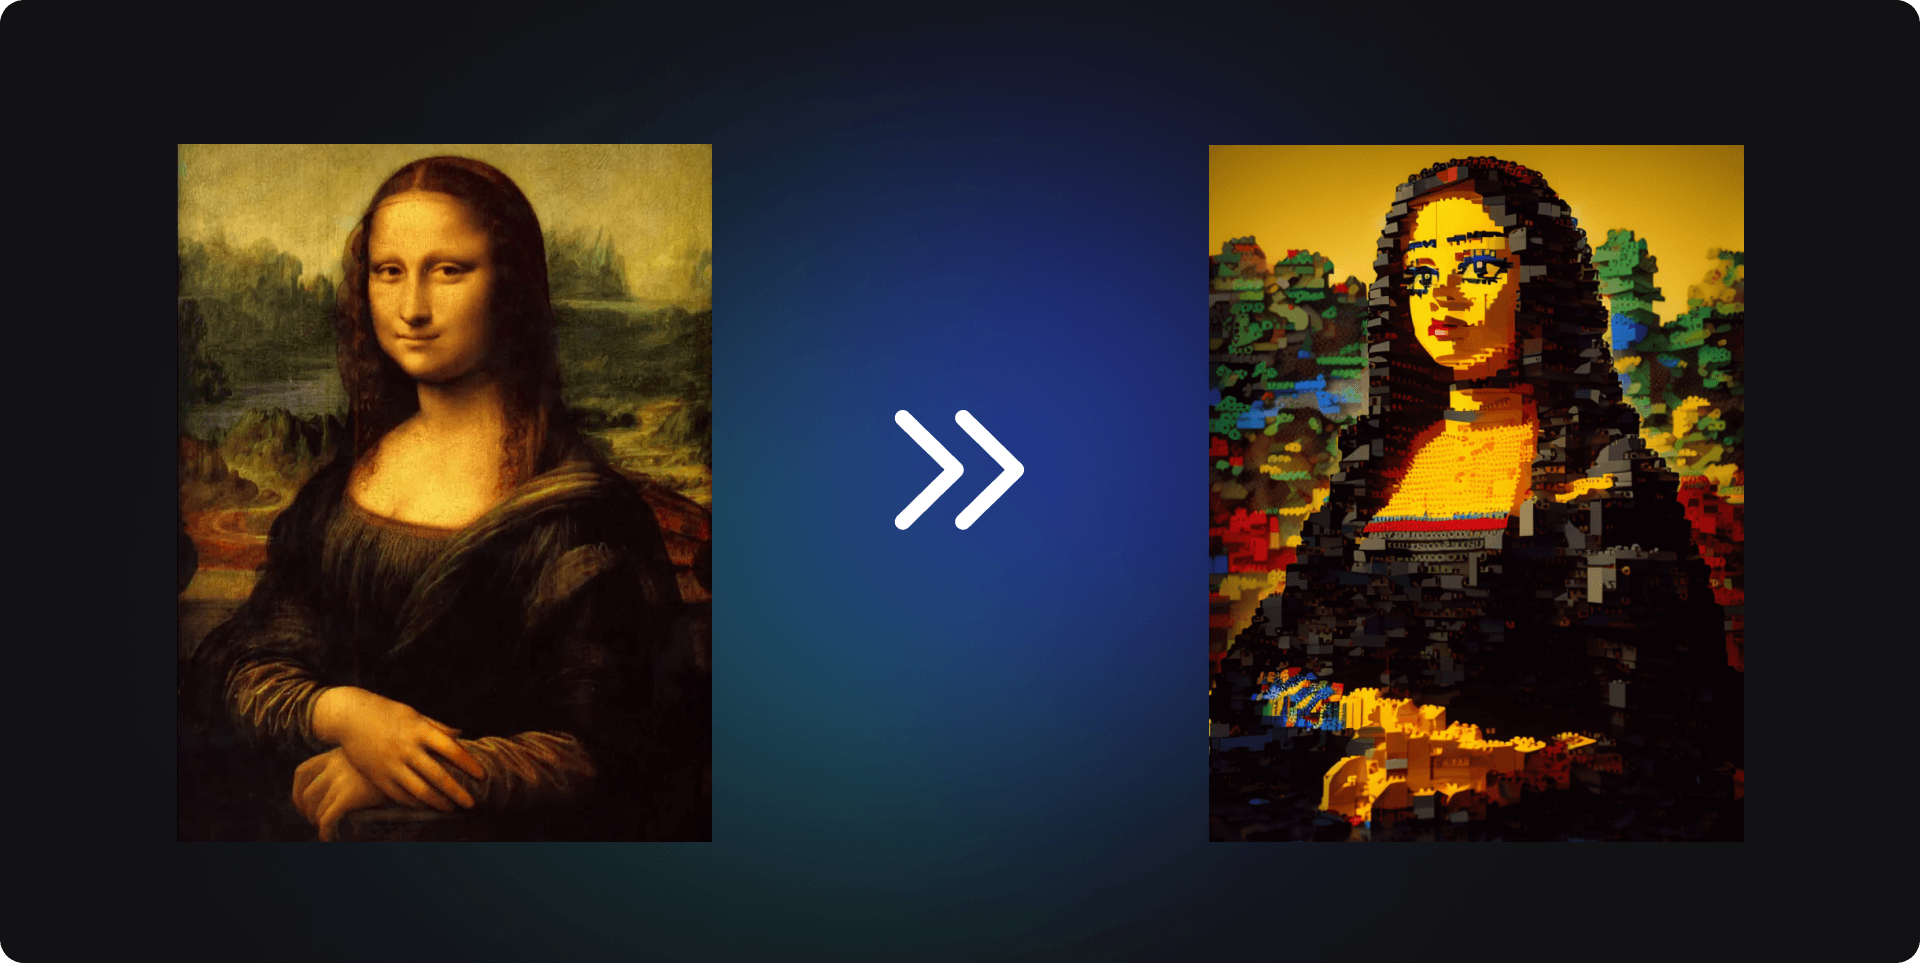
I first tested its capability in generating figures, speculating whether there would be differences in the recognition of paintings and photographs. Therefore, I started by importing the classic oil paintings, such as Mona Lisa and the Girl with a Pearl Earring, into this workflow and generated a LEGO effect. It can be observed that these paintings were endowed with the distinctive colors and unique textures of LEGO bricks.

The transformed artworks exhibit vibrant colors and add a sense of modernity and interactivity, presenting these historic masterpieces in a completely new way before us.
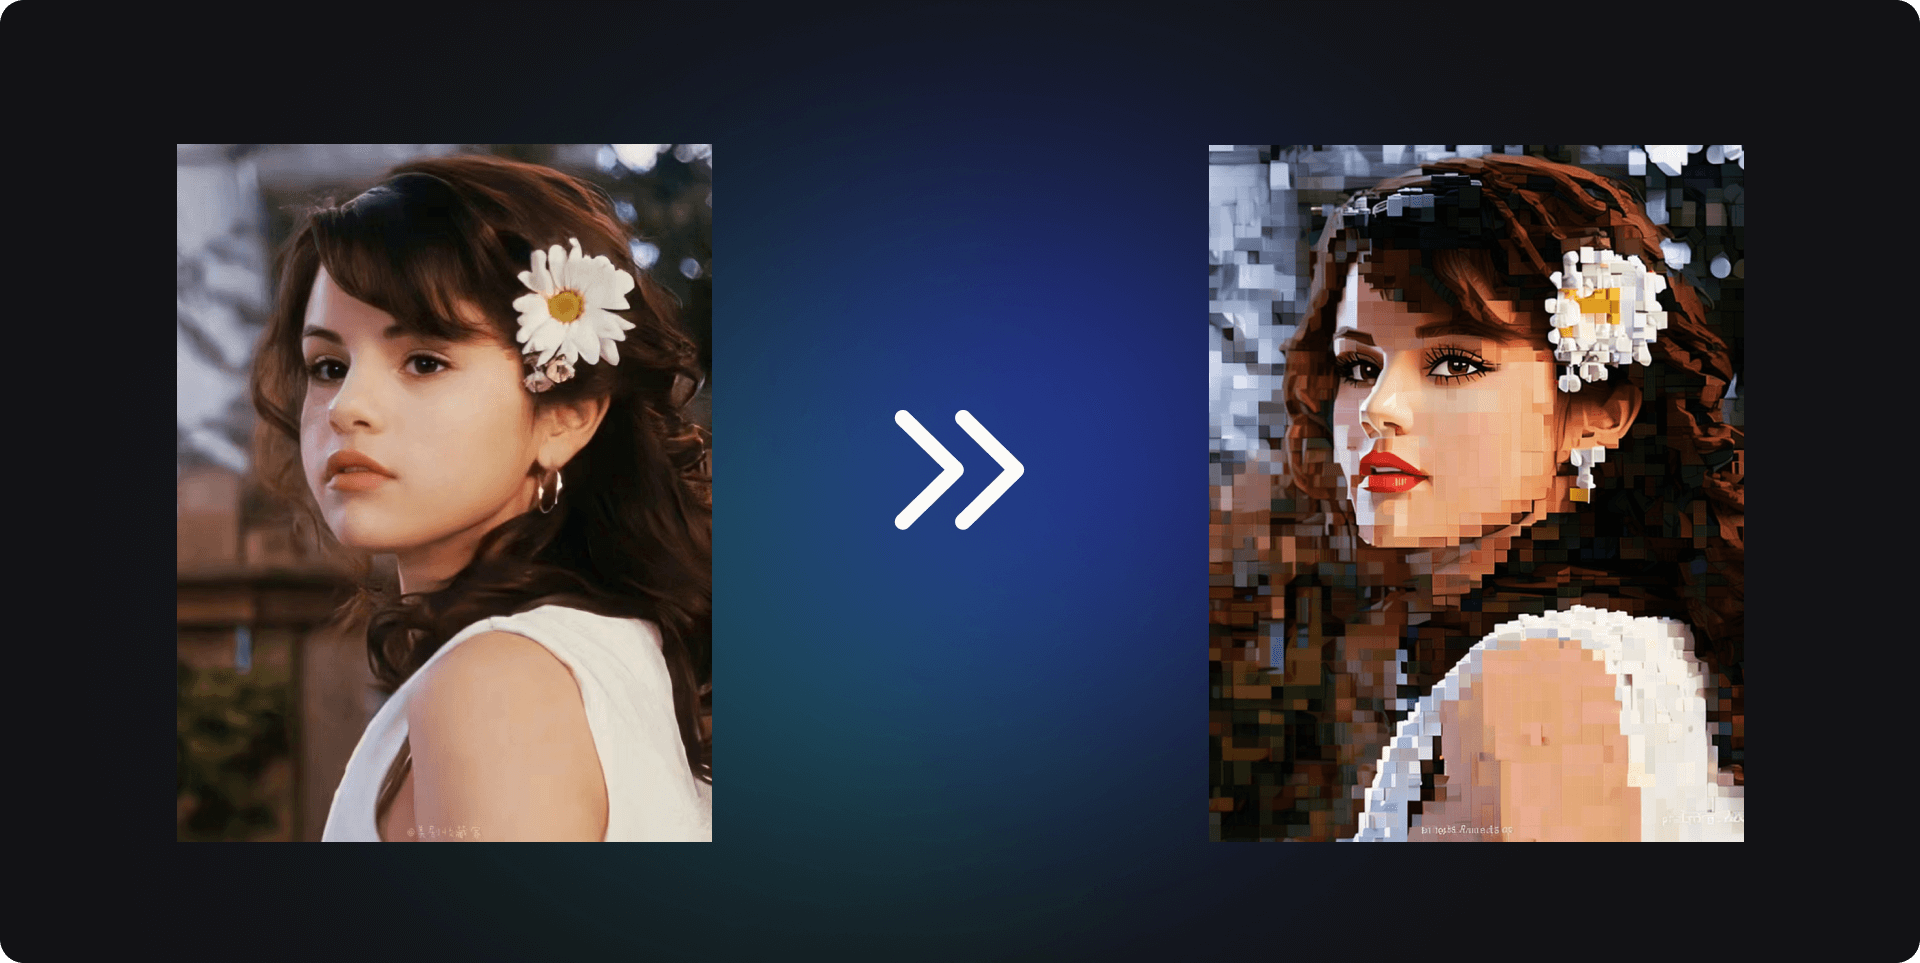
When processing real-life photos, it's evident that each image undergoes careful analysis and treatment, ensuring that while transforming into LEGO style, the key features and expressions of the individuals are preserved. The geometric shapes and vibrant colors of LEGO bricks add a unique visual style to the portraits, infusing every detail with vitality and personality. Such image transformation is not just a technical implementation but also an artistic reinterpretation.
Through ComfyUI's illustration, we can turn simple moments from everyday life, such as family gatherings, graduation ceremonies, or travel snapshots, into LEGO-themed keepsakes. These LEGO-style images not only serve as unique decorations but also as wonderful mediums for sharing and cherishing memories.

3.2 LEGO Items
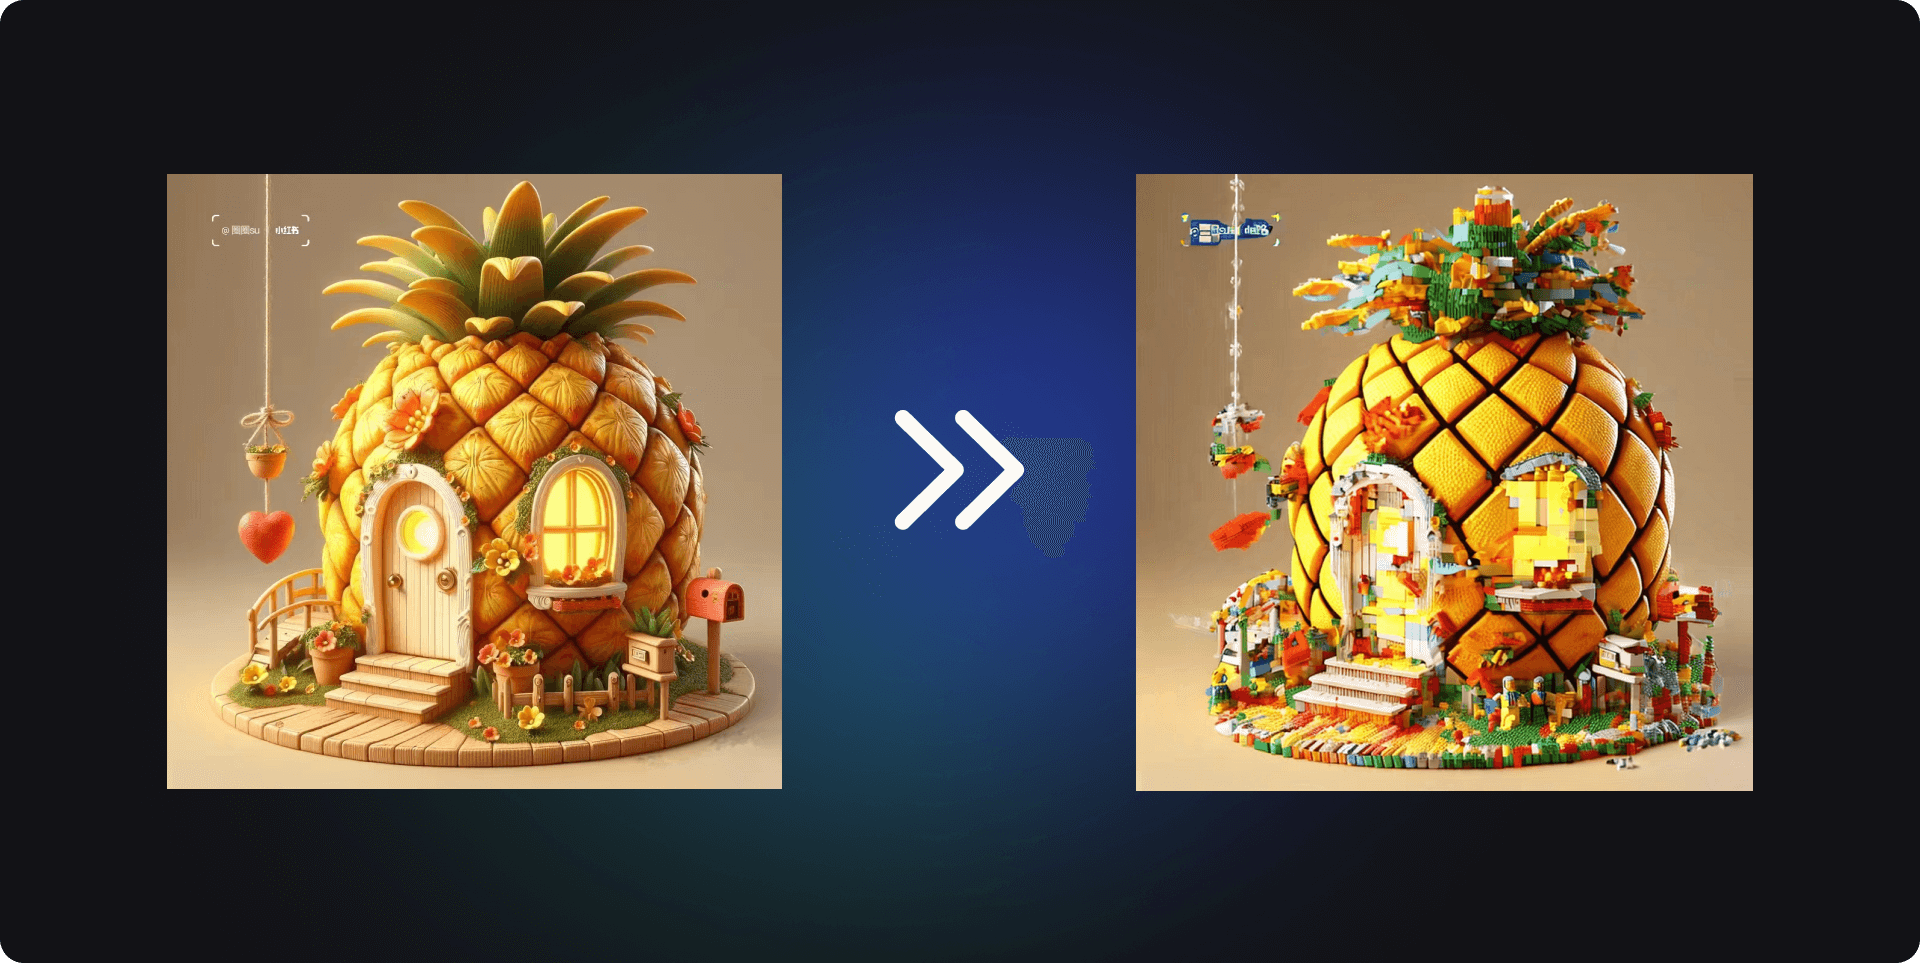
Furthermore, I also transform everyday items from daily life - such as cameras, cars, coffee machines, and more - into ingeniously crafted LEGO-style images using this workflow.
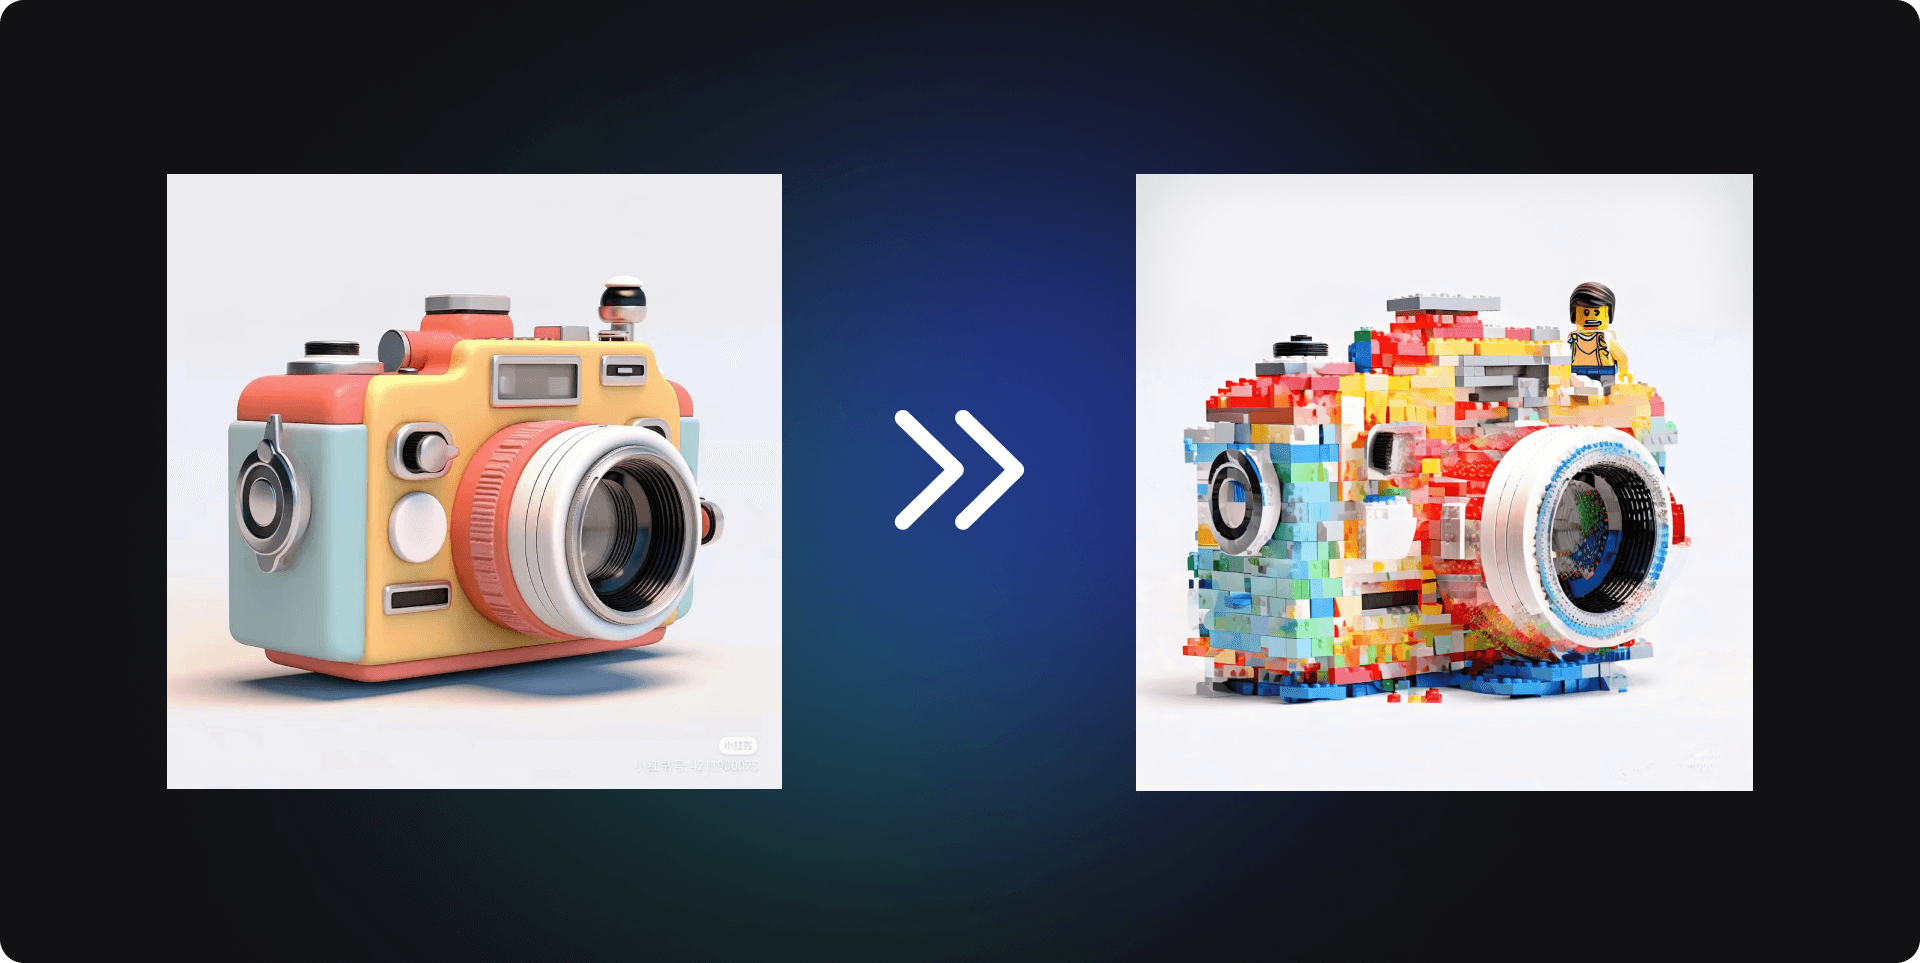
During the generation process, it not only captures the shapes and details of the items but also imbues them with the vibrant colors and texture of LEGO bricks. The vivid colors and modular design of LEGO bricks bring a unique visual impact to these items, making them seem like toys that can be picked up and assembled, brimming with interactivity and fun.
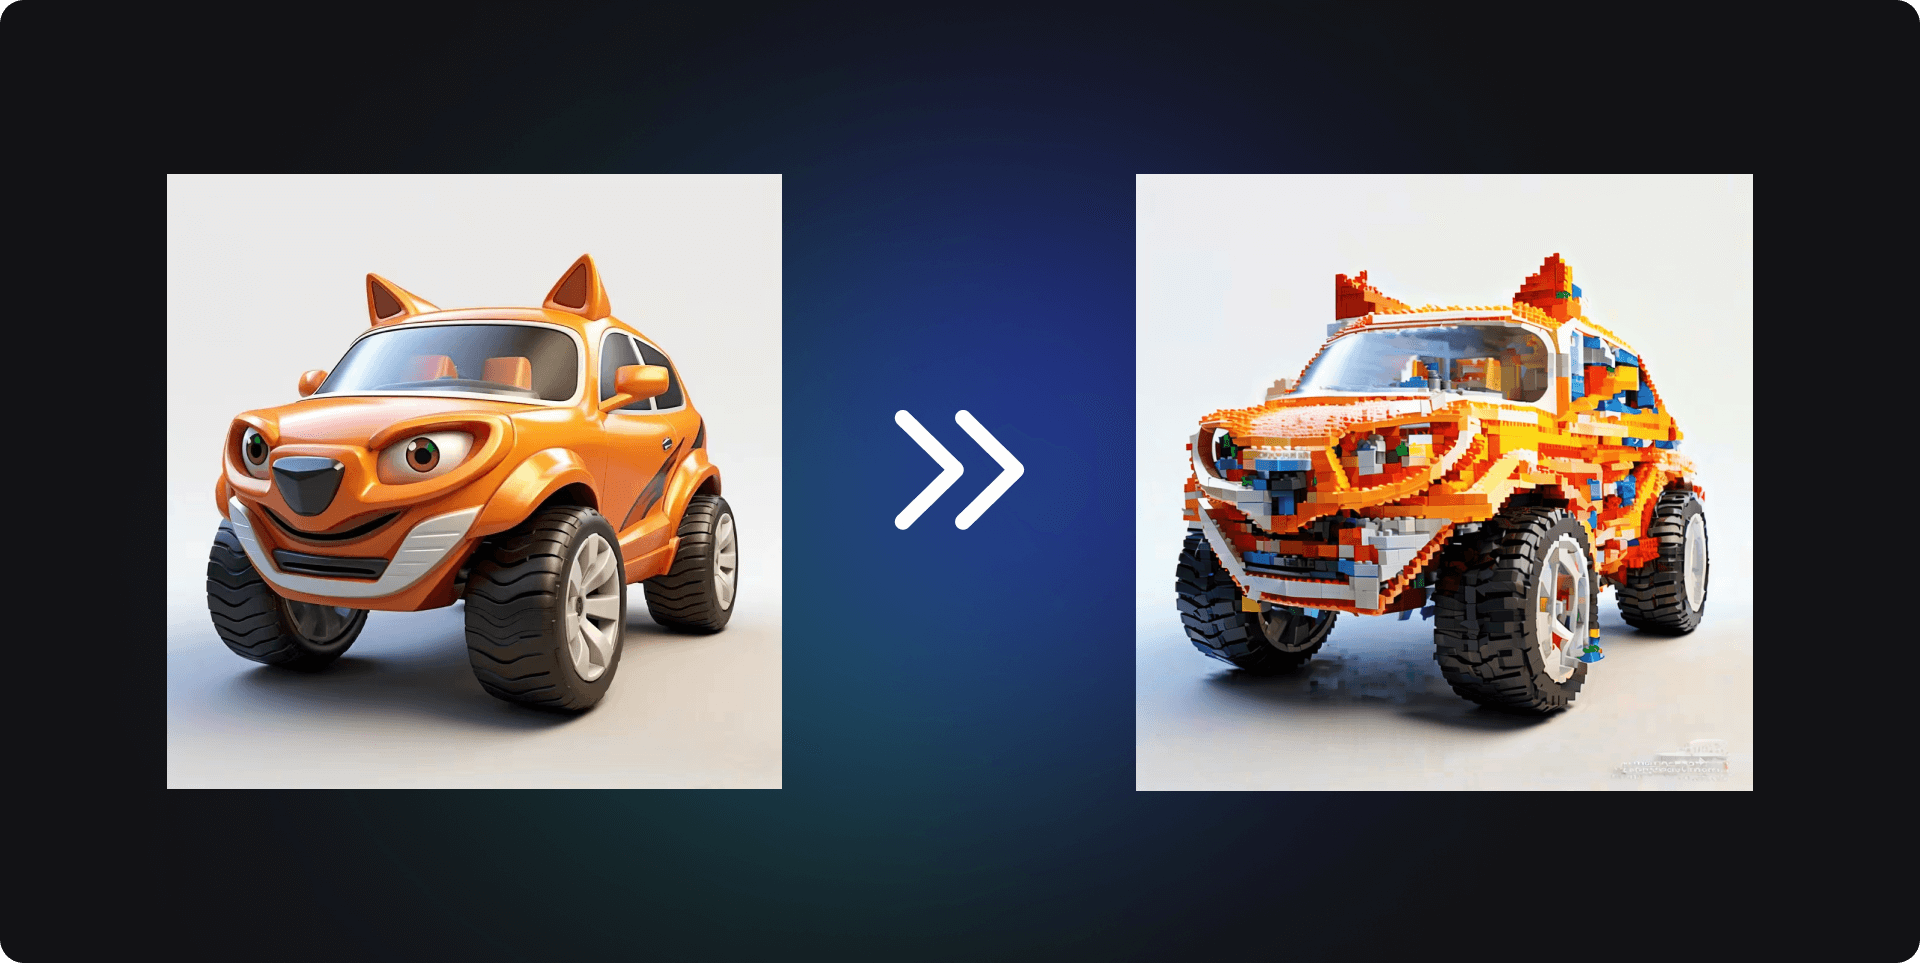
Such image transformation not only turns each item into a static display but also transforms it into a toy that can be imaginatively assembled, sparking viewers' imagination and desire for exploration.

For more dynamically shaped flowers with irregular edges, it also demonstrates impressive performance. Each flower and leaf undergoes careful transformation, becoming a three-dimensional image composed of colorful LEGO bricks, seamlessly blending the elegance of the flowers with the creativity of LEGO bricks.

This process not only captures the natural beauty of the flowers but also imbues them with a unique sense of architectural artistry. In these LEGO-style floral images, the combination of colors and the construction of shapes are reimagined and redesigned, showcasing not only the delicacy and intricacy of the flowers but also presenting viewers with a fresh perspective through the form of LEGO bricks.