How to use ComfyUI to turn anime characters into real people ①

Imagine how cool it would be if we could see a real-life version of Luffy! Thinking back on the anime characters that accompanied us through our entire childhood, suddenly bringing these images into the real world would be quite an experience, wouldn't it? This issue's workflow can make this idea a reality. It's not just about creating an image, but bringing the image to life, as if Luffy is standing right in front of you, ready to set off in search of One Piece at any moment.
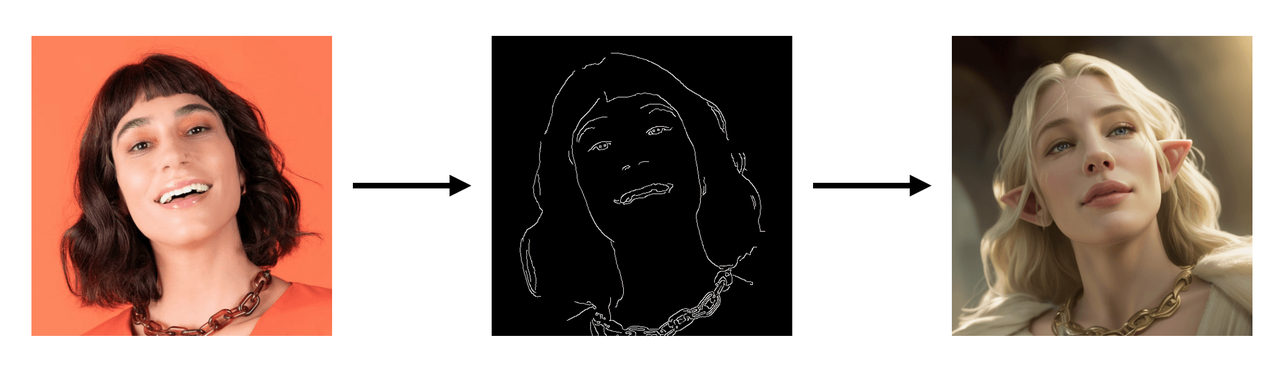
This workflow primarily utilizes the Canny model from ControlNet, employing Canny edge maps to control the edges in the images generated by the model, ensuring that the shape of the generated content remains consistent.
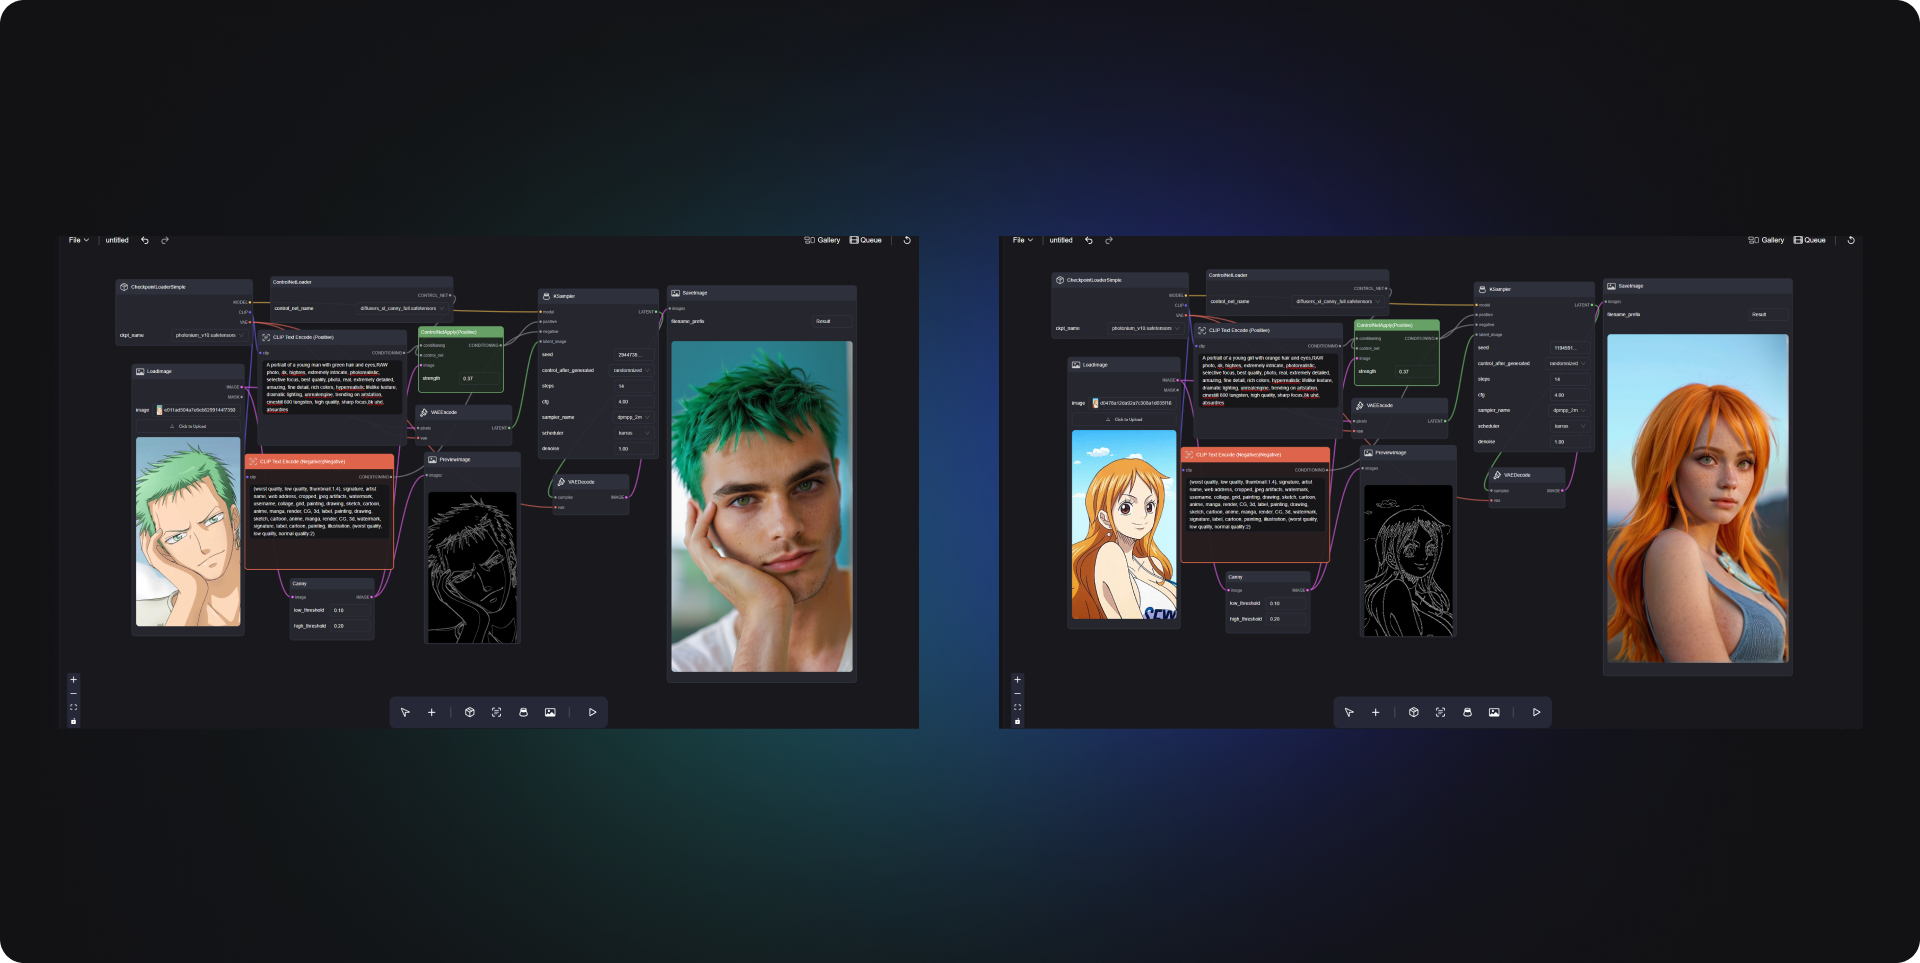
I have regenerated classic characters from "One Piece" such as Zoro, Nami, Trafalgar Law, Sanji, etc. The distinct features of different characters can be made more accurate in the generated images by adjusting the prompt words, such as specifying hair color, clothing characteristics, and so on.

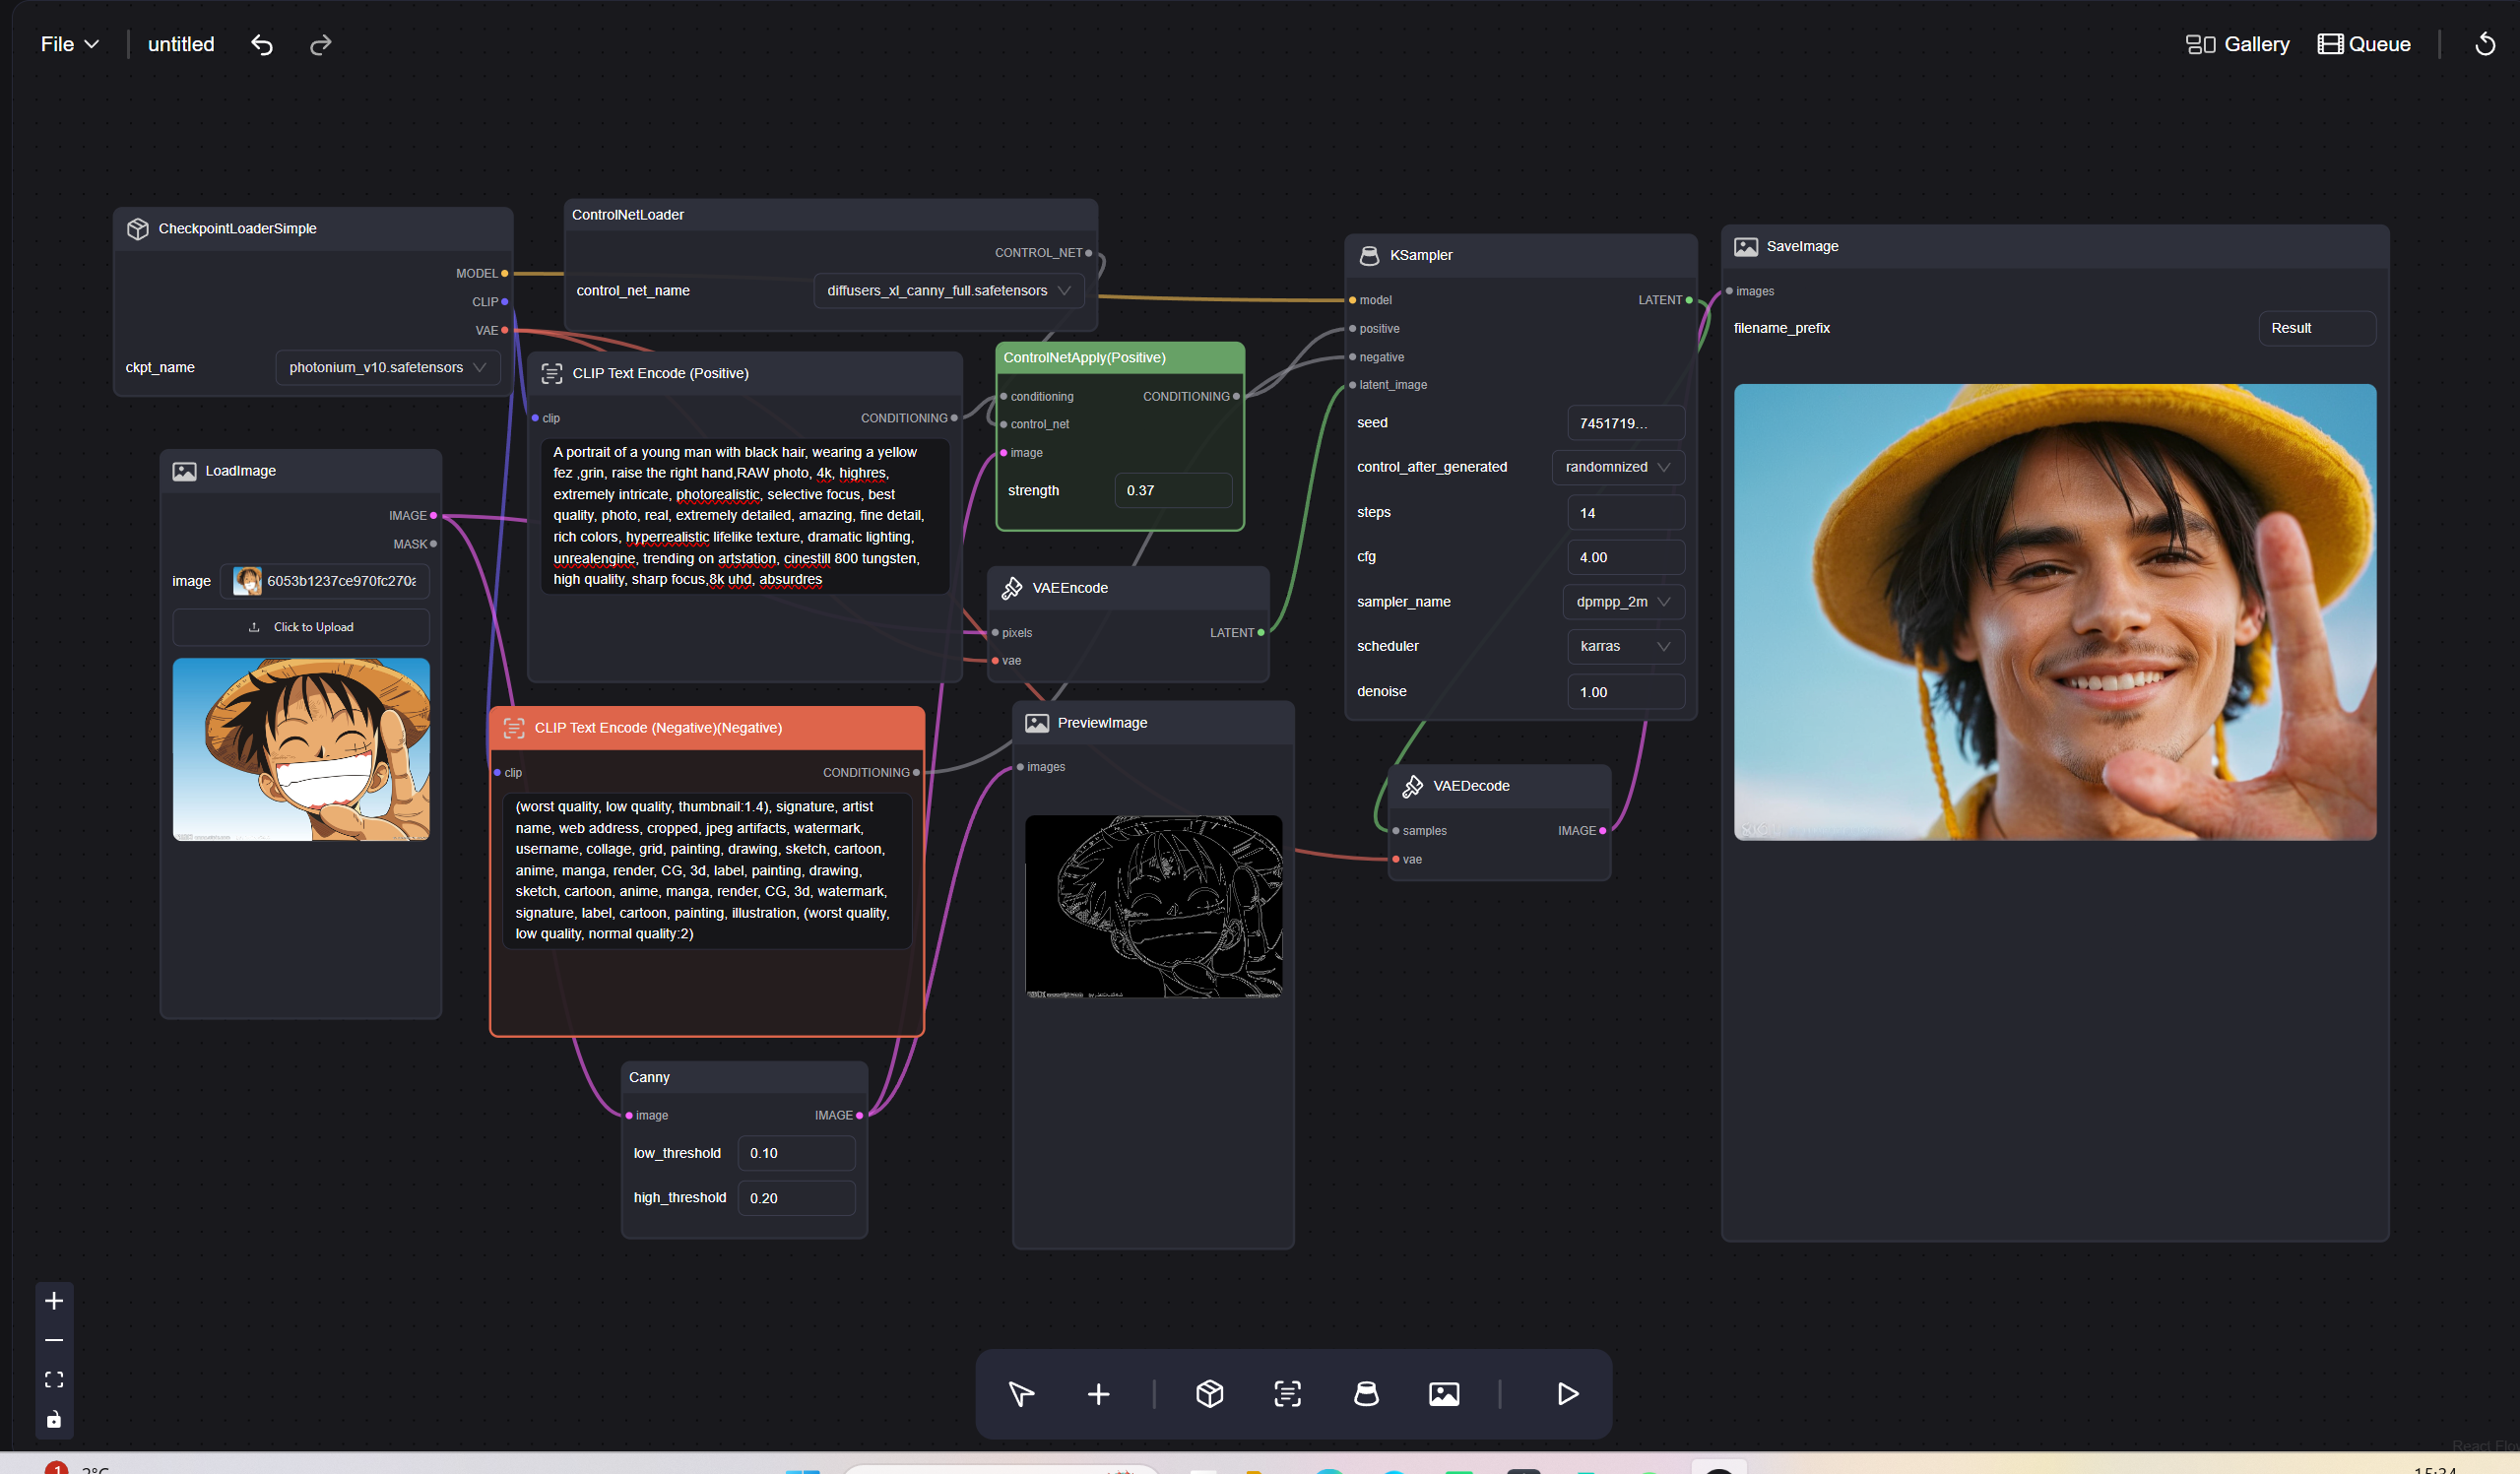
When generating, you can refer to my prompt words: "A portrait of a young man with blue eyes, wearing a yellow fez and red clothing, RAW photo, 4k, highres, extremely intricate, photorealistic, selective focus, best quality, photo, real, extremely detailed, amazing, fine detail, rich colors, hyperrealistic lifelike texture, dramatic lighting, unrealengine, trending on artstation, cinestill 800 tungsten, high quality, sharp focus, 8k uhd, absurdres."
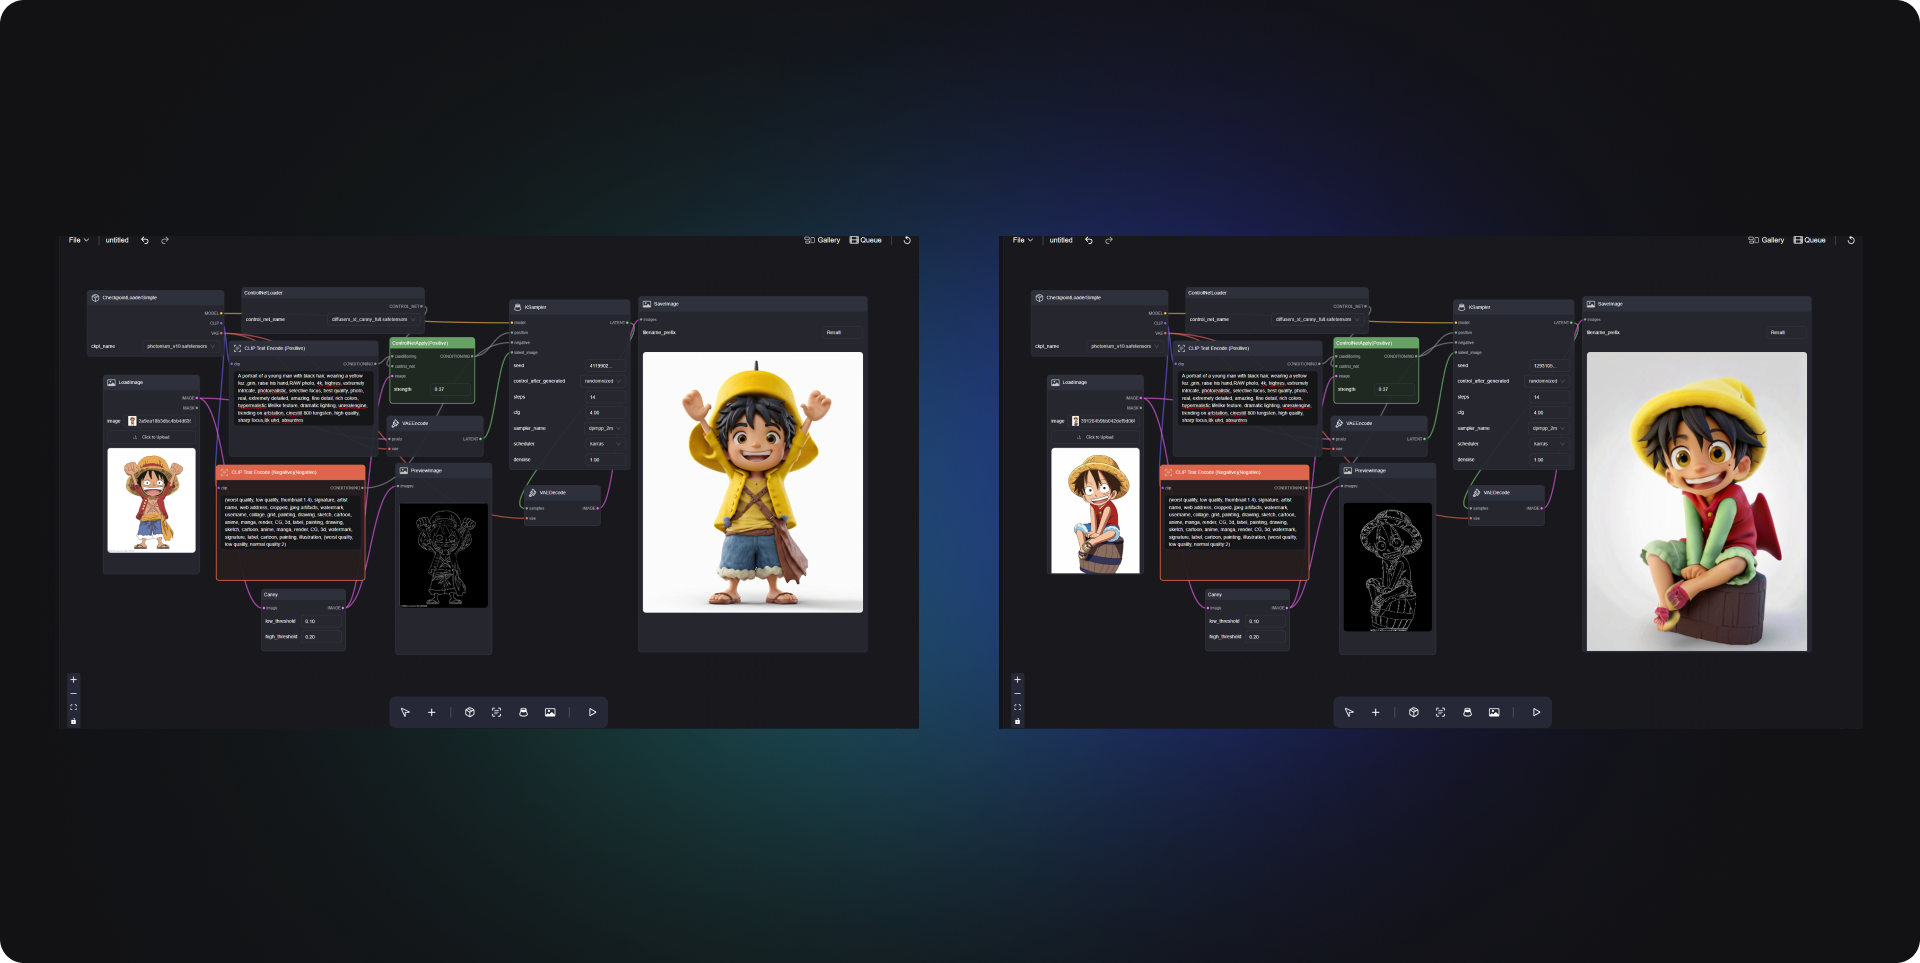
Finally, I discovered that the cartoon image of Luffy can be generated with a figurine texture through this workflow, which is very vivid and three-dimensional. If you are a figurine enthusiast or a figurine designer, you can upload your drawing sketches through this workflow, generate images, and see the final effect of the figurine.
Step One
Download checkpoint model: Photonium (opens in a new tab). This model has been enhanced and trained for photo-realistic fidelity, making it suitable for character beautification, photography, and photorealistic rendering.

Step Two
Then you need to download the Canny model. This method allows you to control the edges of the images generated by the model using Canny edge maps. The advantage of this approach is that you can manipulate the outlines of the generated images through Canny edge maps, like this:
To learn more about the features of the ControlNet, you can check this tutorial (opens in a new tab).
Step Three
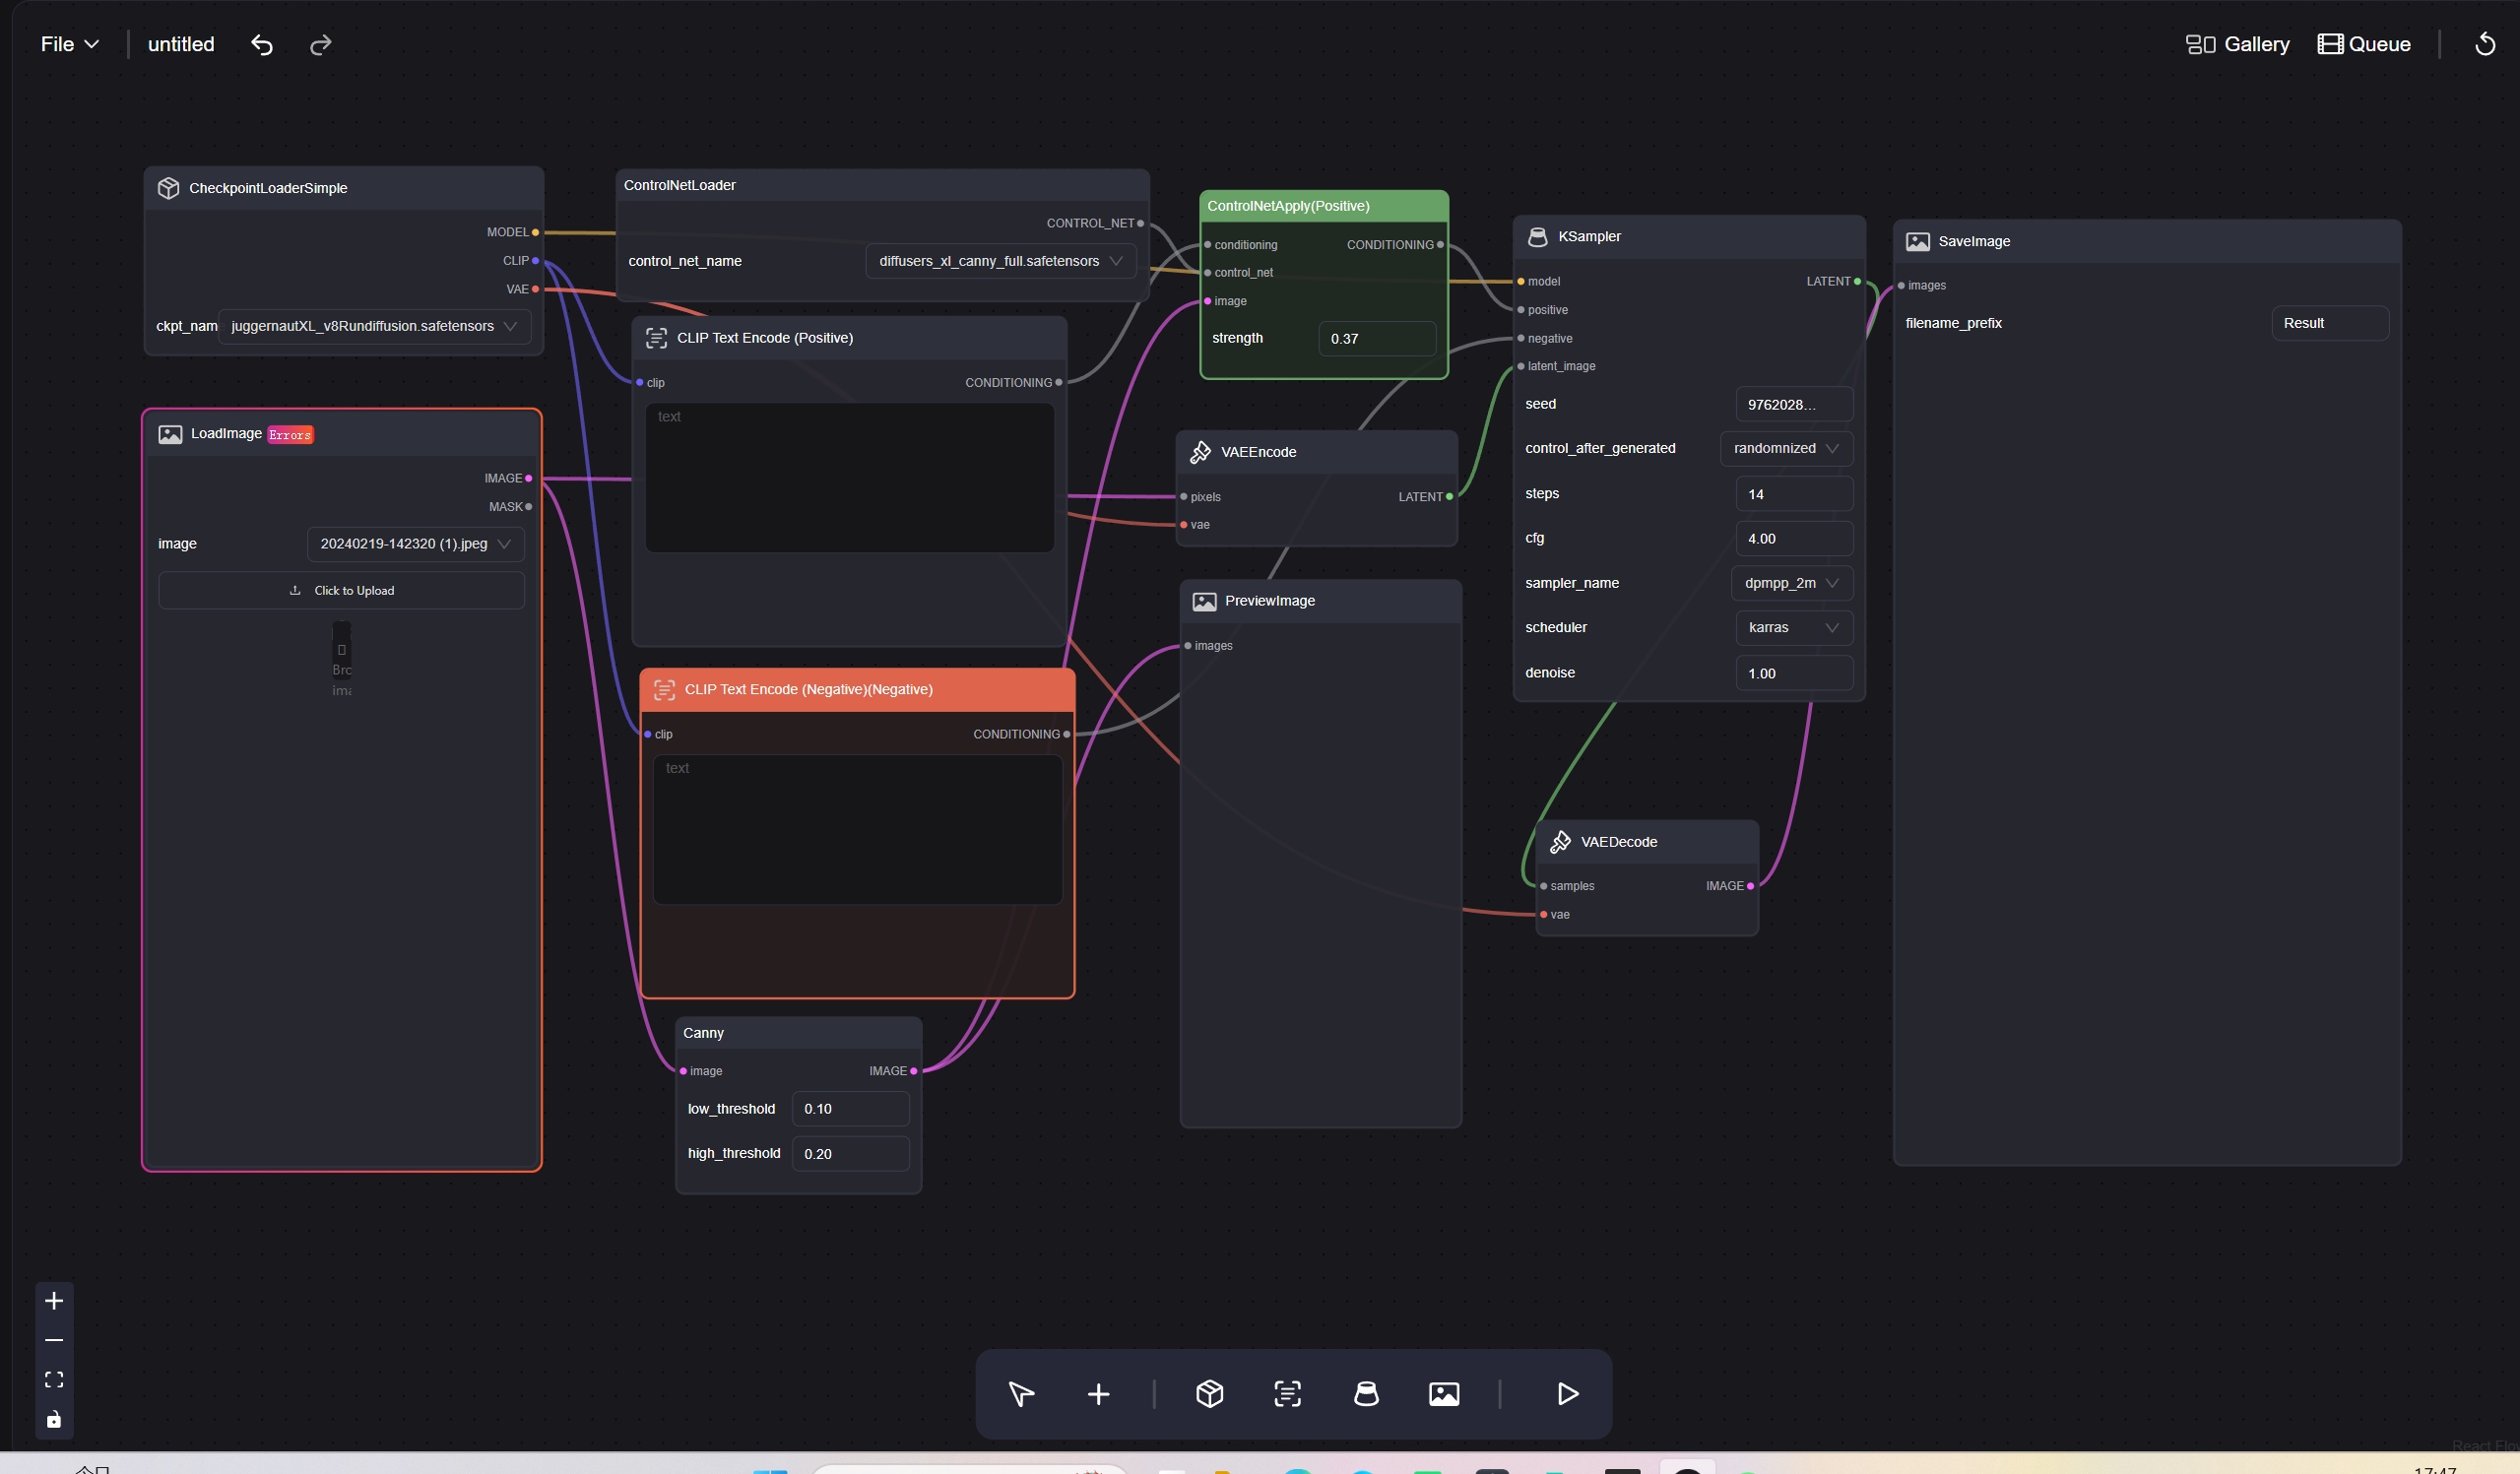
I have set up a workflow following the tutorial recommended above. However, I have also made improvements to it.
I did not add an Empty Latent Image node to the workflow because I wanted the generated images to match the size of the images I imported. Therefore, I converted the Canny-filtered image directly into a Latent image and then connected it to the KSampler node.
By the way, you might notice that the workflow screenshot UI interface looks different from ComfyUI. This is because I am using a version of ComfyUI that offers a better user experience. You can learn about this product here. This product also comes with a Template feature, allowing you to find and directly use the template for this workflow within the product.
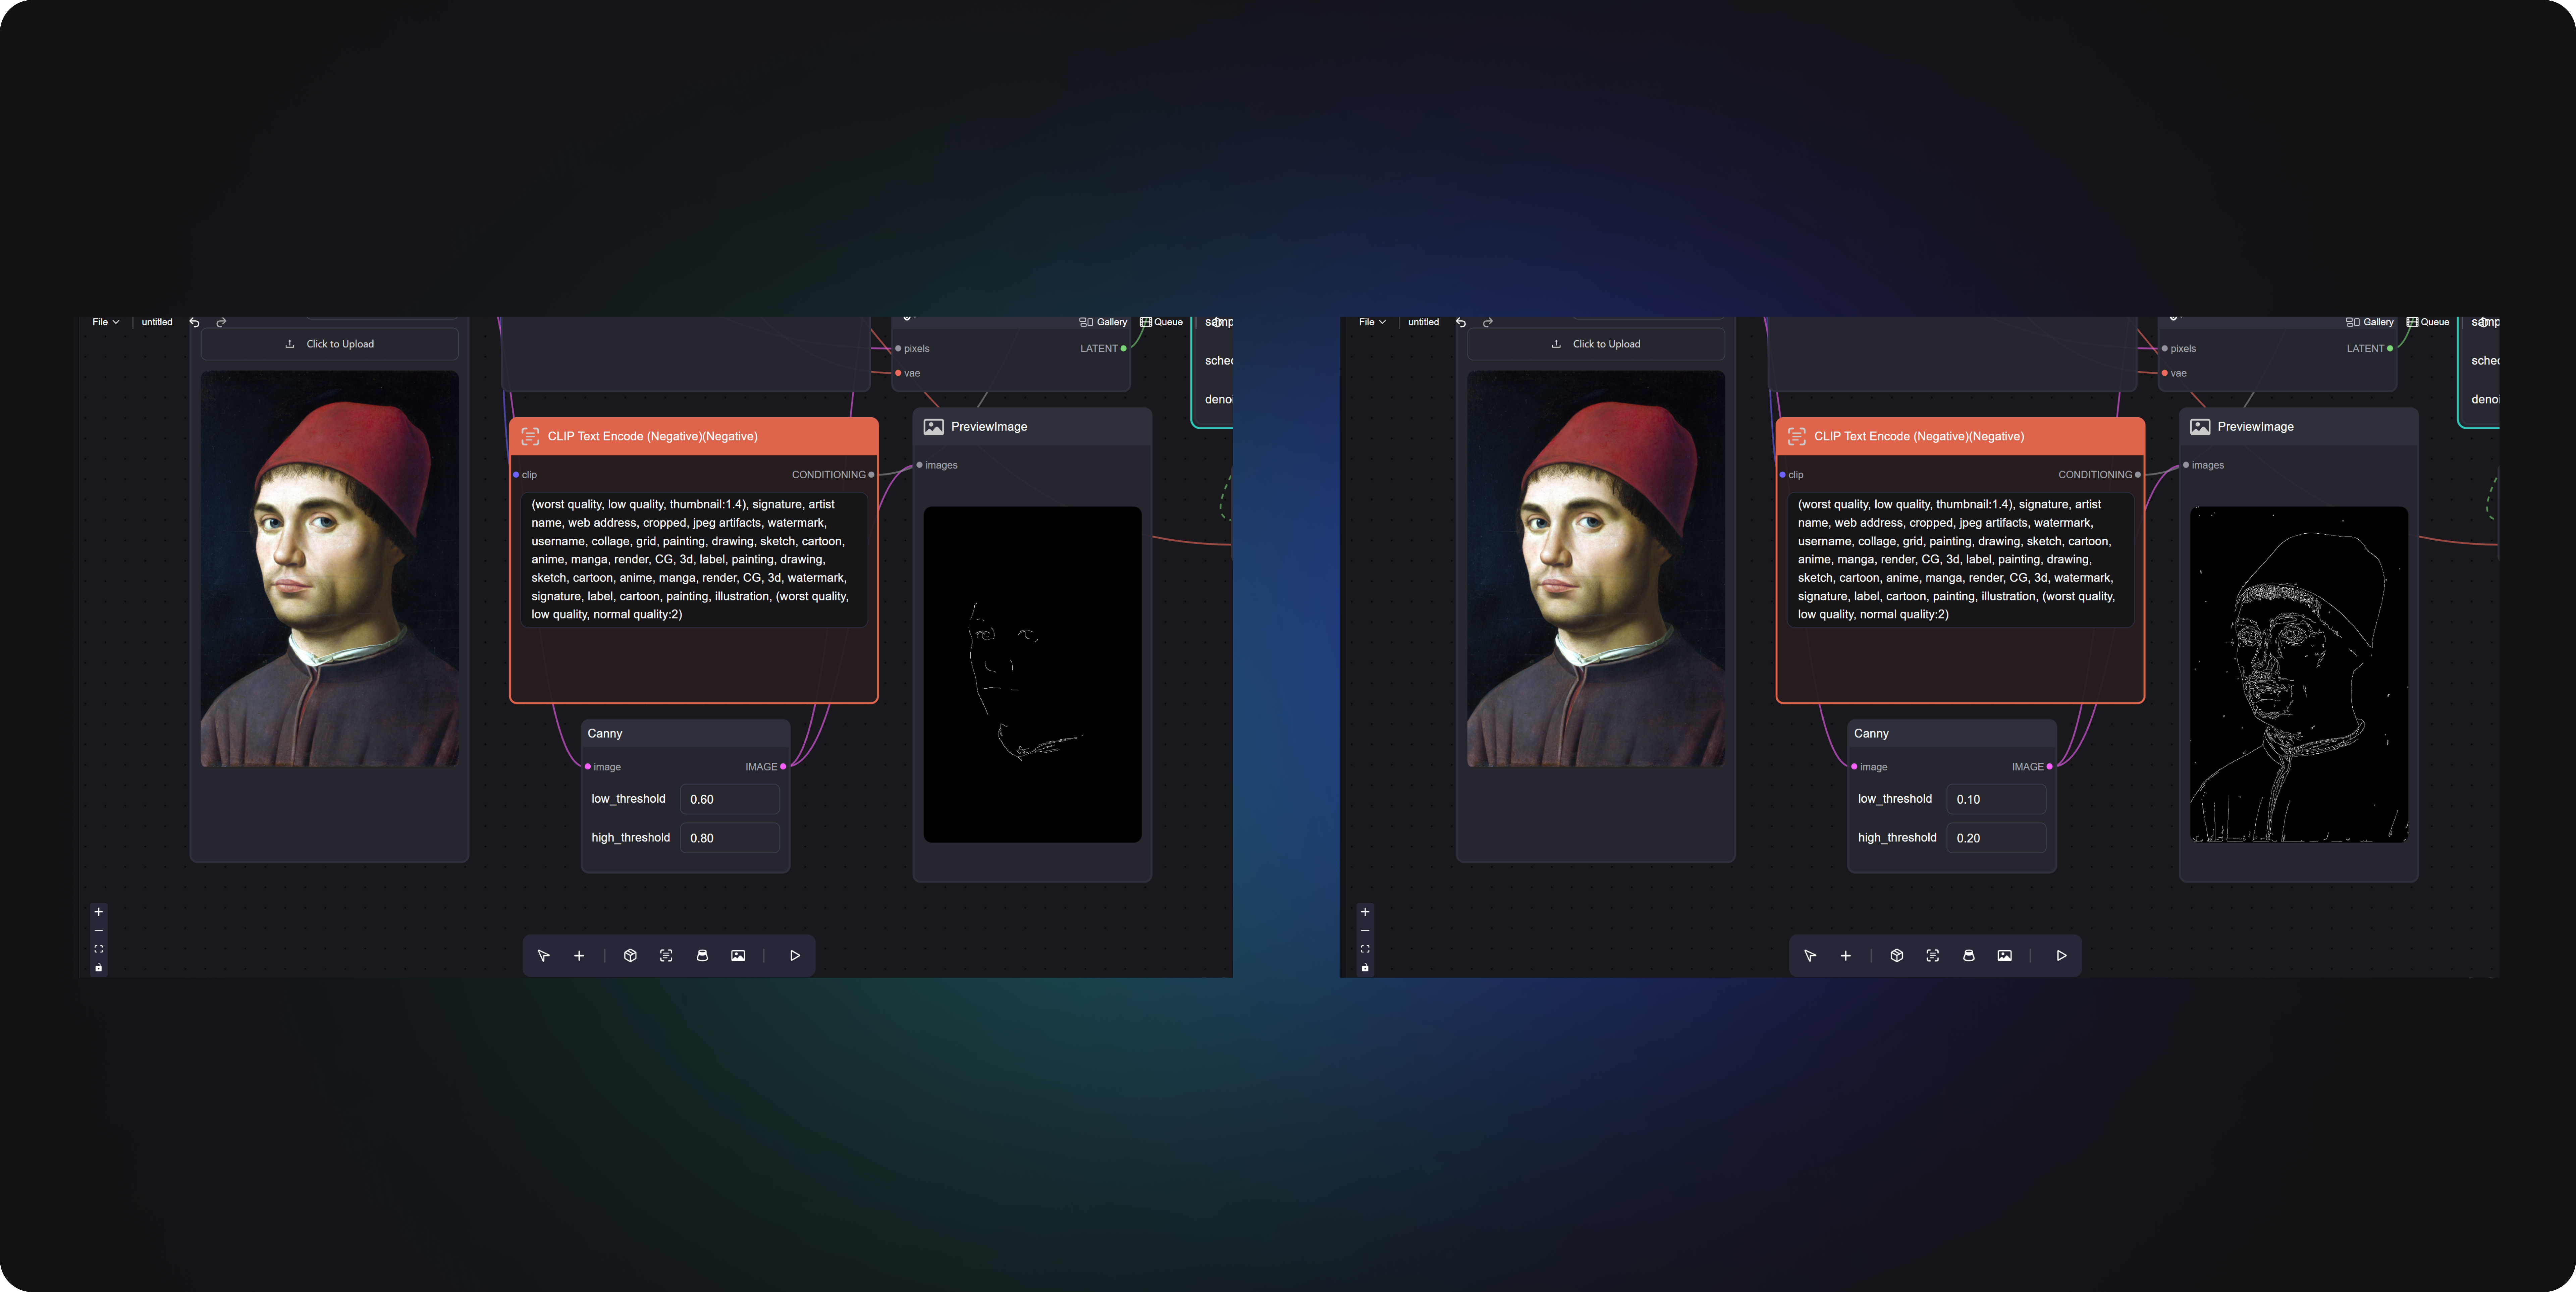
Add a Canny node to the basic workflow, which is used to identify the edge contours of images. By adjusting the low/high threshold parameters, you can tweak the sensitivity of edge detection. If you wish to increase details, you can lower the parameter values. The richer the contour map recognized by Canny, the higher the fidelity of the final generated effect to the original image. Below is a comparison of the contour maps recognized by Canny with different parameter adjustments:
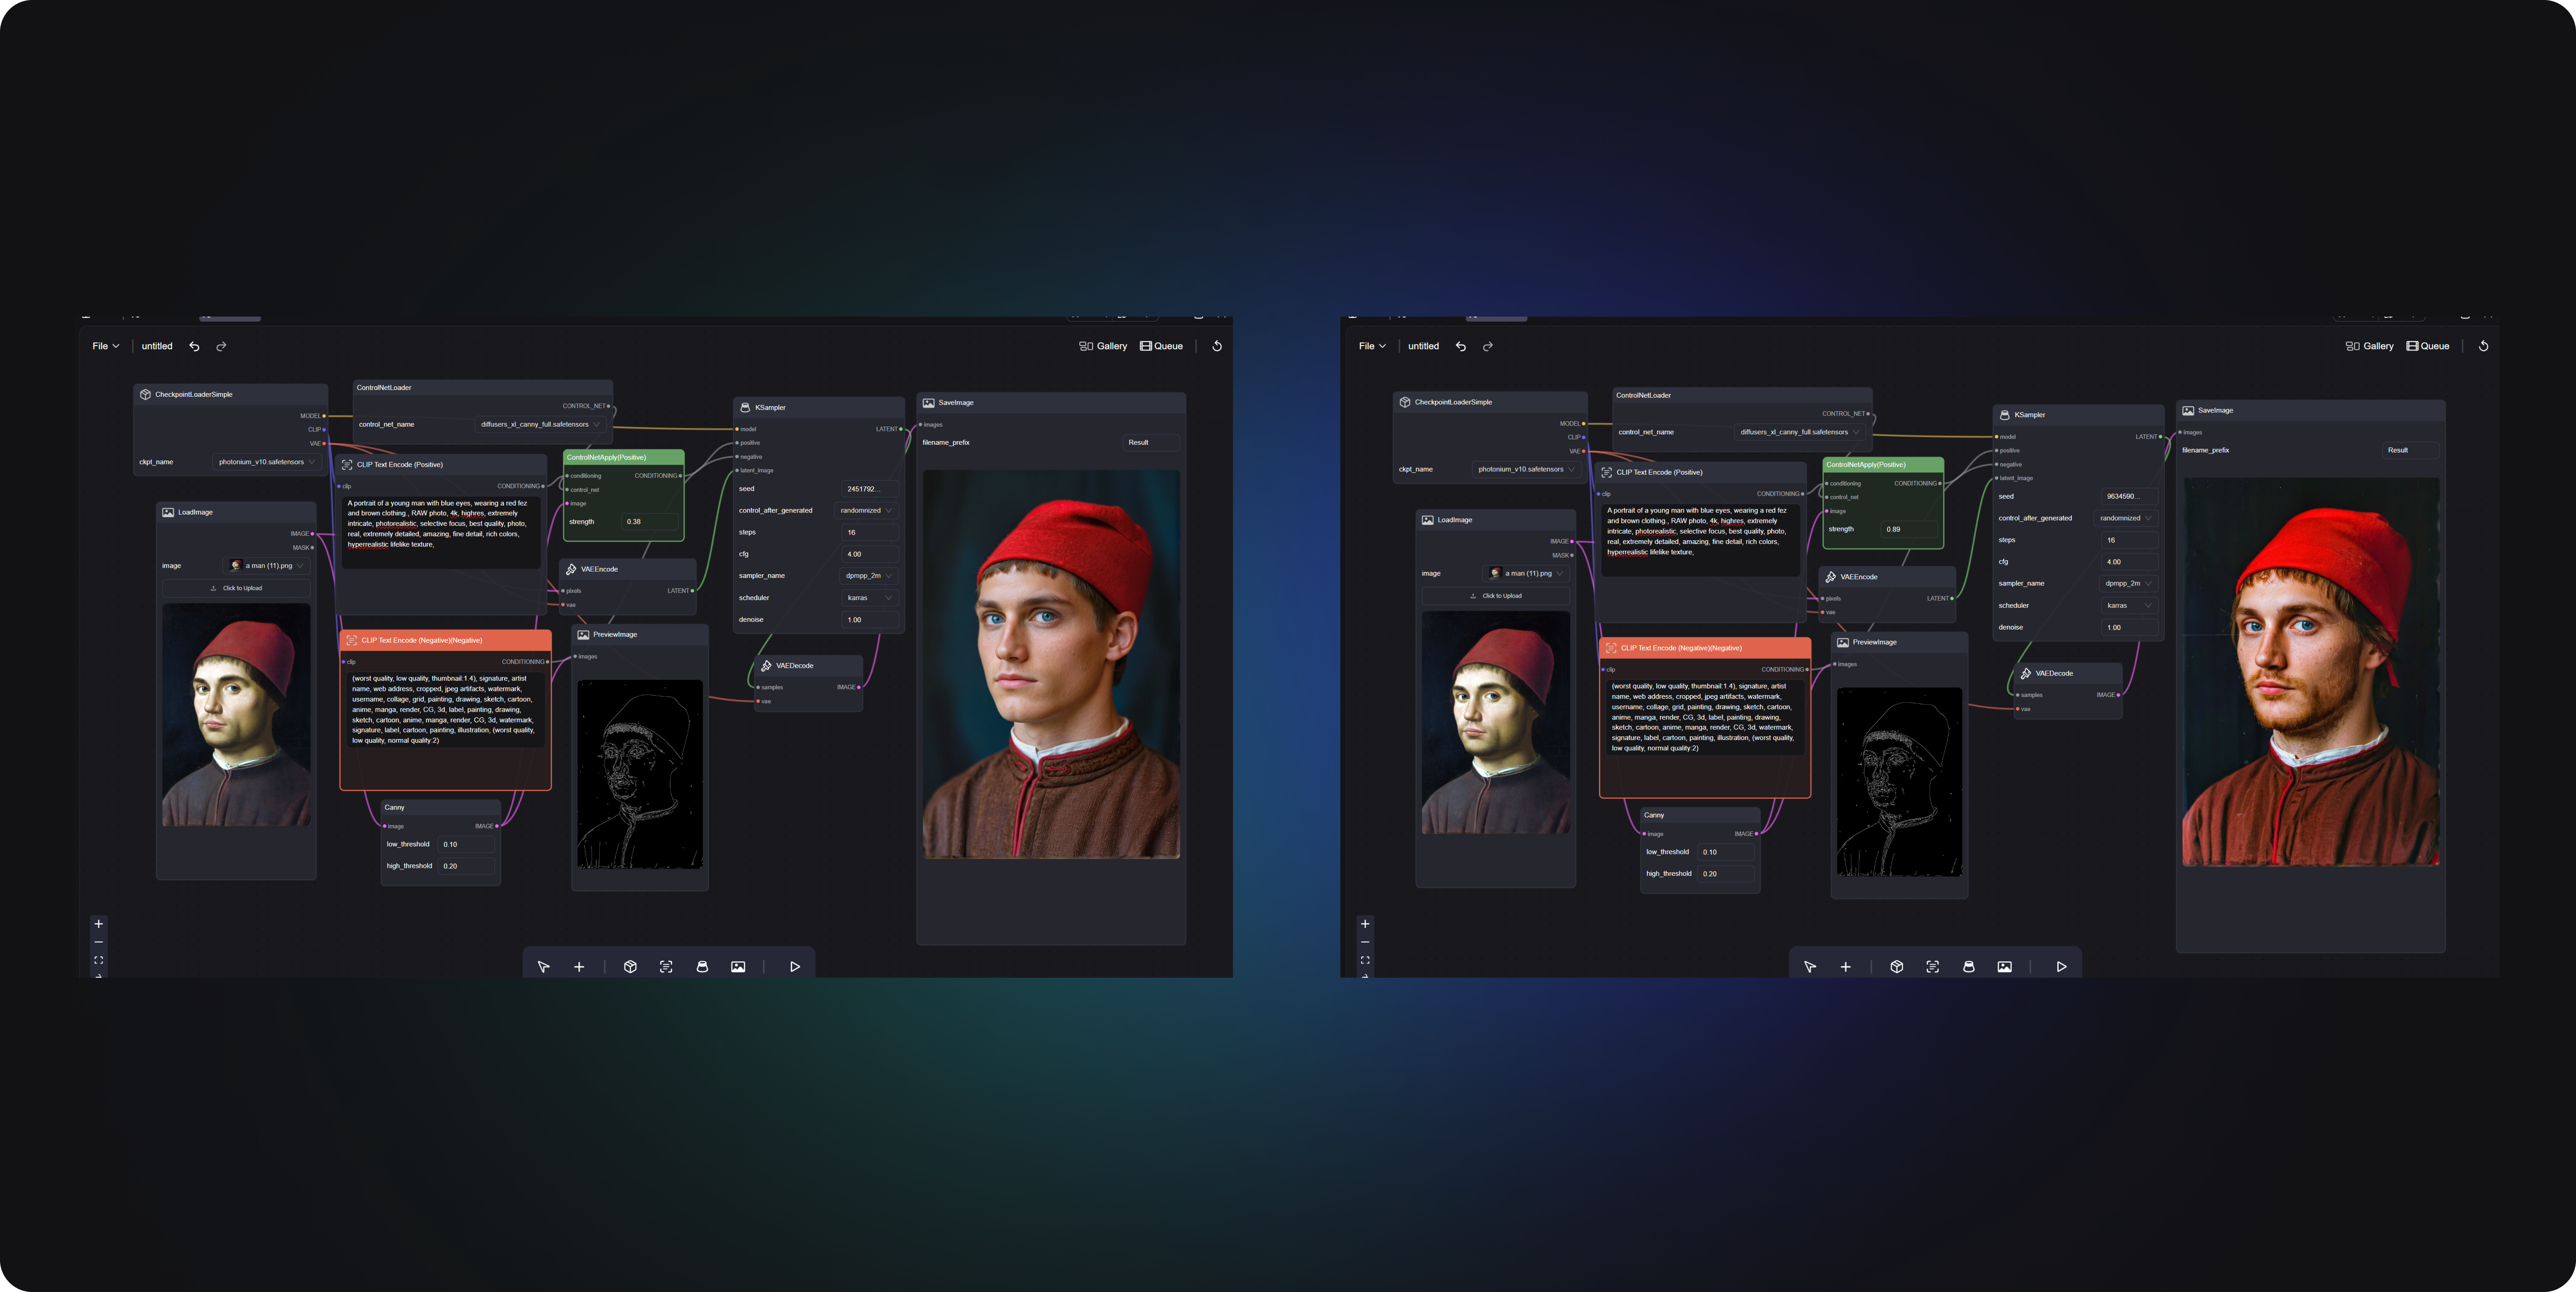
Finally, based on my experiments, you can also adjust the ControNet Apply weights. It's best to set the value between 0.3 and 0.6; too high will affect the final generation effect. As you can see in the comparison below, the image on the right has a higher weight, resulting in an effect very similar to the original image but with a texture that is less delicate than on the left.