ControlNet
Before starting this chapter, please download the following models and place the model files in the corresponding folders:
- Dreamshaper (opens in a new tab): Place it within the models/checkpoints folder in ComfyUI.
- ControlNet Scribble (opens in a new tab): Place it within the models/controlnet folder in ComfyUI.
- ControlNet Openpose (opens in a new tab): Place it between the models/controlnet folder in ComfyUI.
- ControlNet Canny (opens in a new tab): Place it between the models/controlnet folder in ComfyUI.
If you want to use the workflow from this chapter, you can either download and use the Comflowy local version or sign up and use the Comflowy cloud version (opens in a new tab), both of which have the chapter's workflow built-in. Additionally, if you're using the cloud version, you can directly use our built-in models without needing to download anything.
When using Stable Diffusion, you may wish to control the construction of the graph, but adjusting via prompts may not yield great results. This chapter will teach you several common methods of using ControlNet to control the graph construction.
Principle Introduction
Essentially, all the methods I teach in the advanced tutorial are image-to-image methods. They all provide different information to the model through images, so the model can generate the images we want. ControlNet controls the images that the model generates based on the structural information of the image. This structural information could be a sketch, a mask of an image, or even the edge information of an image. All these information can be used to control the generation of images by the model through ControlNet. You can choose different ControlNet to control the image generated by the model according to your needs.
As usual, to help you better understand how to use ControlNet, we will first introduce the principle of ControlNet visually:
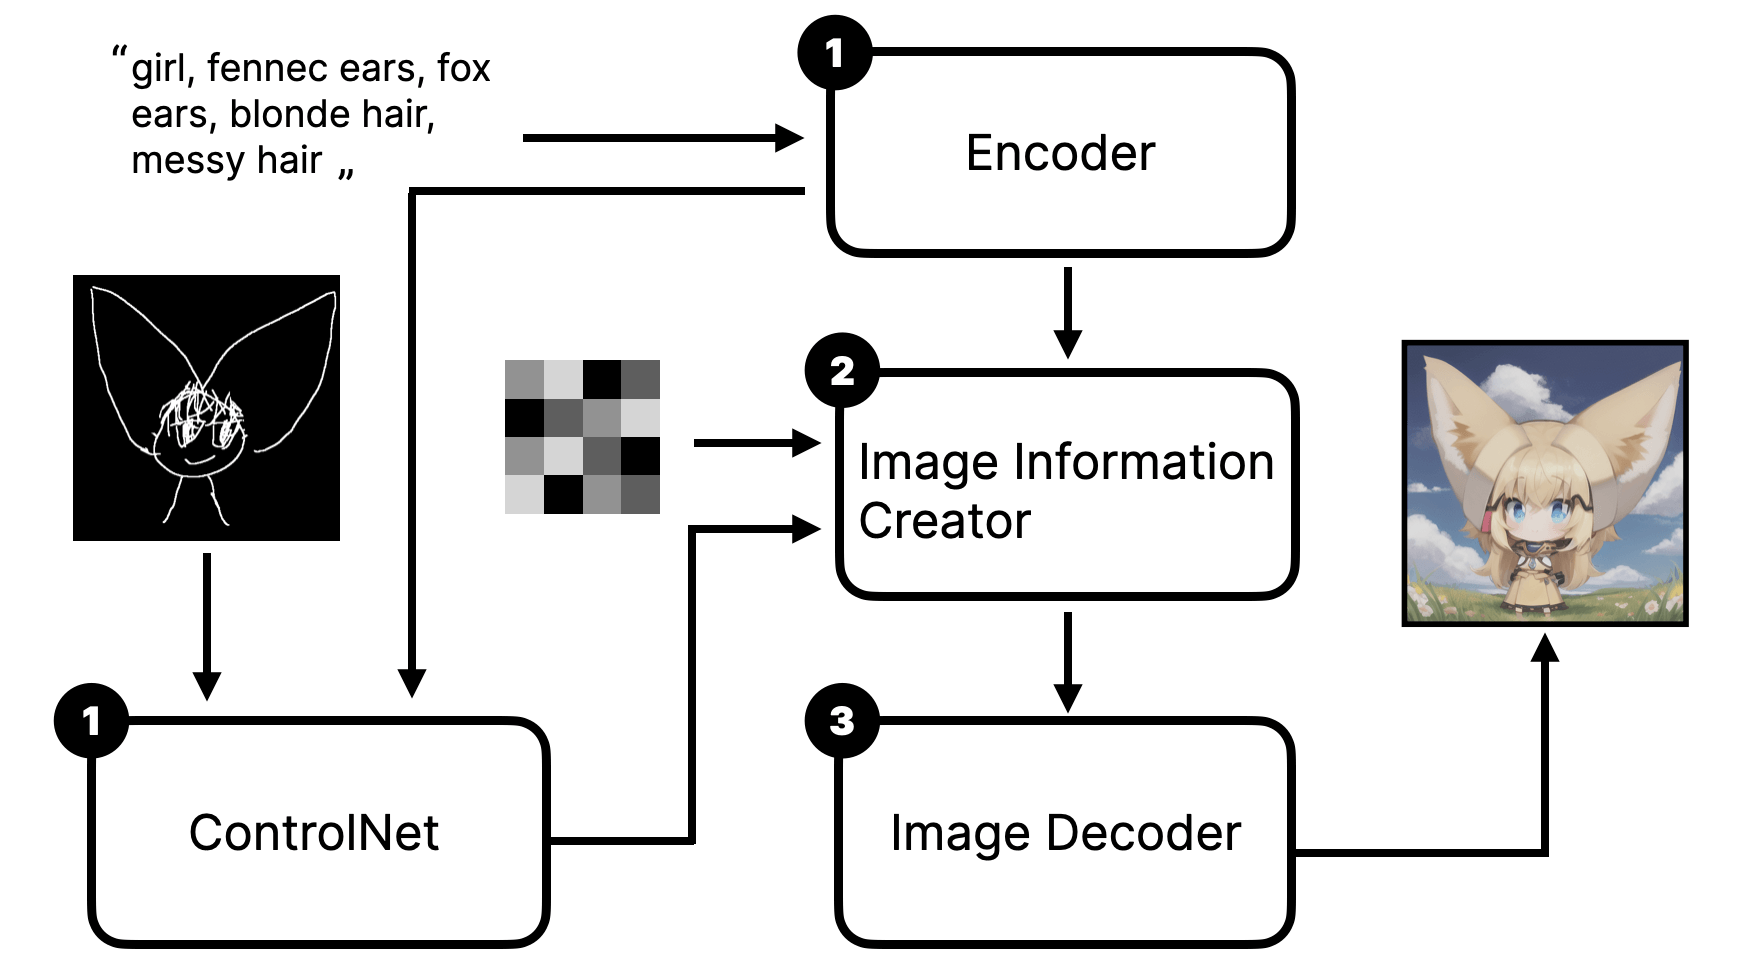
From the above picture, we can see that when we use ControlNet, we first input the text prompt and image into the ControlNet model. Then, the ControlNet model generates a latent image. The latent image will be used as Conditioning and the initial prompt to input into the Stable Diffusion model, thus affecting the image generated by the model.
Scribble ControlNet Workflow
Through the introduction of the principle, you should be able to deduce how to use ControlNet in ComfyUI. We might as well try how to build a simple ControlNet workflow - control with a simple sketch. The effect is roughly as follows:
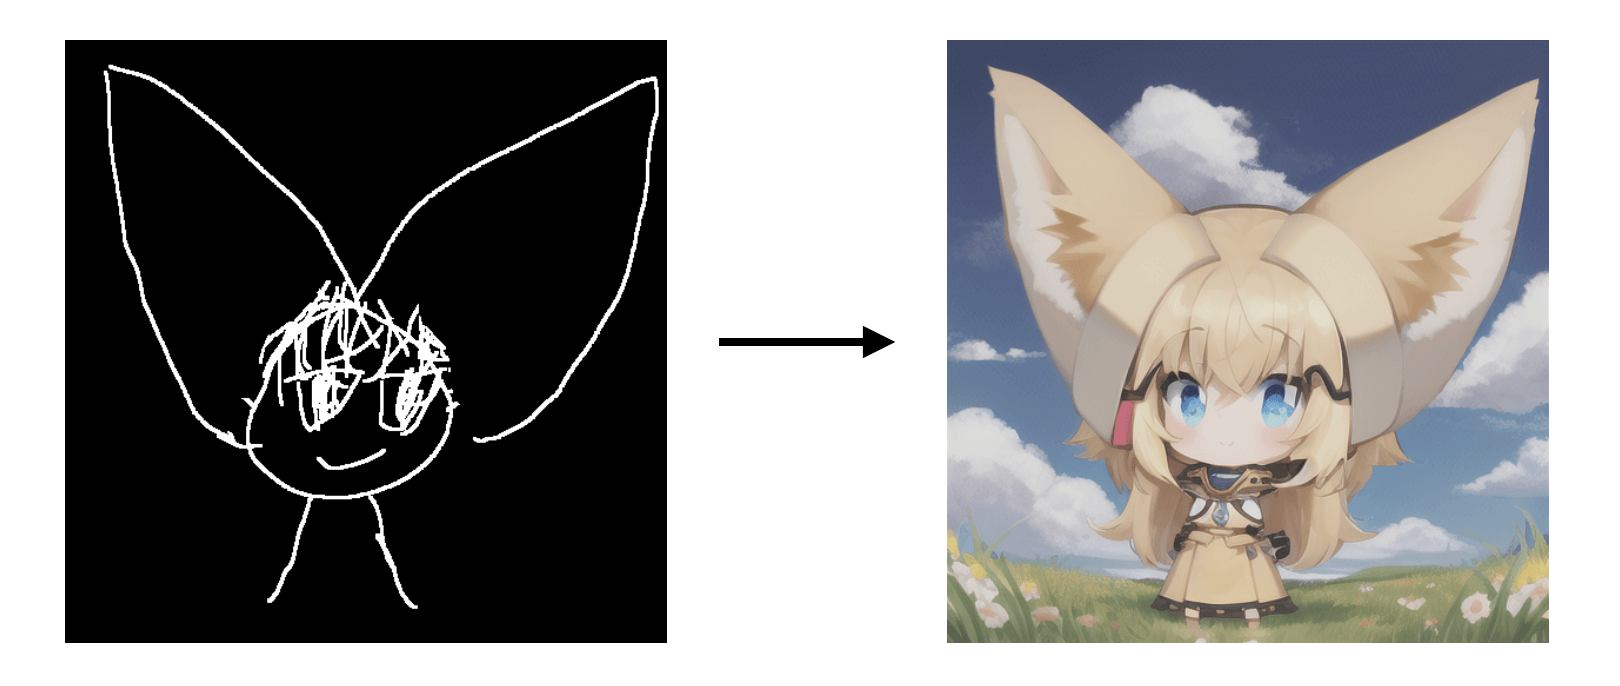
With ControlNet, the image output of the model will construct the image according to the sketches you draw. As you can see from the left sketch, it's a very rough cartoon character, while the generated image on the right matches the basic composition and character features (two big ears) of the sketch on the left.
OK, now that you have an impression of Scribble ControlNet, let's see how to construct this workflow together. You can try to construct it on your own first. This way, it can deepen your impression.
In the LoRA chapter, I compared LoRA to a filter. For ControlNet, I believe it's more like a visual prompt supplement, which visualizes the prompts that are hard to describe with text, and also helps the model understand better. It thus solves the problem that the CLIP model's understanding of grammar is quite poor. If you understand it this way, you should be better able to reason and remember how to connect the lines. LoRA is a filter, affecting the model, so it's connected to the Model. And ControlNet is a supplement to the prompt, controlling Conditioning, so it's connected to the Prompt node.
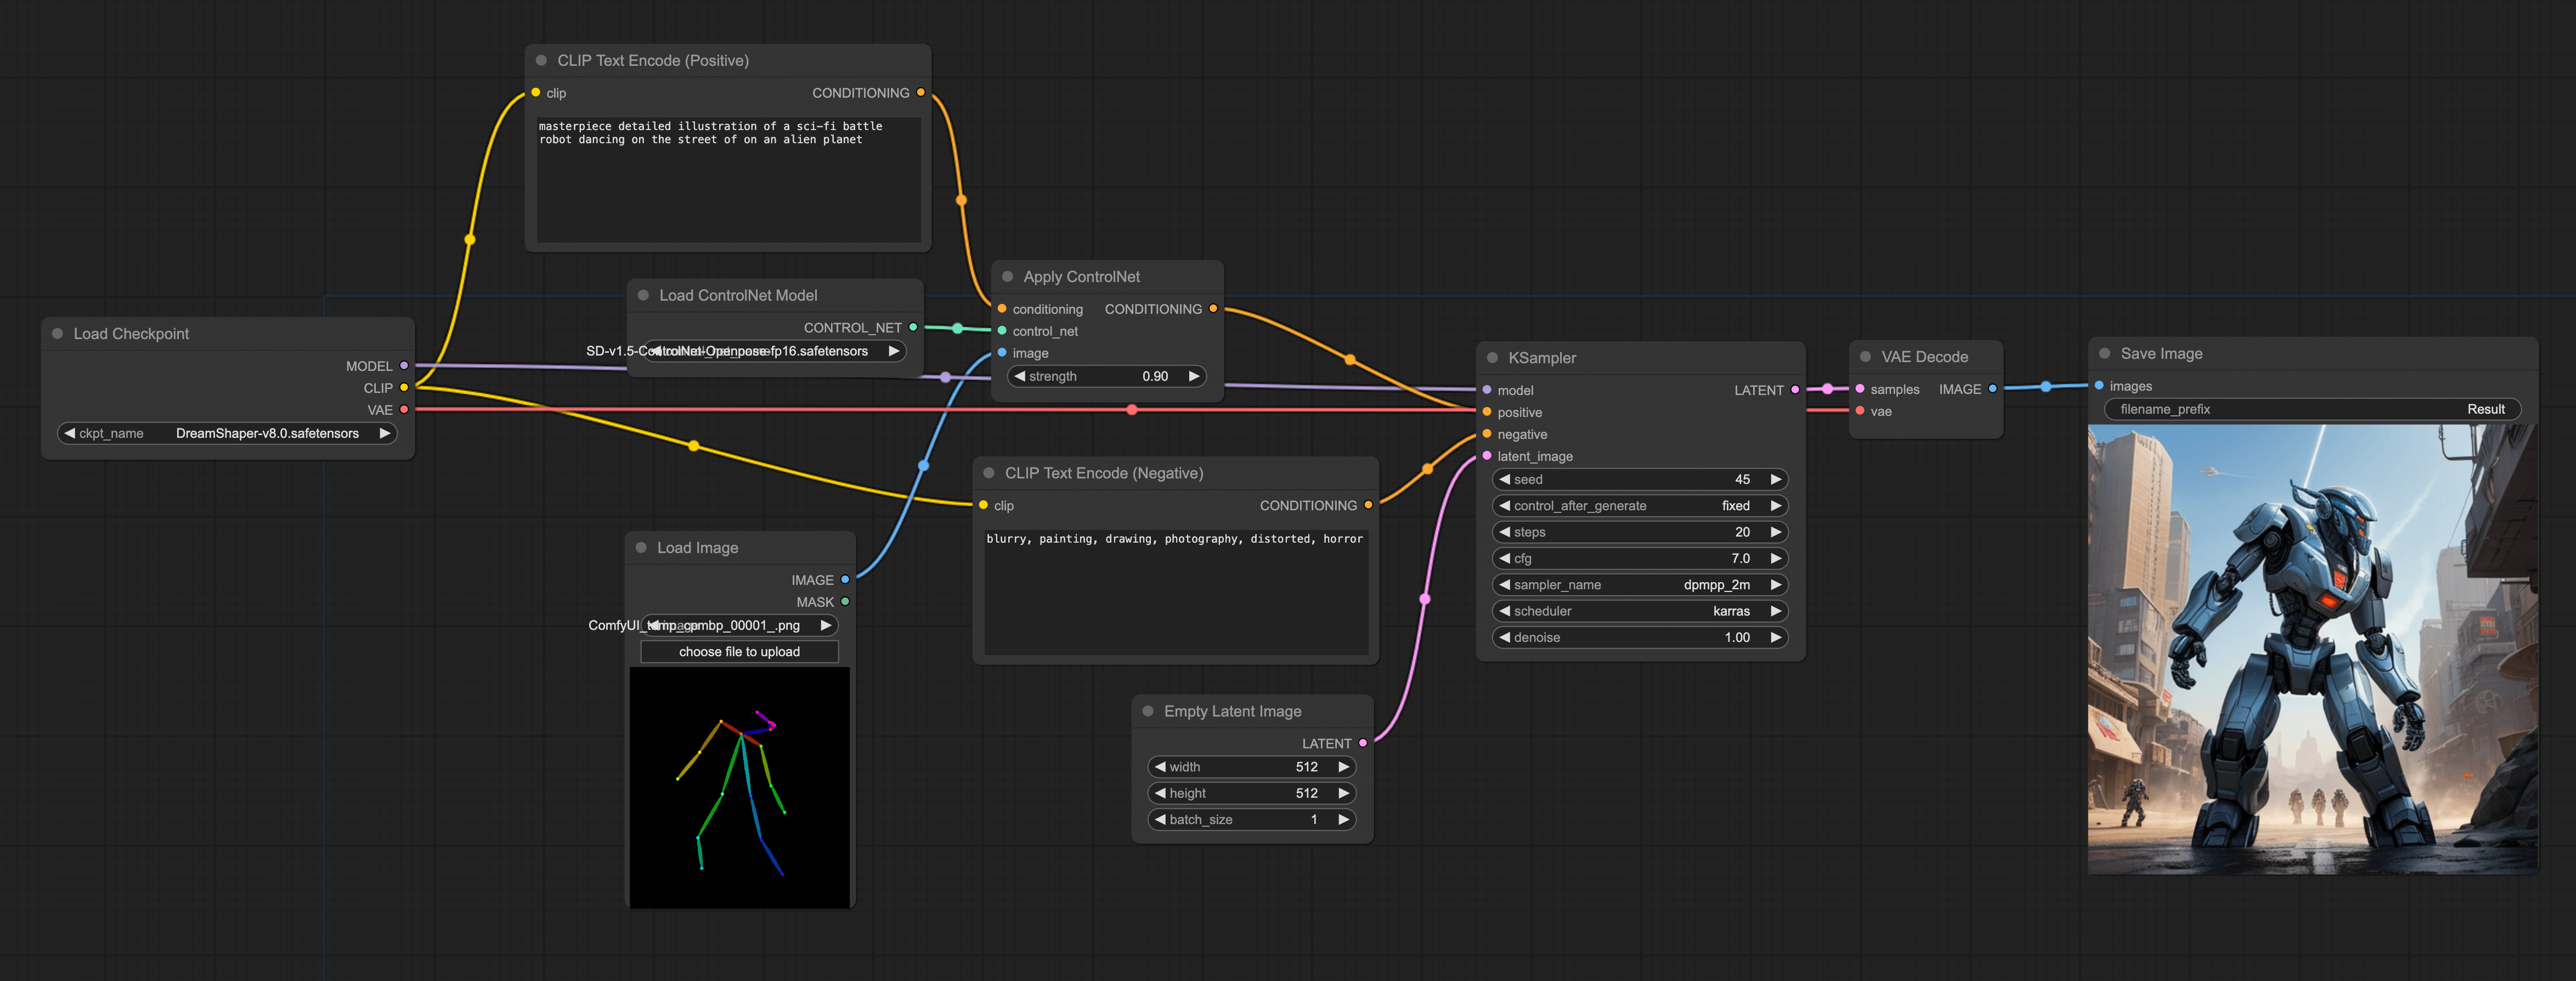
Pose ControlNet Workflow
Once you can build a ControlNet workflow, you can freely switch between different models according to your needs.
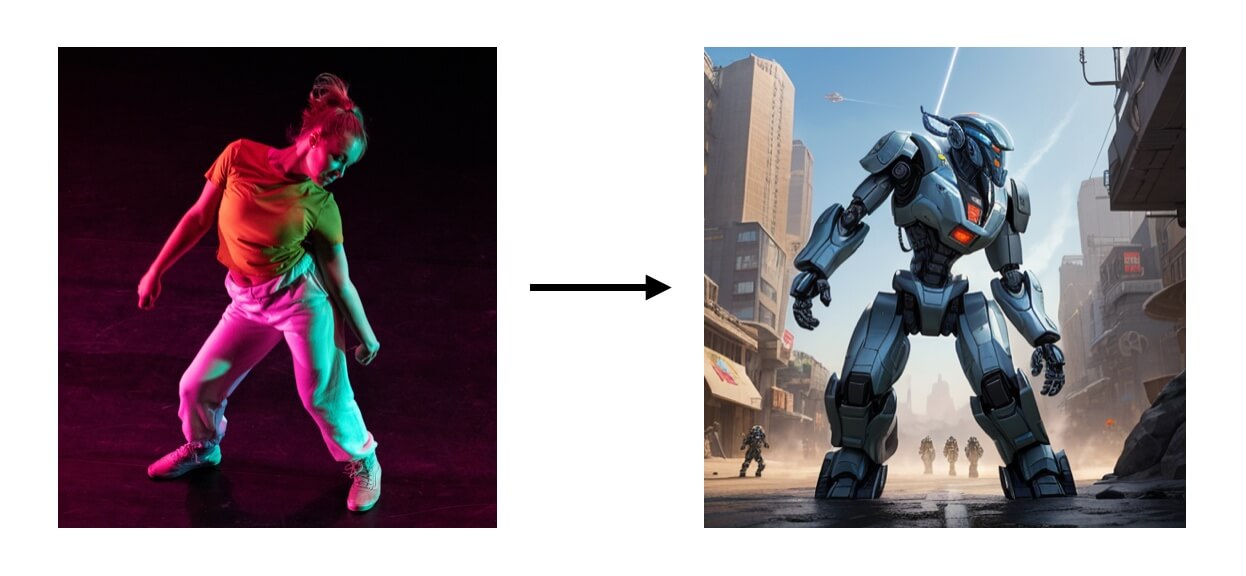
The previous example used a sketch as an input, this time we try inputting a character's pose. The advantage of this is that you can use it to control the pose of the character generated by the model. Like this:
However, note that we can't directly input the image into the ControlNet model like in the previous example, but need to first convert the image into a pose, and then input it into the ControlNet model. But you can also use other tools to make a skeleton diagram, and then directly input it into the ControlNet model.
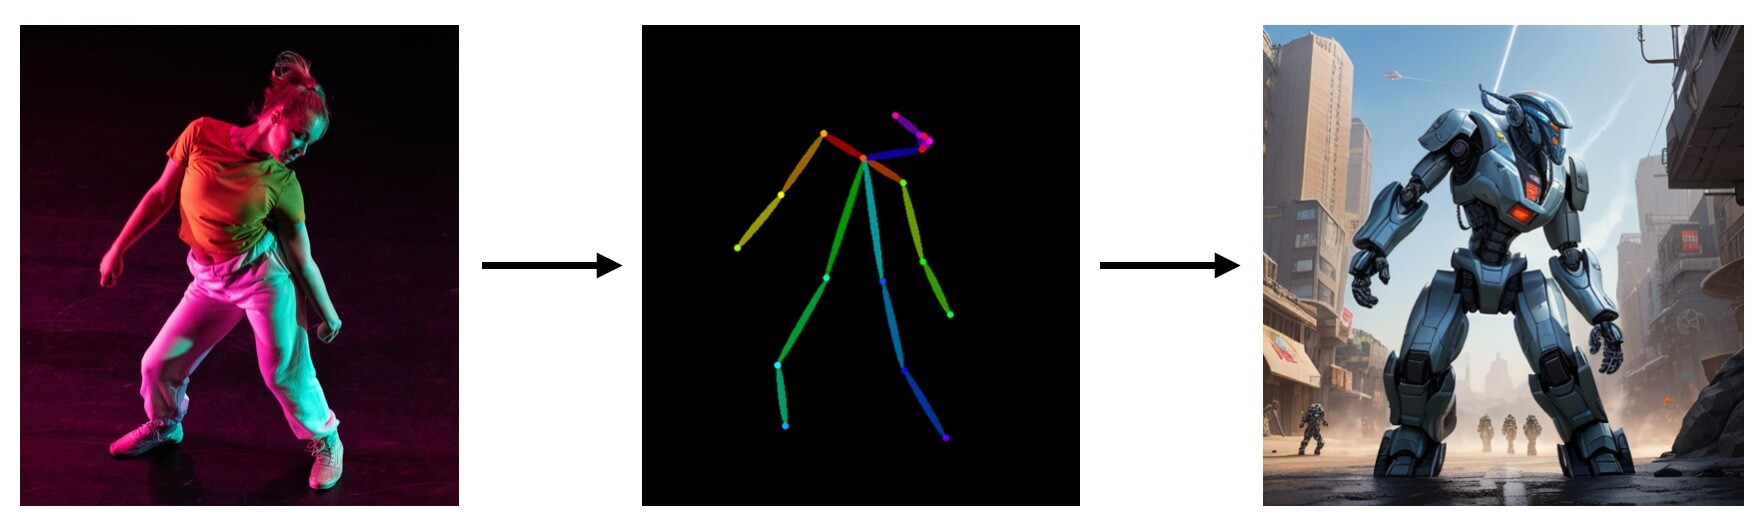
So the construction of the entire workflow is the same as the previous workflow, only in the Load ControlNet Model node, we need to load the ControlNet Openpose model, and load the skeleton diagram:
Depth ControlNet Workflow
The third use of ControlNet is to control the generated images through depth maps. The advantage of this method is that you can control the depth of field of the generated images through depth maps. For example, like this:
This workflow is also similar to the previous one. You can directly import the depth map, or use a plugin to generate the depth map, and then input it into the ControlNet model. Like this:
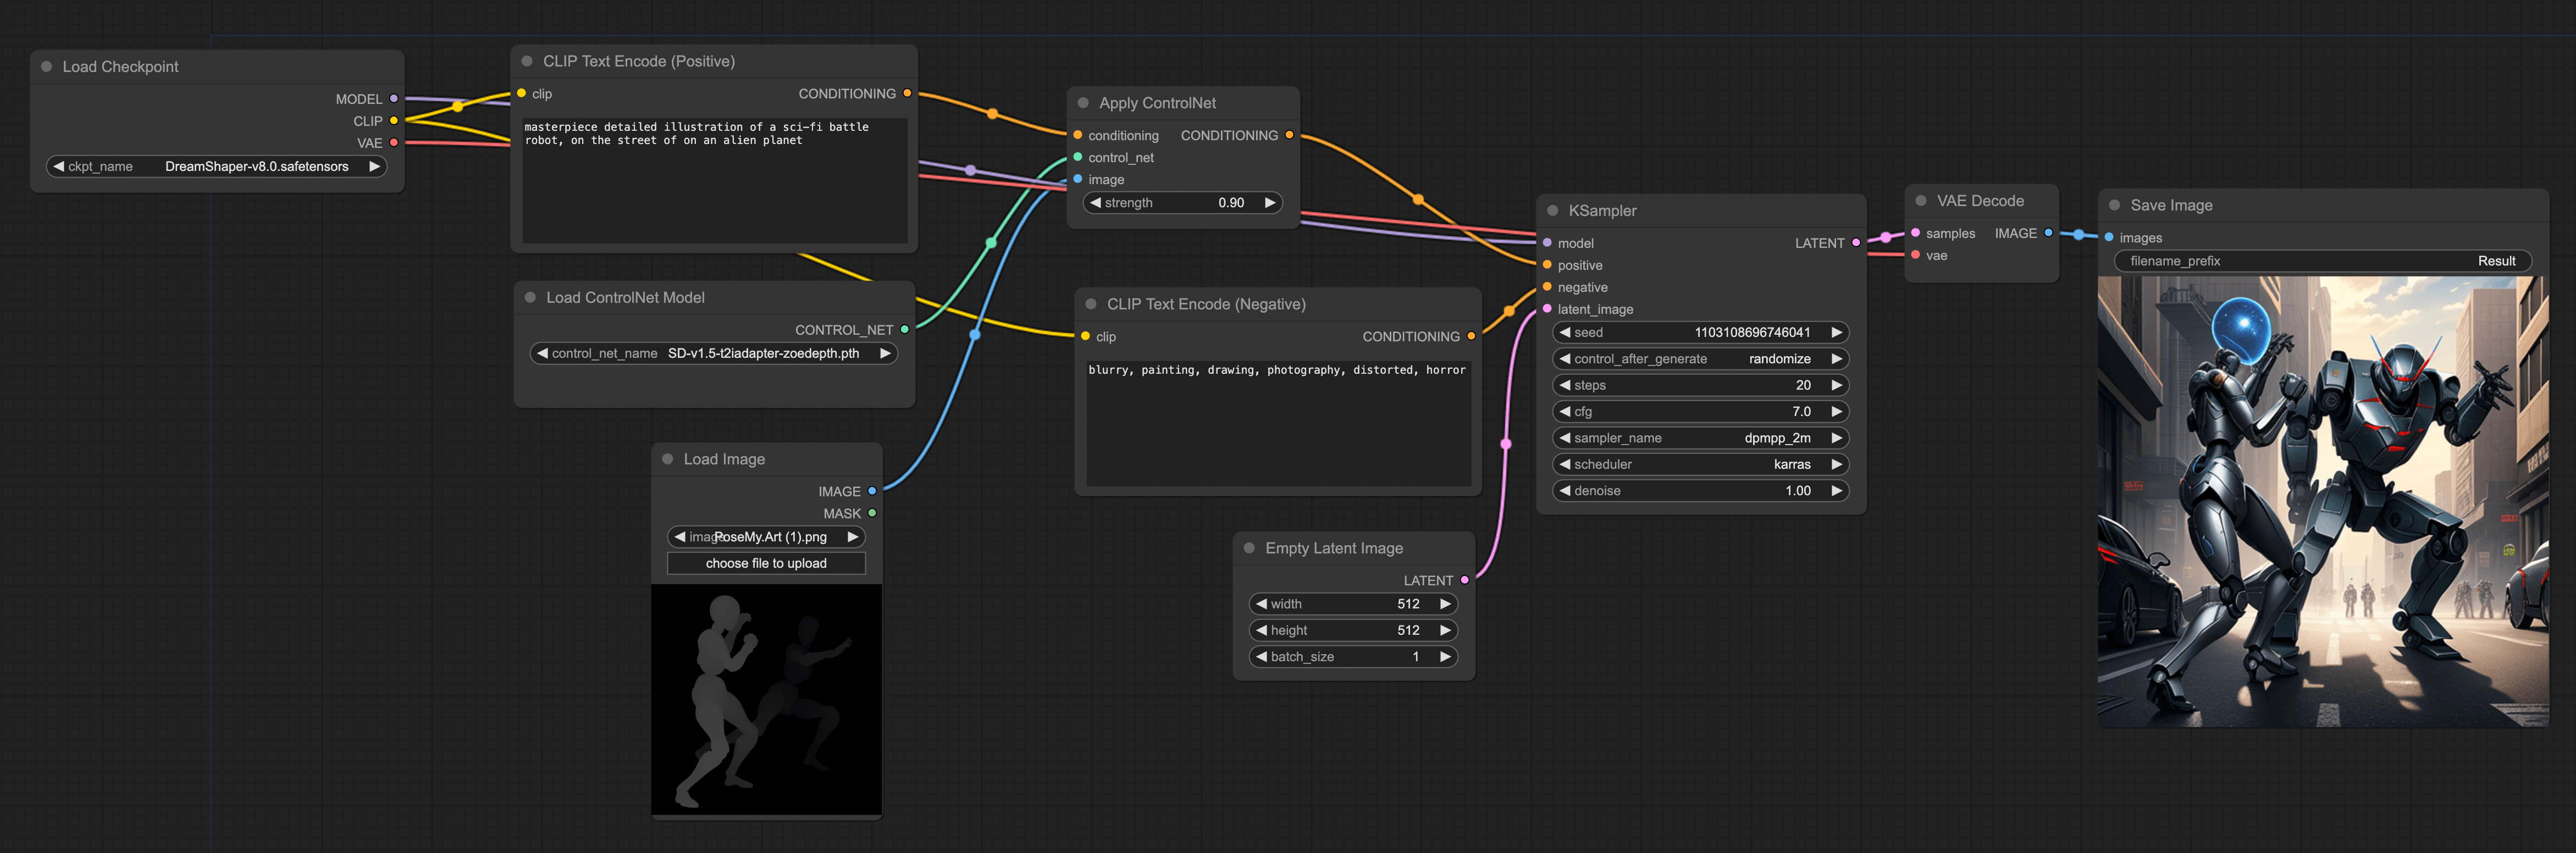
This has more depth of field information than pose. For example, my imported image is of two people fighting, standing one in front of the other. If only using pose to draw, it's relatively difficult to draw this kind of front-back image.
If you want to generate depth maps using plugins like in the pose workflow, the method is also straightforward. Simply replace the DWPose Estimation node in the above workflow with the Zoe-Depth Map node.
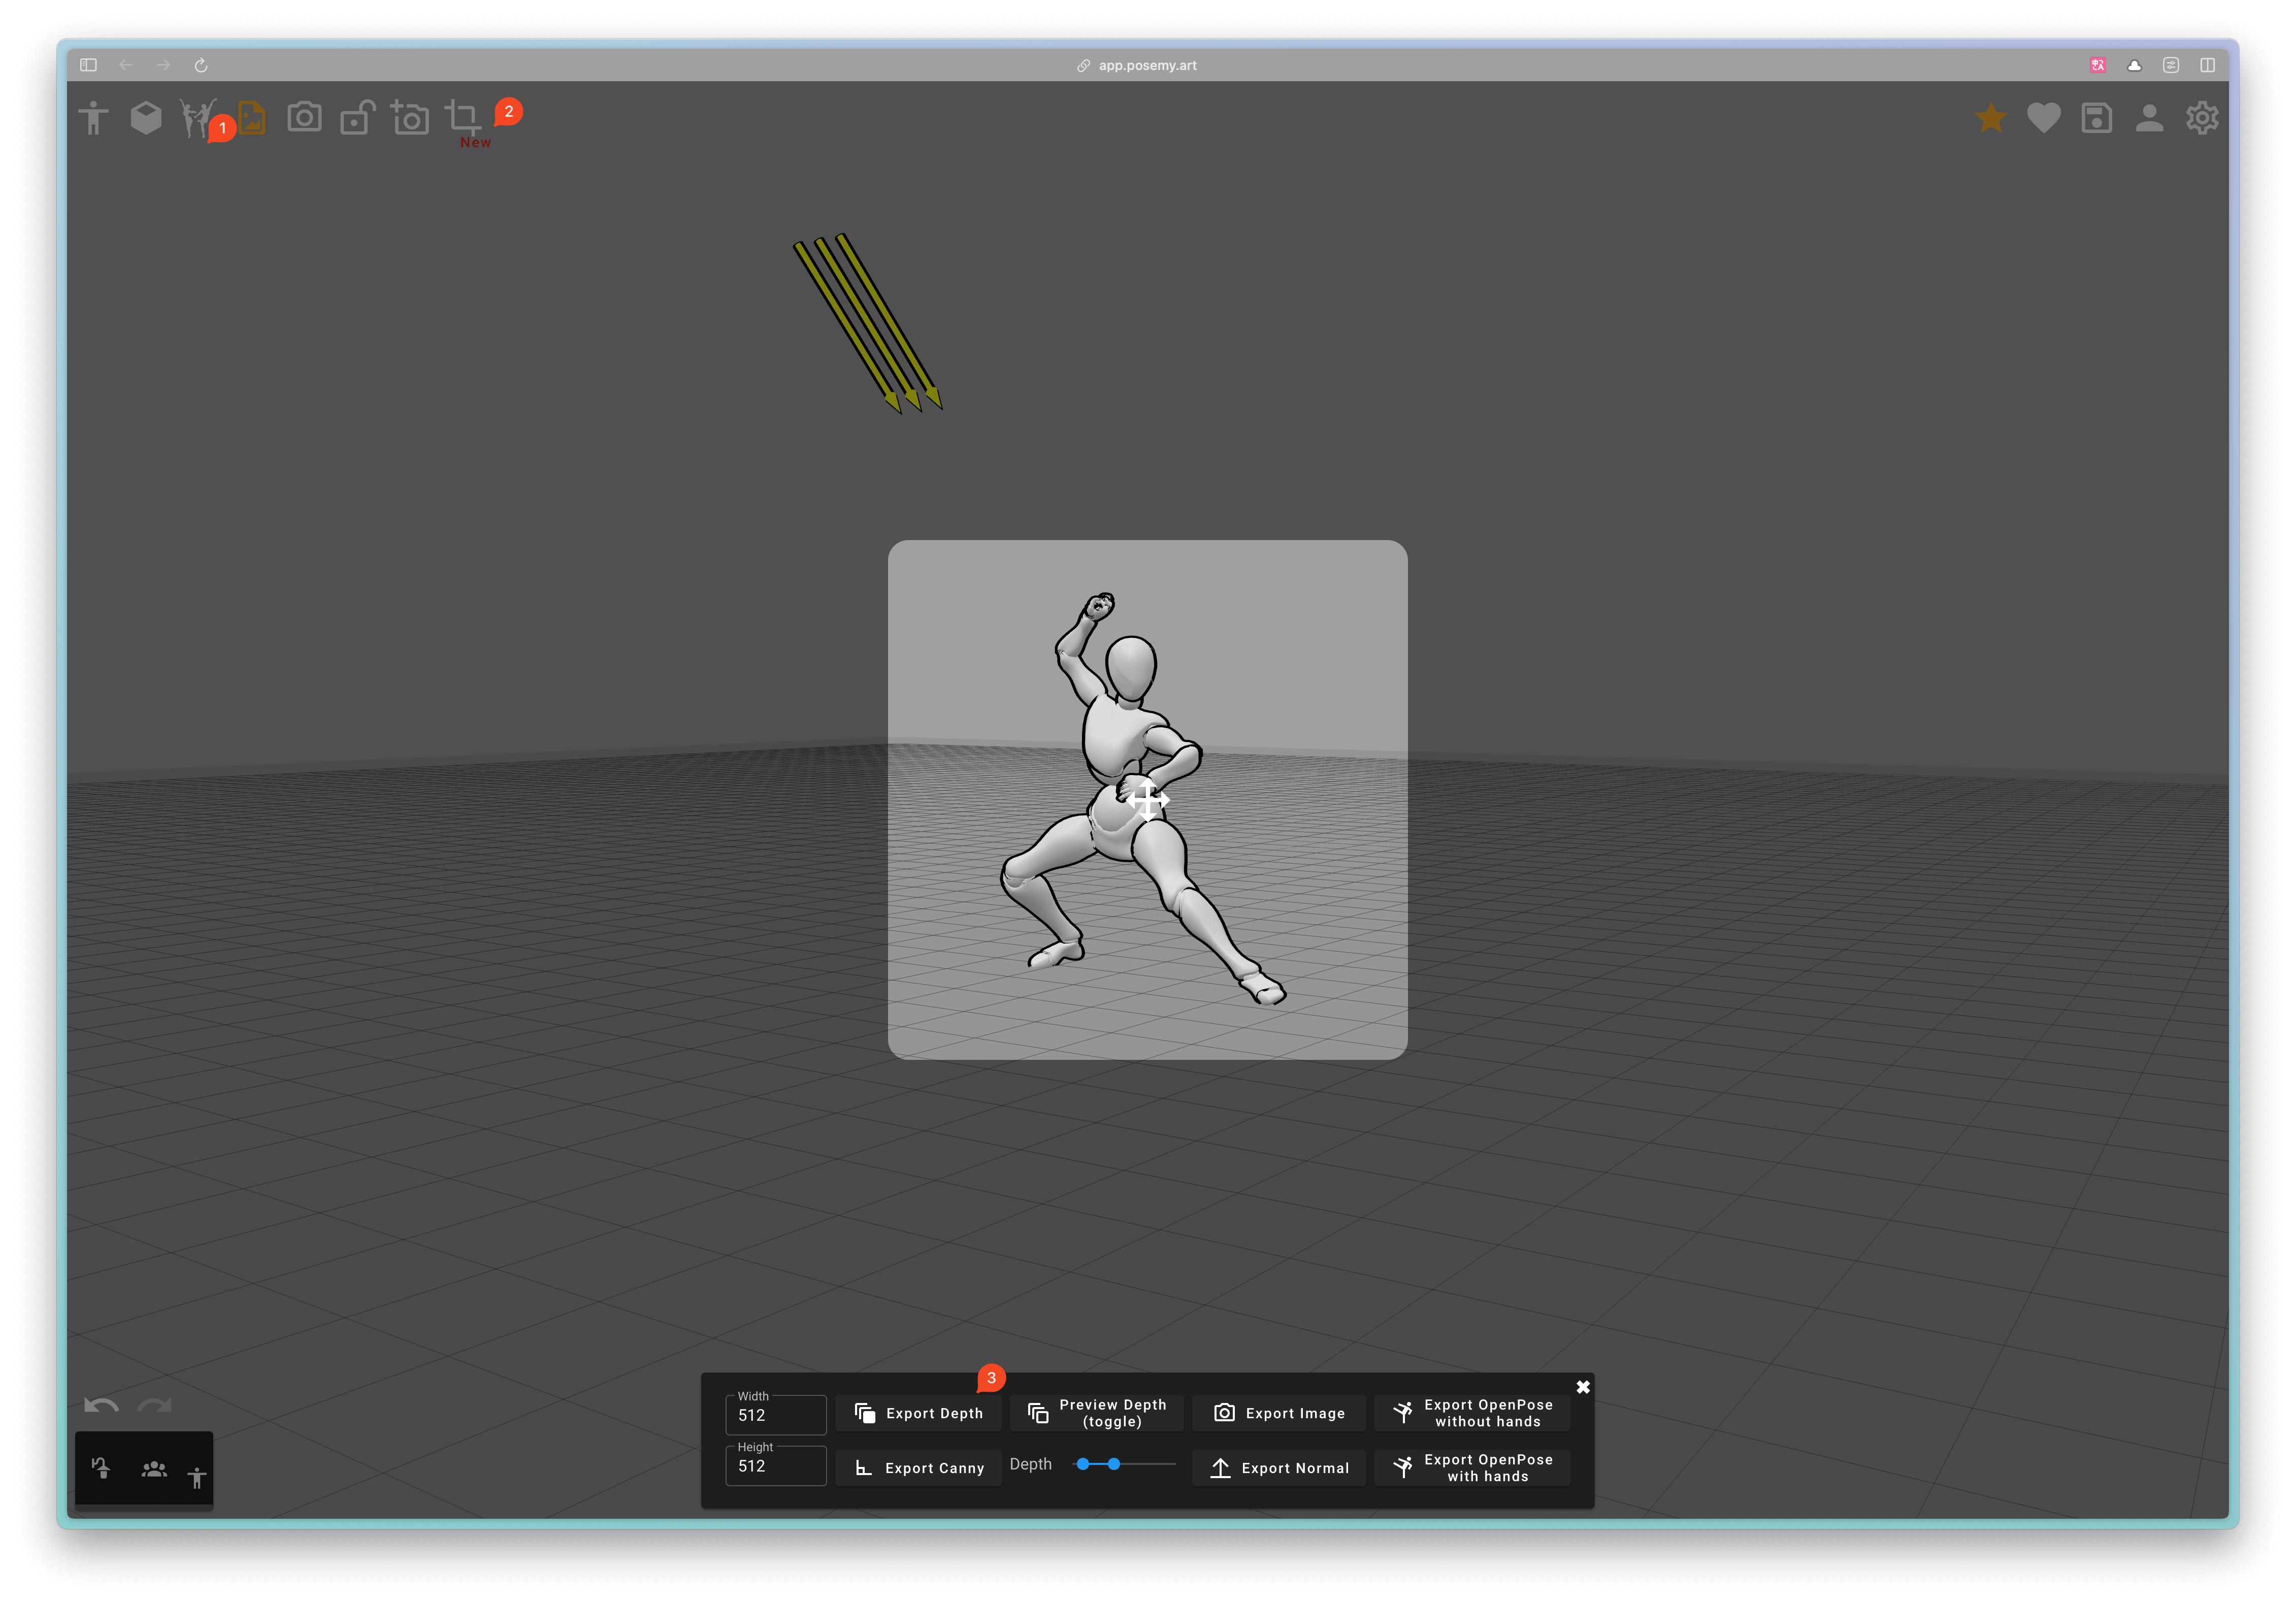
Moreover, there's another method. You can also use some 3D tools to generate character poses or depth maps. For example, Posemy.art (opens in a new tab) is such a product. You can choose the character's pose you want in the upper left corner (marked 1), then adjust the character's pose by dragging the mouse, and finally click the Export button (marked 2) to export the depth map (marked 3), and then import it into ComfyUI:
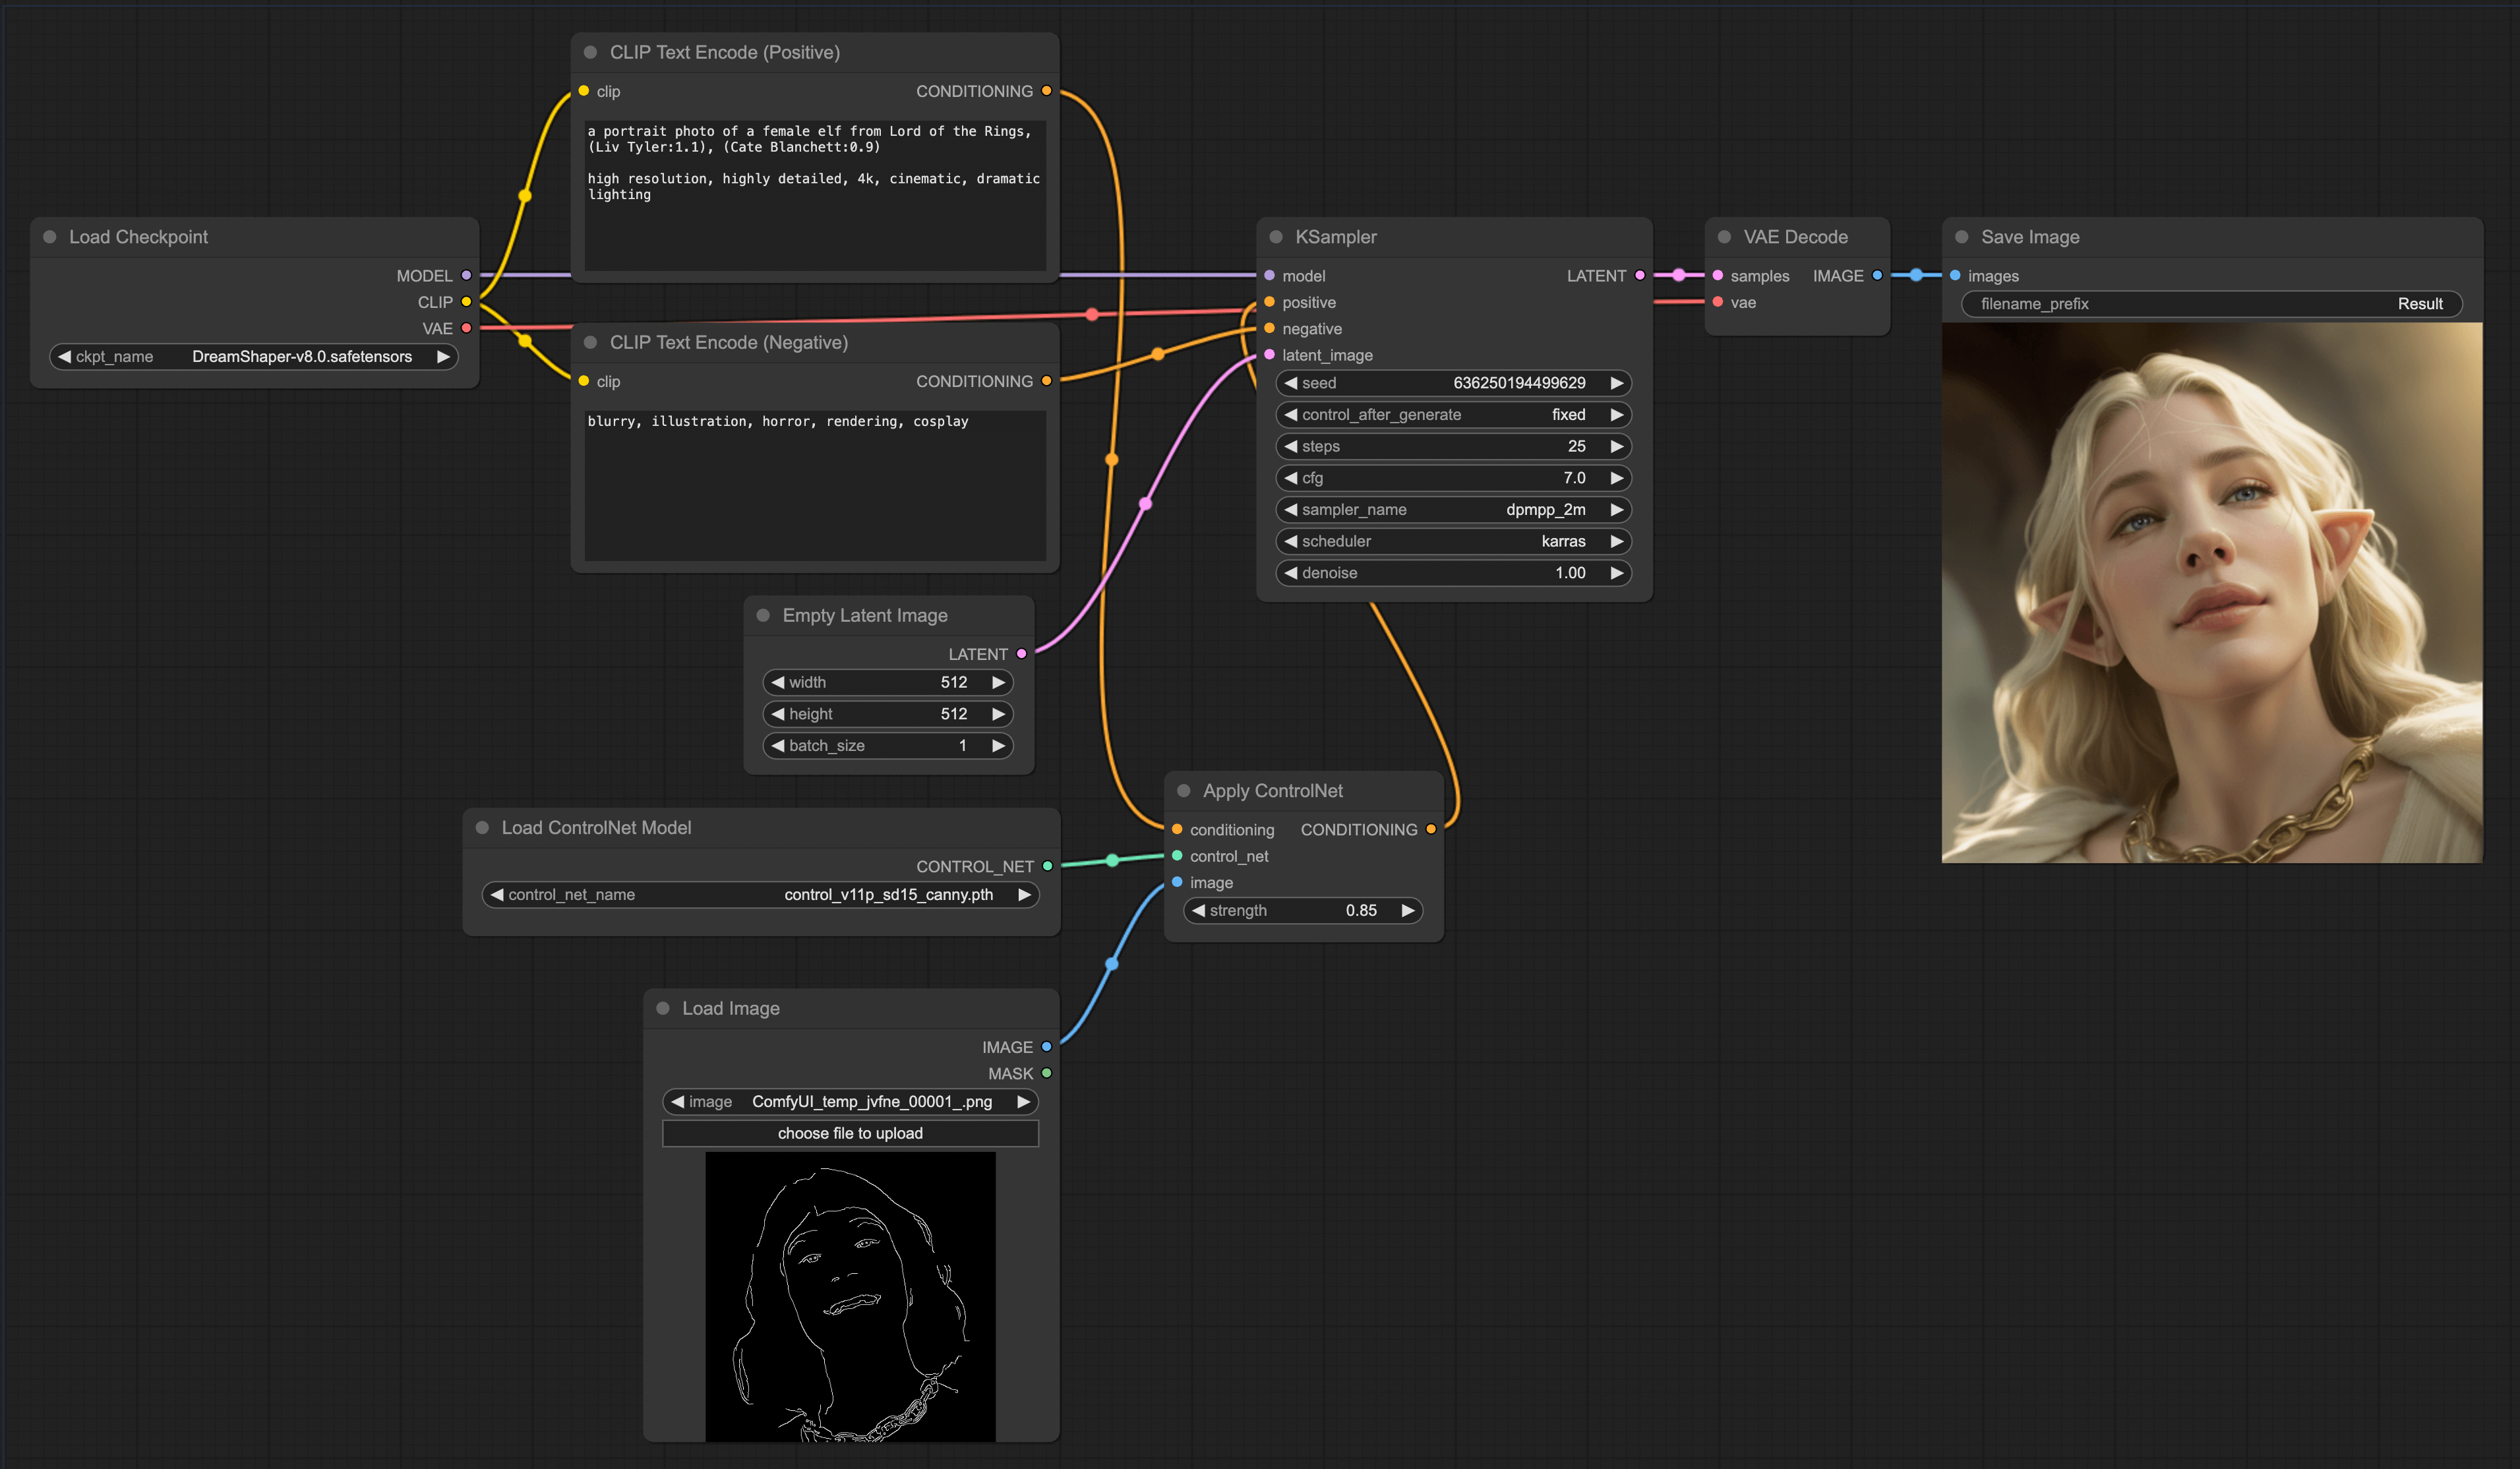
Canny ControlNet workflow
The fourth use of ControlNet is to control the images generated by the model through Canny edge maps. The advantage of this method is that you can control the edges of the images generated by the model with Canny edge maps, like this:
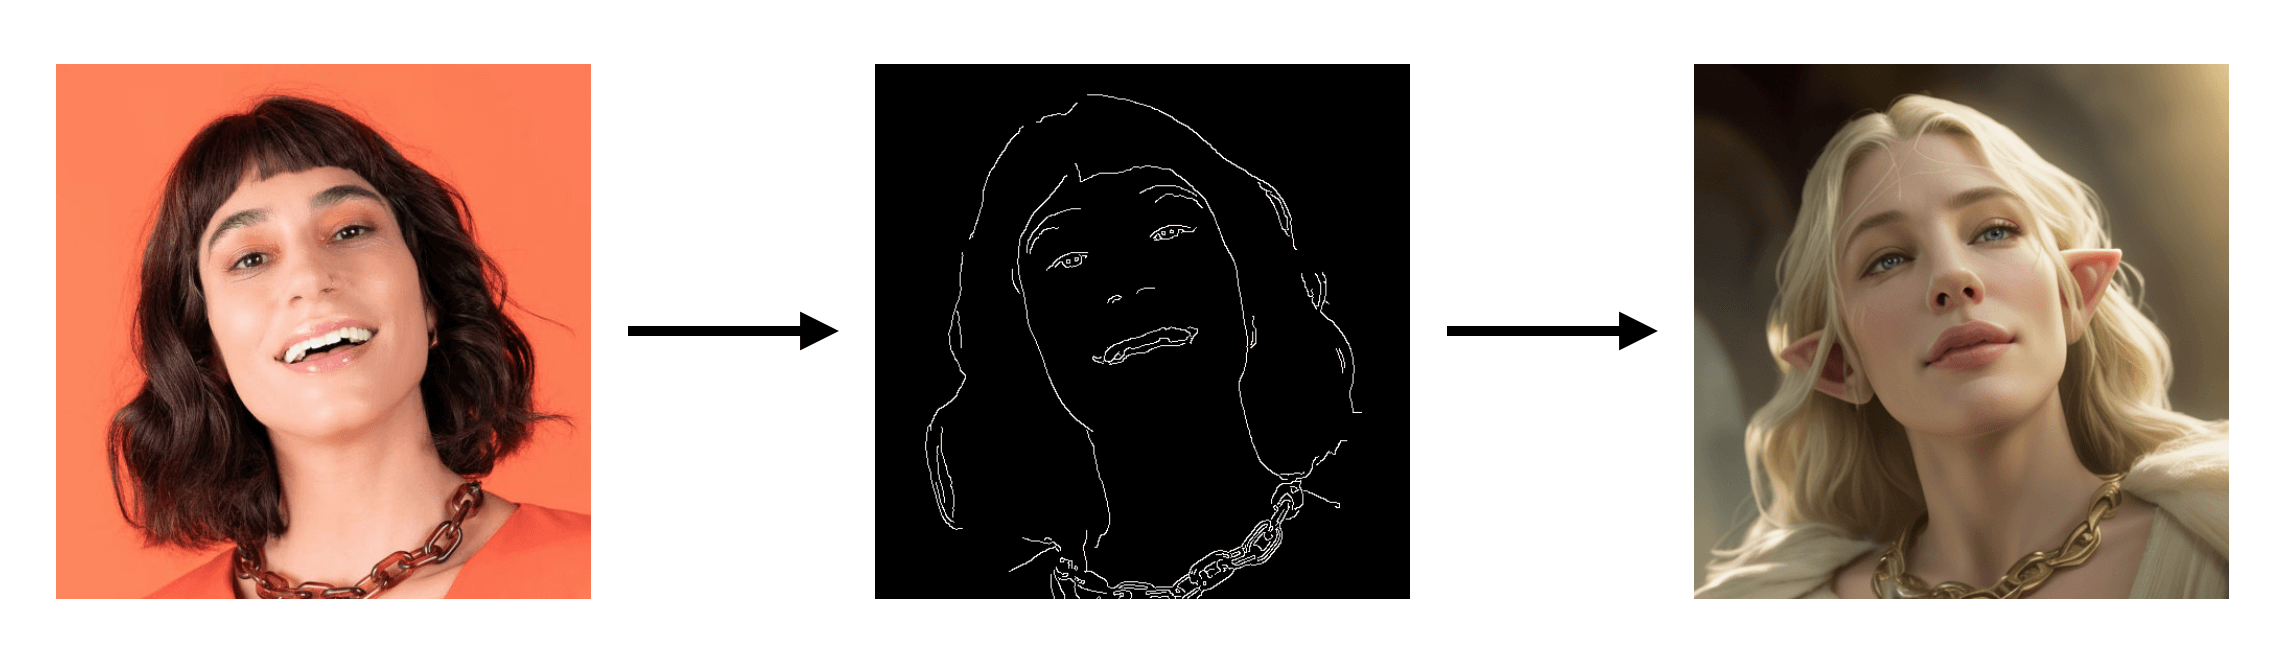
The workflow setup is similar to the previous one, just replace the ControlNet model with the Canny model.