In/Outpainting
Please download the following model and place the model file in the corresponding folder before officially starting to learn this chapter:
- Dreamshaper 8-inpainting (opens in a new tab): Place it in the models/checkpoints folder in ComfyUI.
If you want to use the workflow from this chapter, you can either download and use the Comflowy local version or sign up and use the Comflowy cloud version (opens in a new tab), both of which have the chapter's workflow built-in. Additionally, if you're using the cloud version, you can directly use our built-in models without needing to download anything.
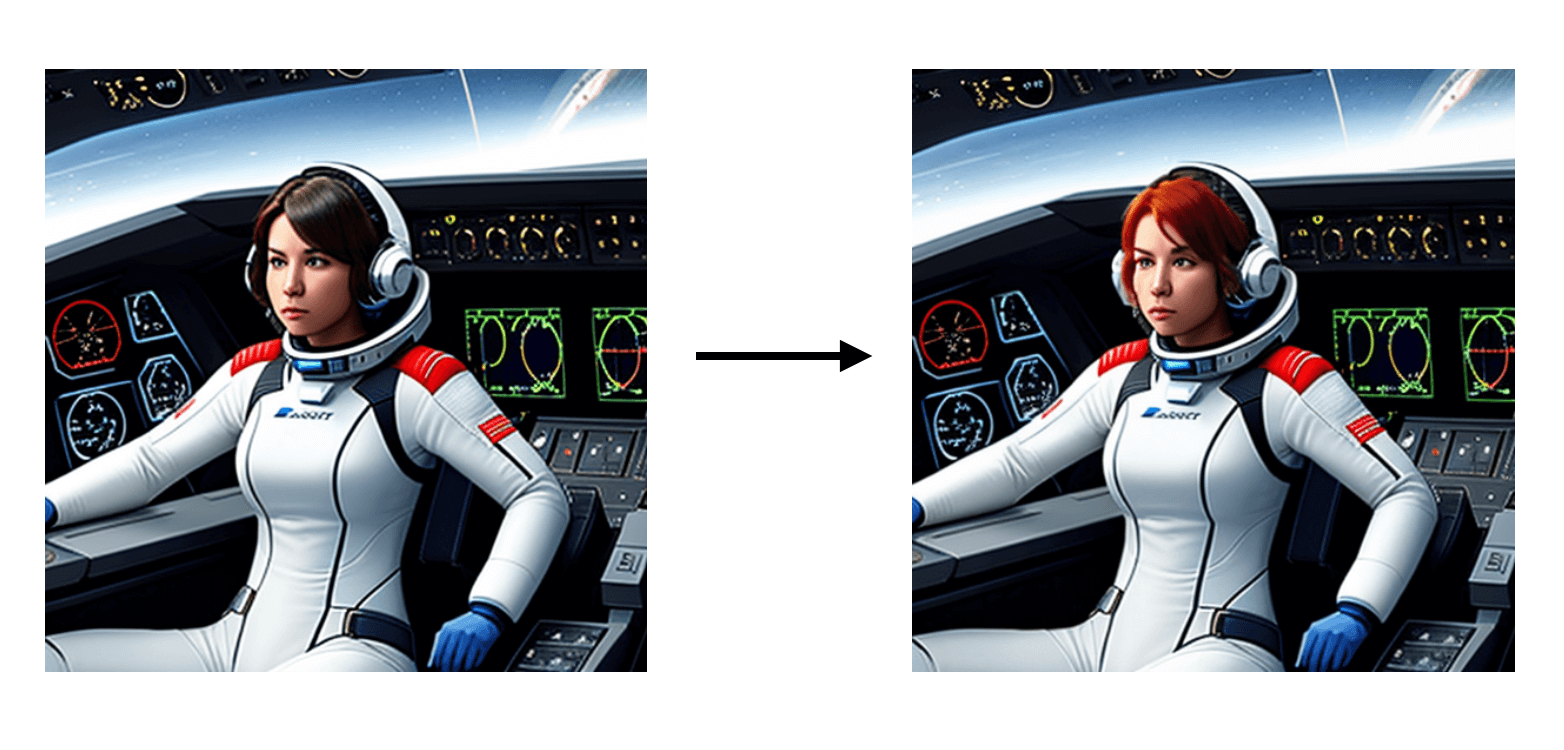
After you have generated an image using Stable Diffusion, you might be unsatisfied with some parts of the image. For instance, if you were discontented with the character's hair in the picture, you might try to modify the Prompt by adding "red hair" and then regenerate the image. But by using this method, the character's portrait might turn red, and other areas might also change.
So how to change only a certain area without affecting other areas?
Inpainting Workflow
Let me explain how to build Inpainting using the following scene as an example. The picture on the left was first generated using the text-to-image function. I was not satisfied with the color of the character's hair, so I used ComfyUI to regenerate the character with red hair based on the original image. Comparing with the original image, the new image did not change in areas other than the hair:
To replace a part of the image with something else, the main technique used is Inpainting, and the steps are very similar to text-to-image generation:
Add VAE Encode (for Inpainting)
As usual, we start with the default workflow. Click the Load Default button on the right panel to load the default workflow. Then double-click in a blank area, input Inpainting, and add this node. You'll see a configuration item on this node called "grow_mask_by", which I usually set to 6-8. Generally speaking, the larger this value, the better, as the newly generated part of the picture will blend more naturally with the original image.
Add Load Image Node
After adding the node, load the image you want to modify. Then connect the Load Image node with the VAE Encode (for Inpainting) and connect VAE Encode (for Inpainting) with KSampler.
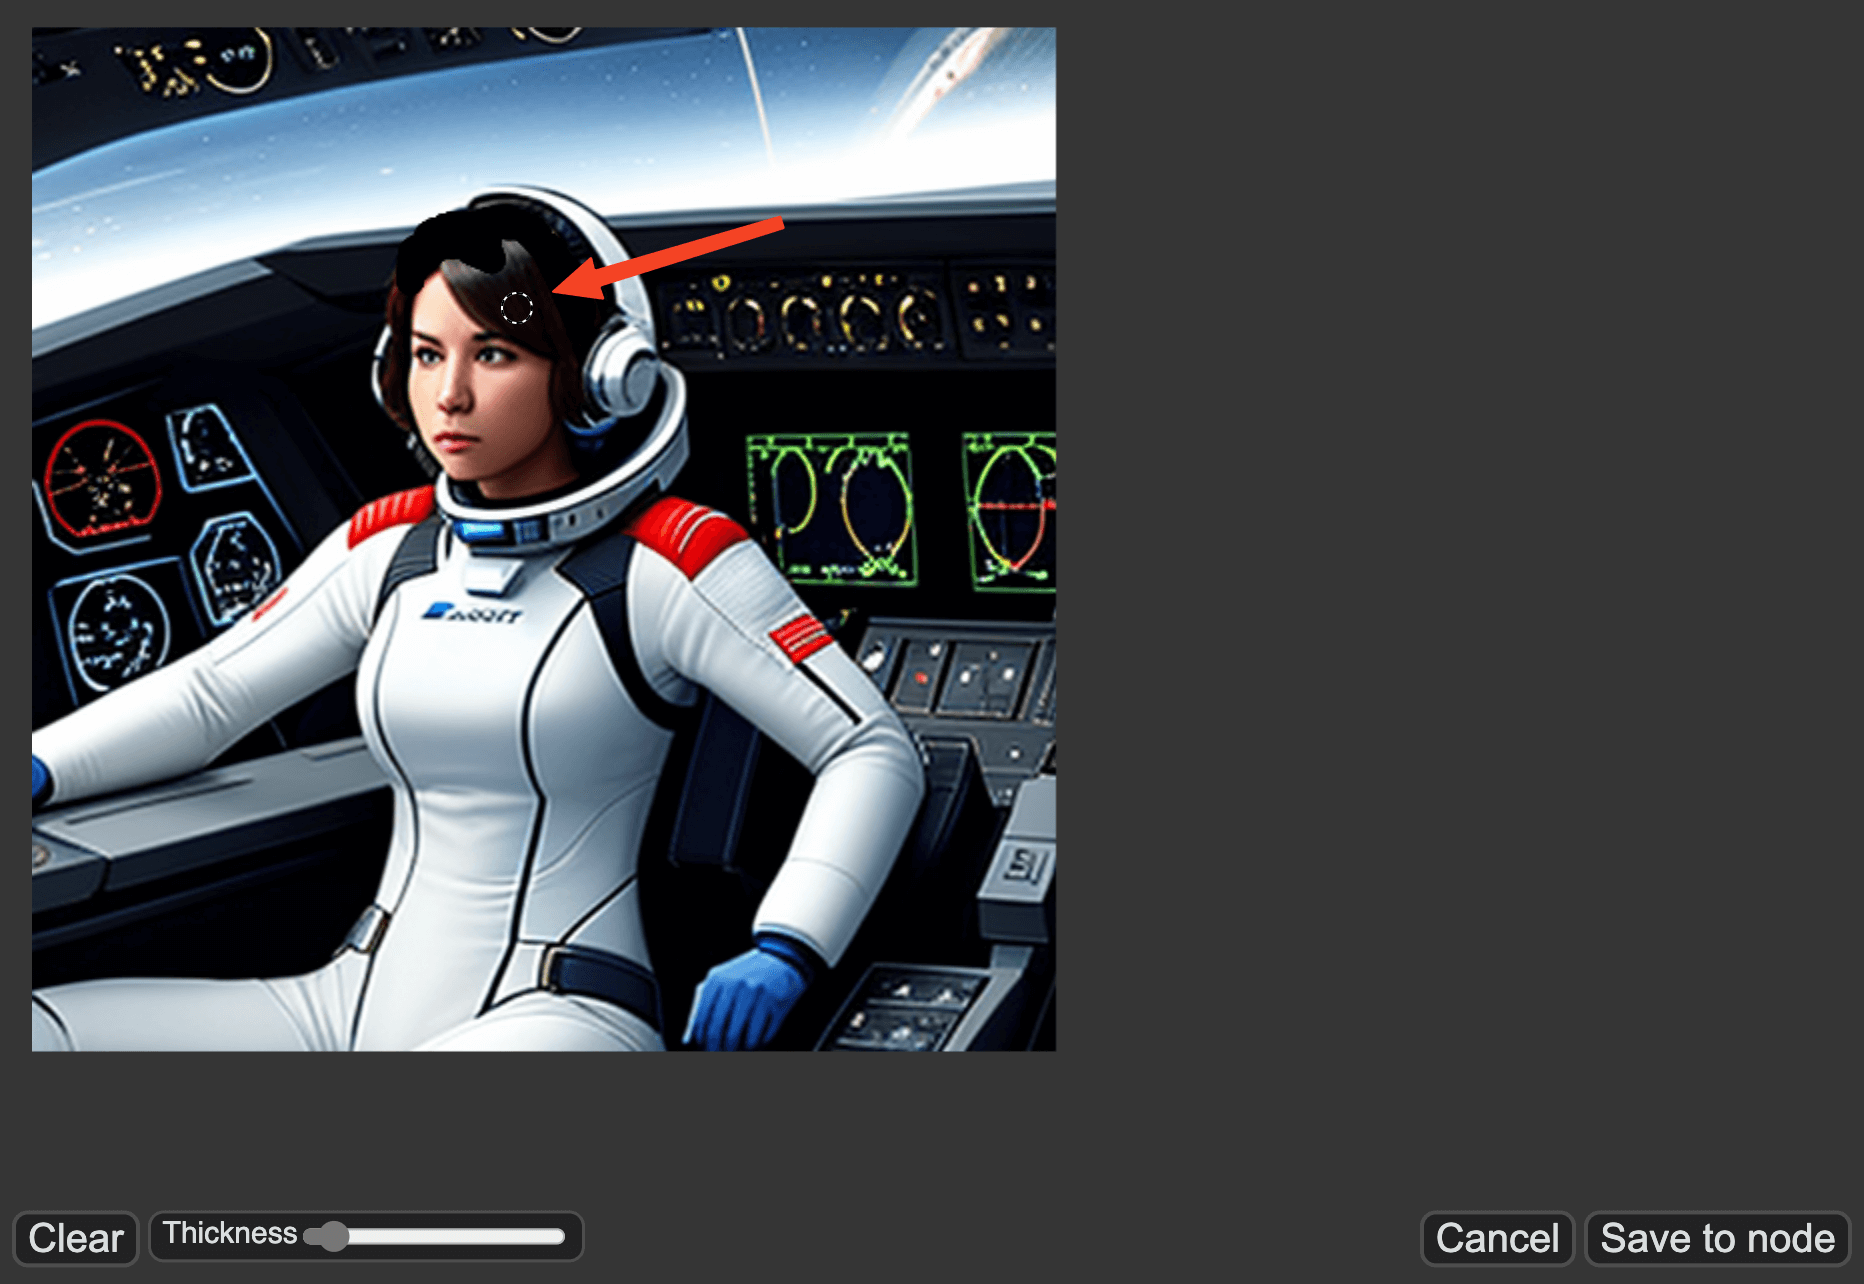
Smear the Area You Want to Change
After all lines are connected, right-click on the Load Image node and click Open in MaskEditor in the menu. Once you enter the MaskEditor, you can smear the places you want to change. For example, if I want to change the character's hair in the picture to red, I just need to smear the character's hair in the image. In addition, you can use the Thickness below to change the size of the brush. After completion, click Save to node at the right bottom corner.
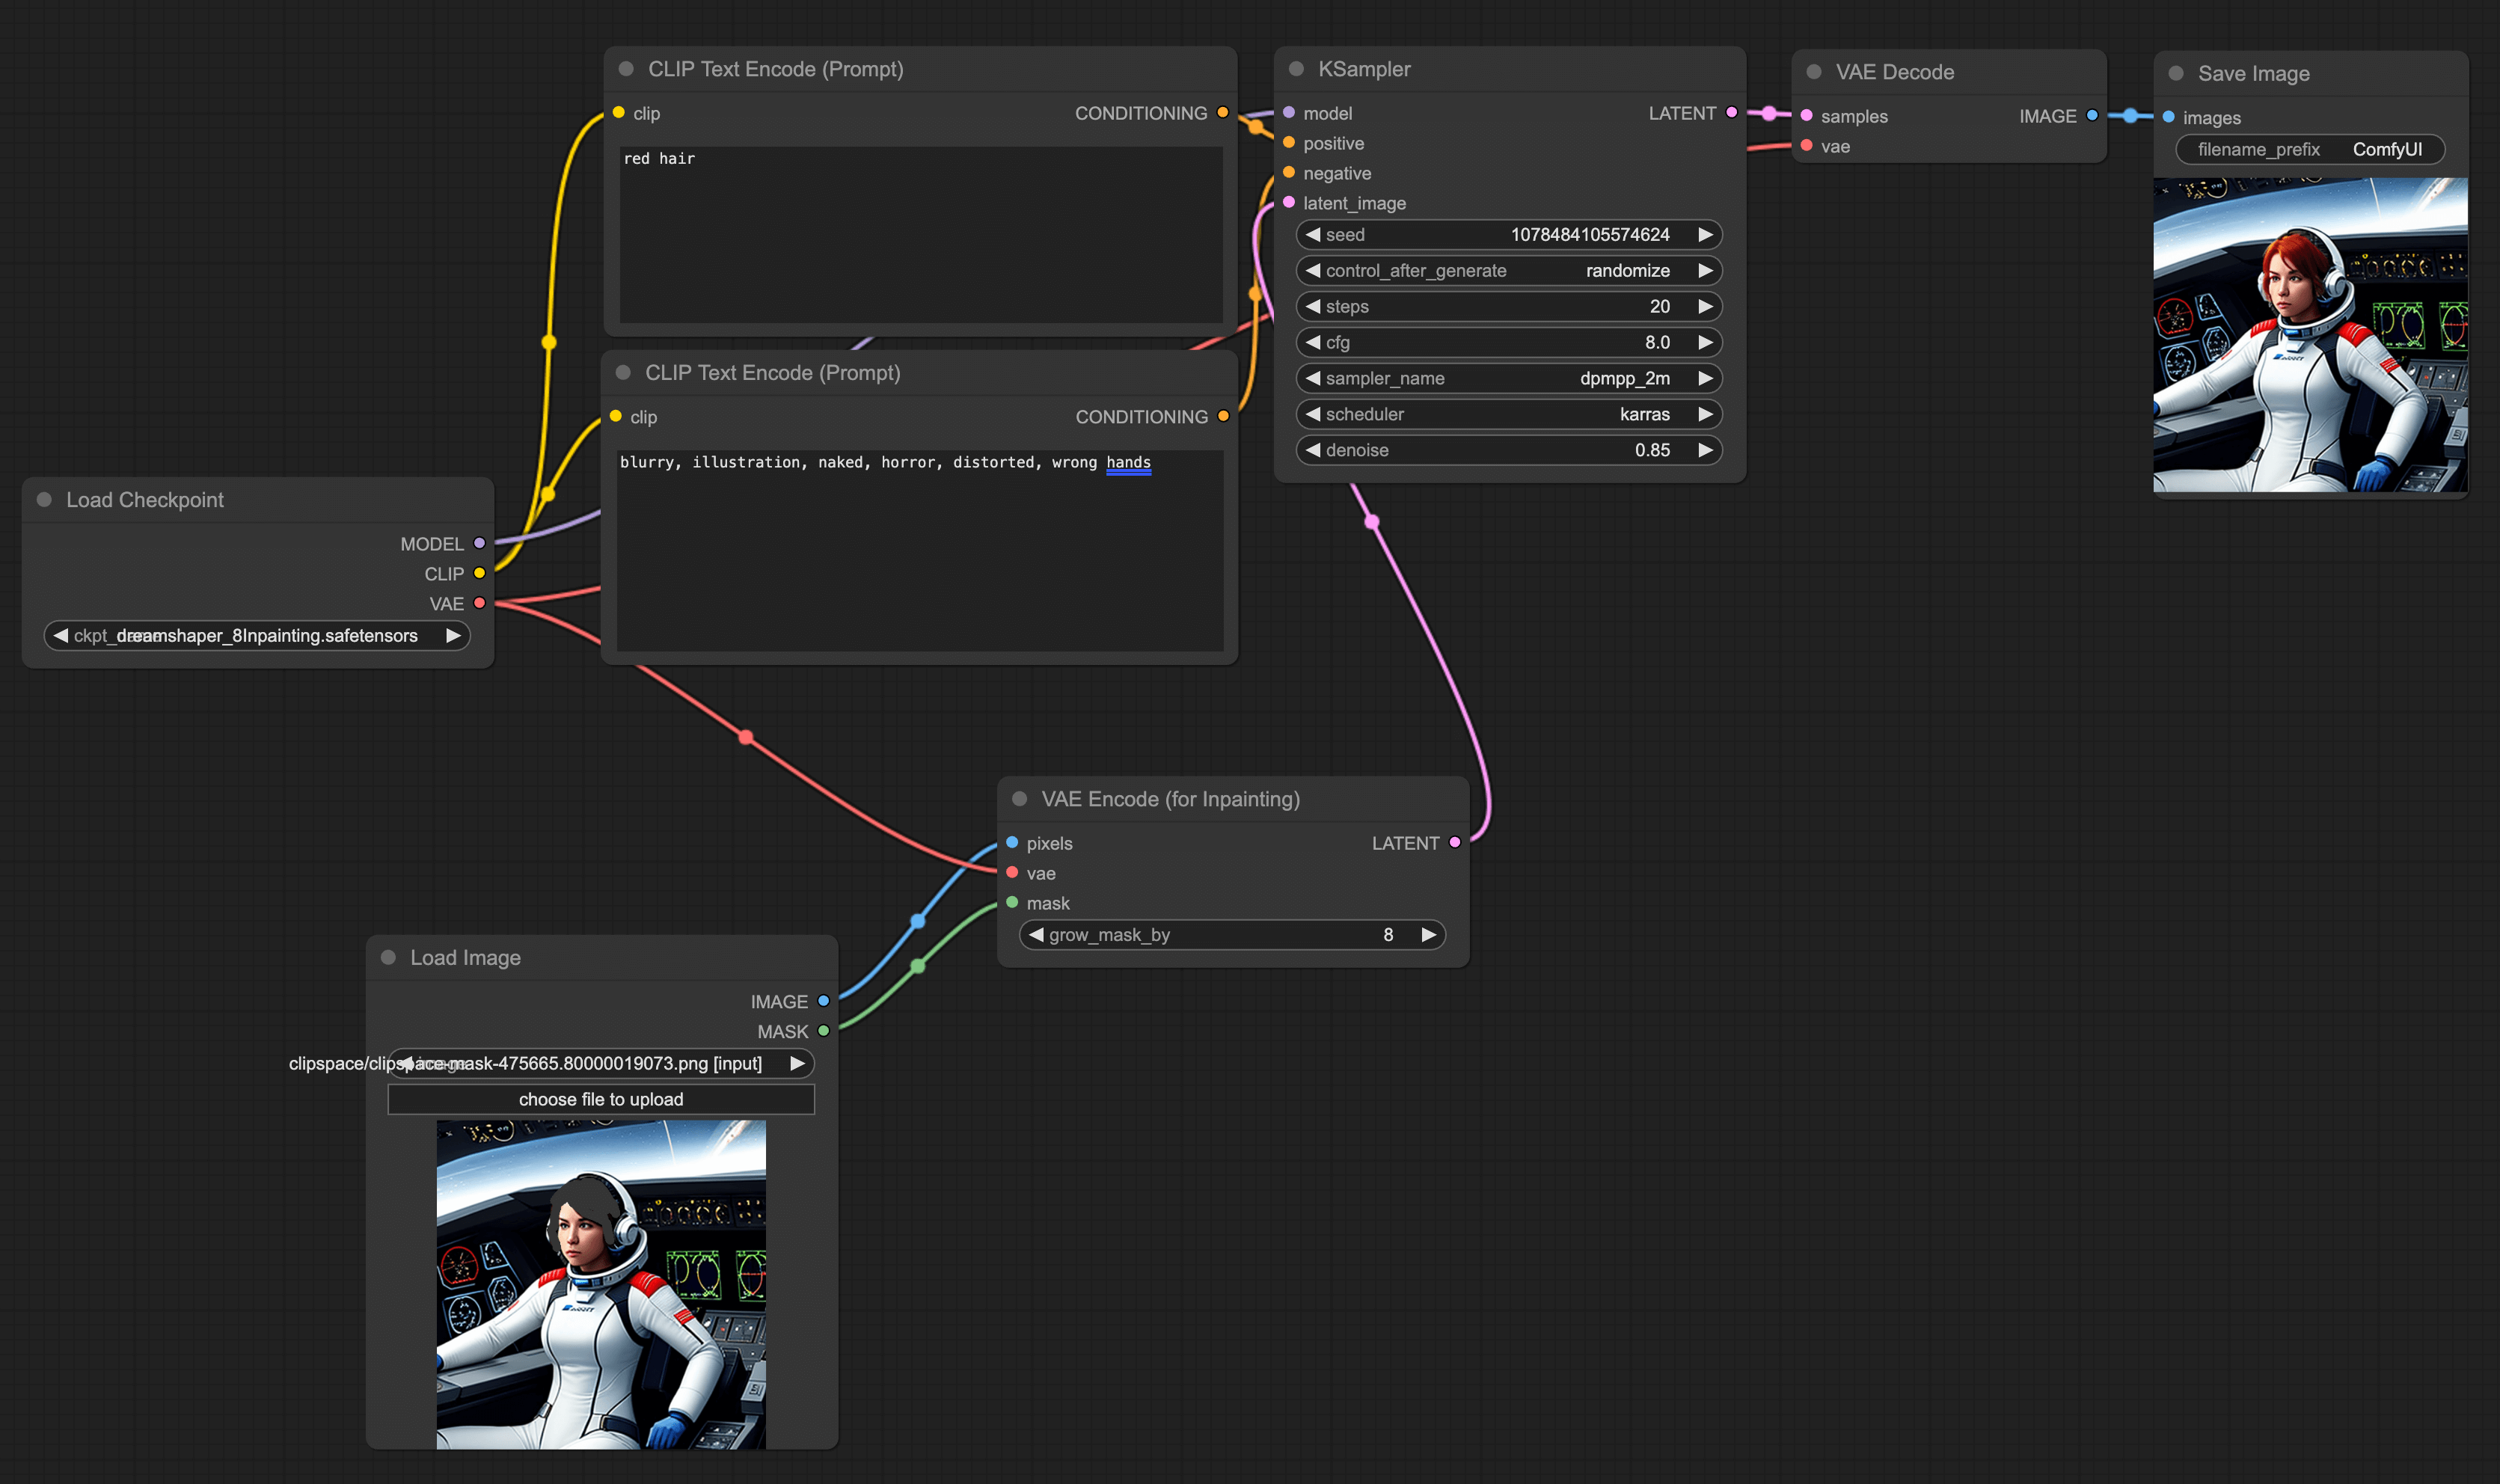
Switch the Model and Configure
Next, switch the model in Load Checkpoint to the inpainting model. Here's a tip: it's best if the model used for Inpainting is the same as the one used for the original image. For example, the astronaut image I want to modify was generated using Dreamshaper, so in the Inpainting scenario, I'm using the Dreamshaper Inpainting model.
Besides adjusting the model, we also need to set the denoise in KSampler to 0.85. Of course, you can adjust this based on your own testing, the smaller it is, the closer it will be to the original image.
Input Prompt
Lastly, input the prompt you want to modify on the positive prompt. For example, I want to change the hair color to red, so I enter red hair. Then click Queue Prompt to generate the image:
Outpainting workflow
In addition to modifying parts of the content, another common requirement is to enlarge the original image. For example, in the astronaut example above, the astronaut's right hand and lower limbs have not been generated. I would like the AI to continue generating, something like this:
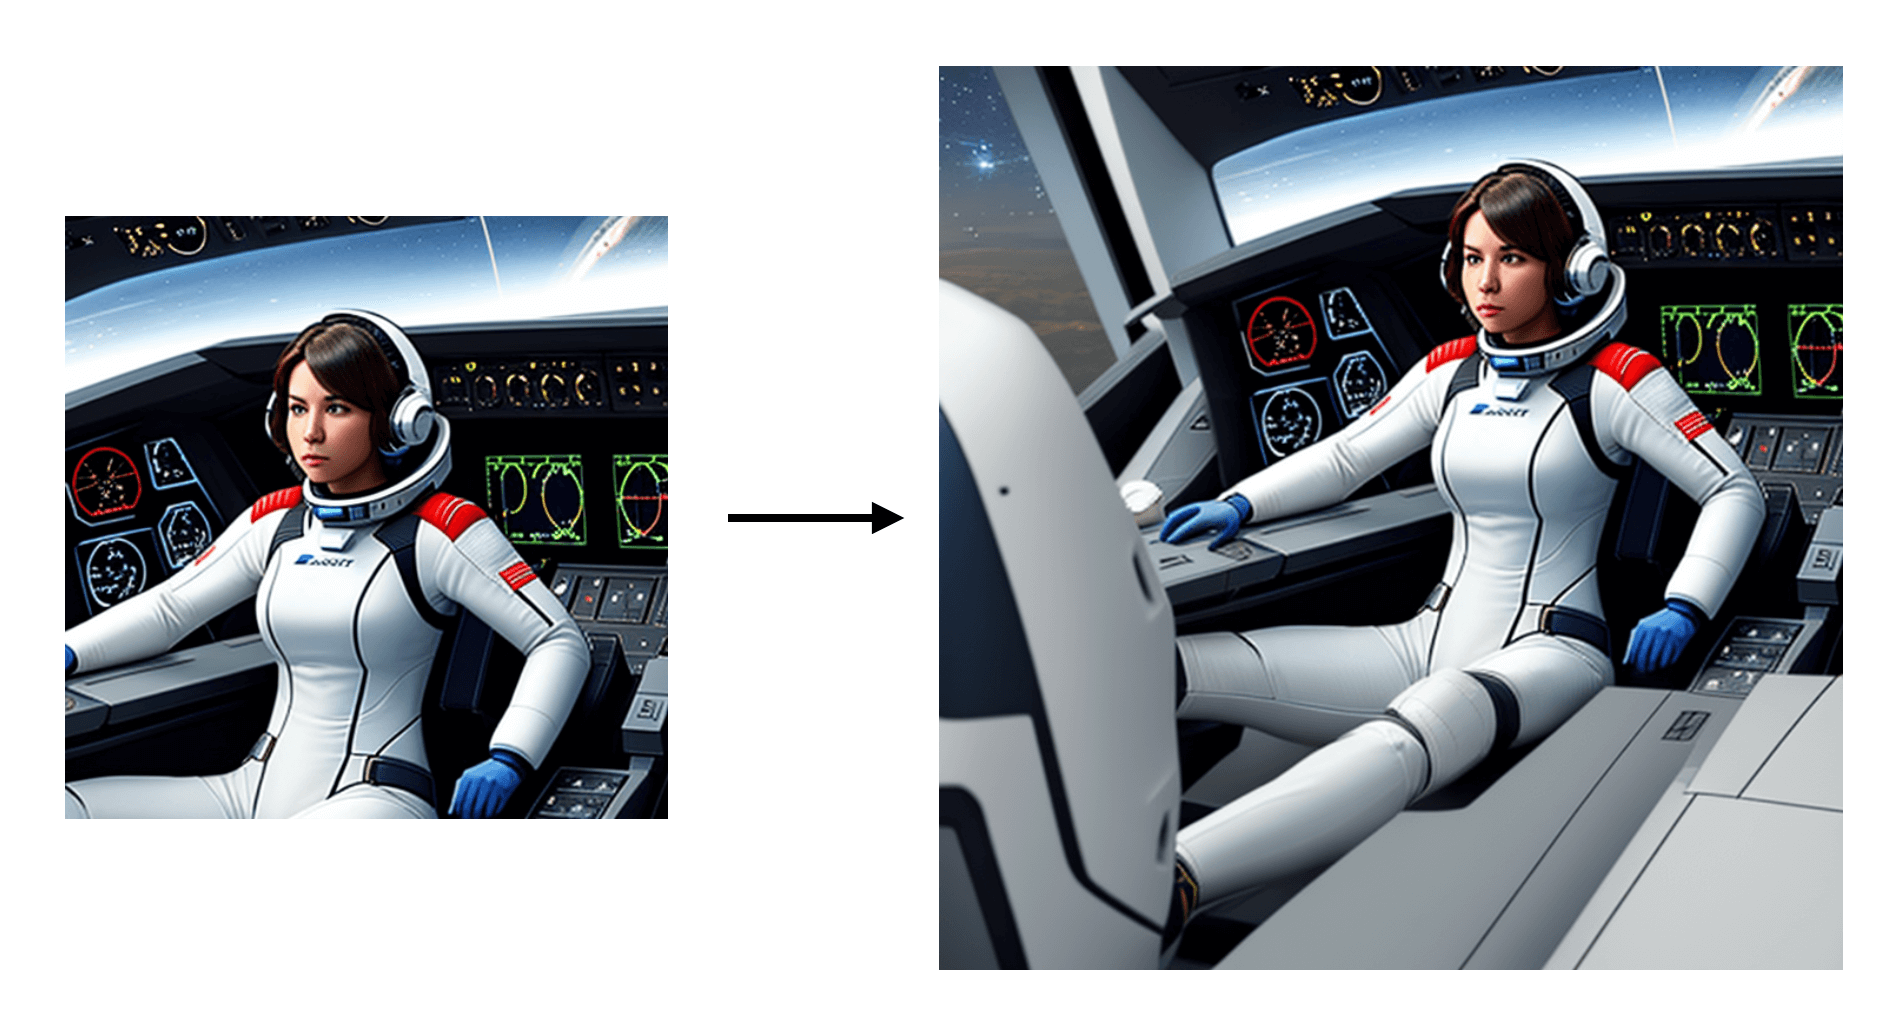
The steps are similar to Inpainting, so you can continue to use the workflow for Inpainting:
Add Pad Image for Outpainting Node
Double click on any blank spot, search and add the Pad Image for Outpainting node. You will see several configurations inside. Left, top, right, and bottom represent how many pixels you want to expand to the left, up, right, and down. The last one, feathering, is used to adjust the smoothness of the edge. If you want the transition to be more natural, you can increase it, but it will cause the picture to have a sense of smearing.
Connect Nodes
For the second step, the Load Image node needs to be connected to the left end of Pad Image for Outpainting. The right end of the Pad Image for Outpainting then connects with the left end of the VAE Encode (for Inpainting).
Adjust parameters
In CLIP Text Encode (Prompt), you can input additional information. Besides, from my experience, the grow_mask_by parameter in the VAE Encode (for Inpainting) needs to be slightly increased, I usually set it to be more than 10:
