Basic Operations
Some Tips about ComfyUI
Lately, a lot of folks have been asking me, "What advice or tips would you give to someone just starting with ComfyUI?" After giving it some thought, I've organized a few key points that I think are particularly important.
① Install ComfyUI on an External Hard Drive
First piece of advice: consider installing ComfyUI on an external hard drive.
AI generative model files are generally quite large, with even the smaller SD 1.5 models being around 2 to 3 GB in size. Downloading several models might take up dozens or even hundreds of GBs of space, which can really fill up your computer's hard drive. Installing it on an external hard drive can save a lot of space on your computer. Additionally, if you want to use ComfyUI both at the office and at home, the best solution is to install it on an external hard drive. Just unplug the hard drive when you leave work, and plug it in at home to continue using it.
If you installed ComfyUI on your machine via Git, you can simply copy the entire ComfyUI folder to your external drive. Then, in the Terminal, cd into the corresponding folder and open ComfyUI from there.
② ComfyUI Can Use Model Files from SD WebUI
Second, if you've previously used SD WebUI, you've likely downloaded numerous model files. Actually, these model files can also be used in ComfyUI without needing to download them again. The detailed method can be found in the Download & Import Model tutorial.
③ ComfyUI Also Allows You to See Preview Images Like Midjourney Does
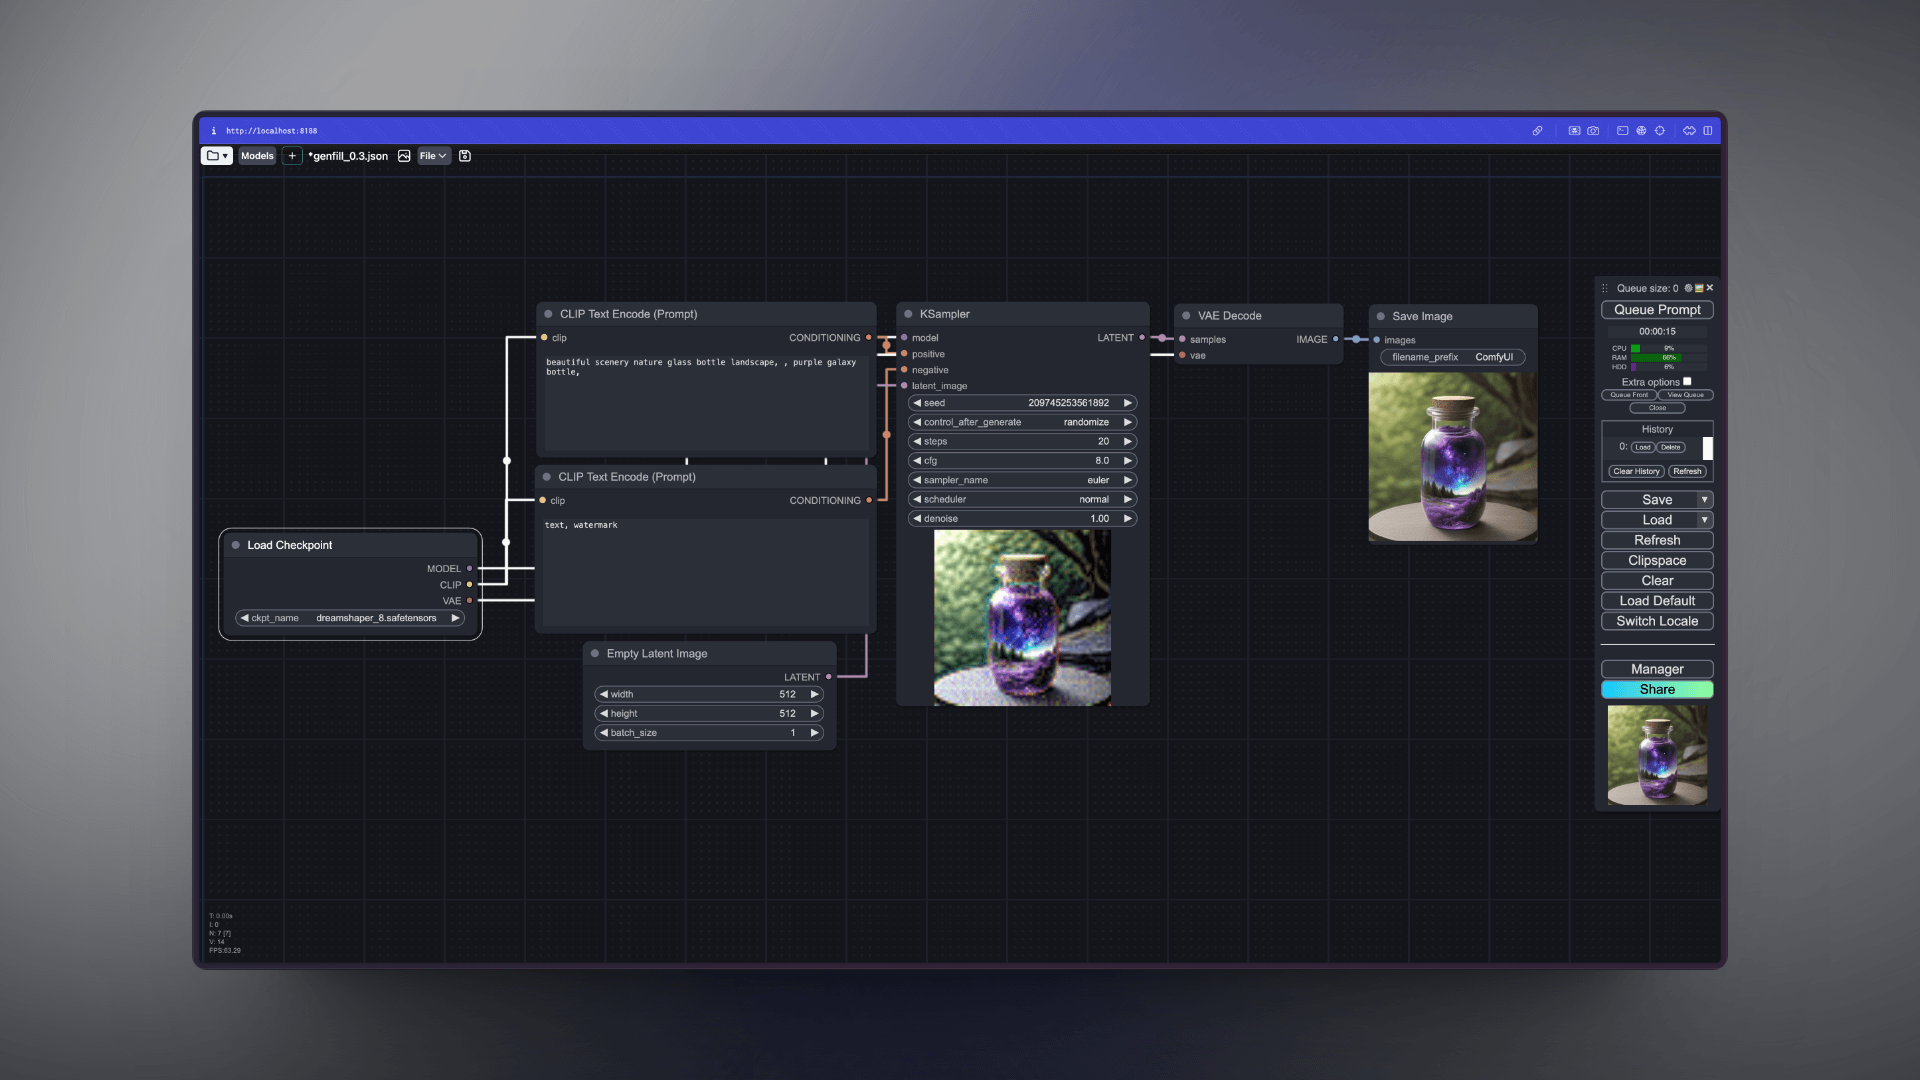
Third, when producing images, mj allows you to see the process of the image generation, and comfyui can do this too. First, you need to install ComfyUI Manager, then in the settings, set the Preview Method to Latent2RGB (this method is faster in generating images):

After setting it up, when you generate an image, you'll be able to see preview images during the process at the KSampler node:
④ Make Good Use of the Bypass and Mute Functions
The fourth tip, I believe, is to effectively use the Bypass and Mute functions. Those new to ComfyUI might initially confuse these two functions, thinking they serve the same purpose. However, they have quite significant differences.
Simply put, Mute is more like pausing the workflow. If you mute a node and then run the workflow, when the program reaches the muted node, it will pause and not proceed further. On the other hand, with a node set to Bypass, the program doesn't pause but skips over that node and continues running. If you have some coding knowledge, you can think of Mute as similar to setting a breakpoint during debugging, while Bypass is like commenting out a piece of code.
These functionalities are particularly useful for debugging.
For example, if you've added a LoRA node to the Workflow and after running it, you decide you no longer need this node, the common approach would be to delete the LoRA node and then reconnect the workflow. However, a more efficient method would be to set the LoRA node to Bypass. This way, you don't need to delete and reconnect the node, saving you time. Moreover, if you want to reintegrate the LoRA node later, you just need to remove the Bypass.
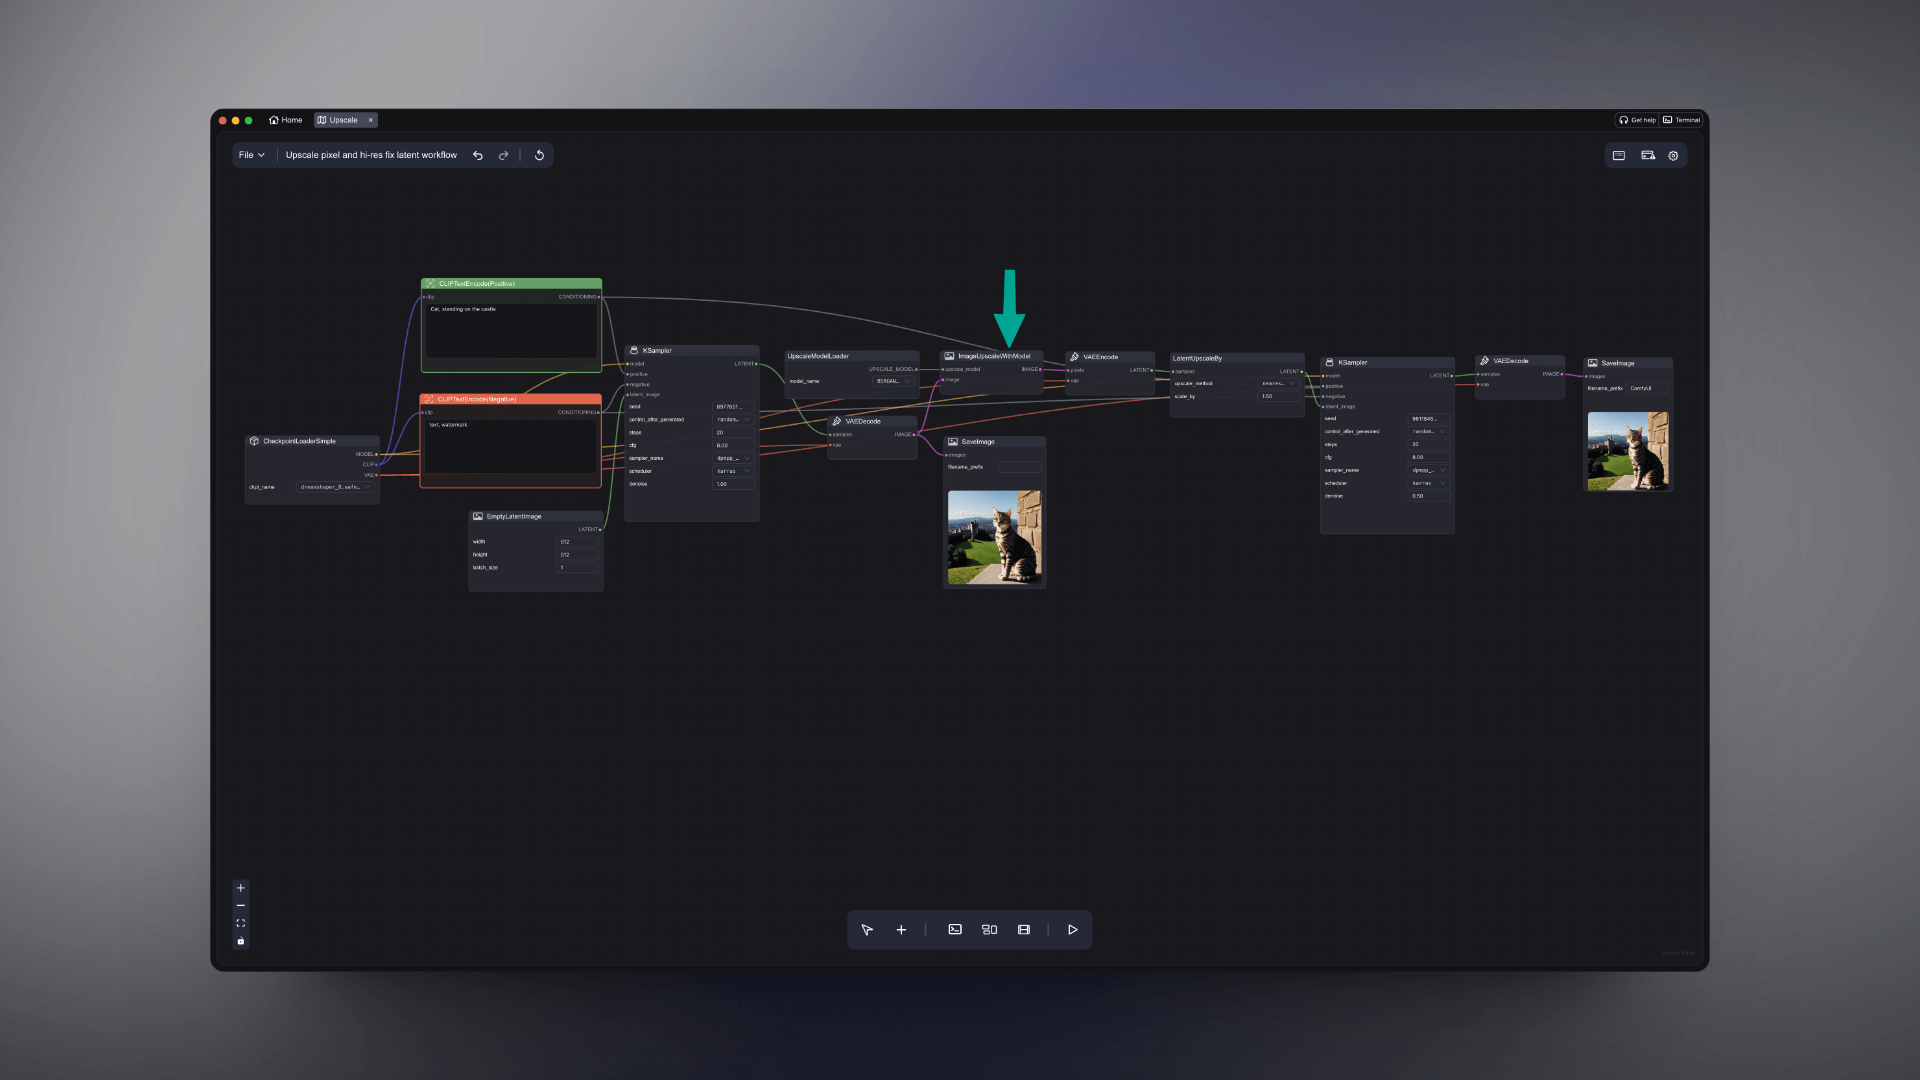
Unlike Bypass, which "skips a certain node and lets the subsequent nodes run," Mute "stops a node and all nodes following it" from running. For instance, in the following workflow, there's a node for enlarging images (indicated by the green arrow), and the nodes connected after it are all related to enlargement. Since running the enlargement node can be time-consuming, if you don't want every image to be enlarged, you might set the enlargement node to Mute. This way, the program won't continue past it.
⑤ Batch Generation
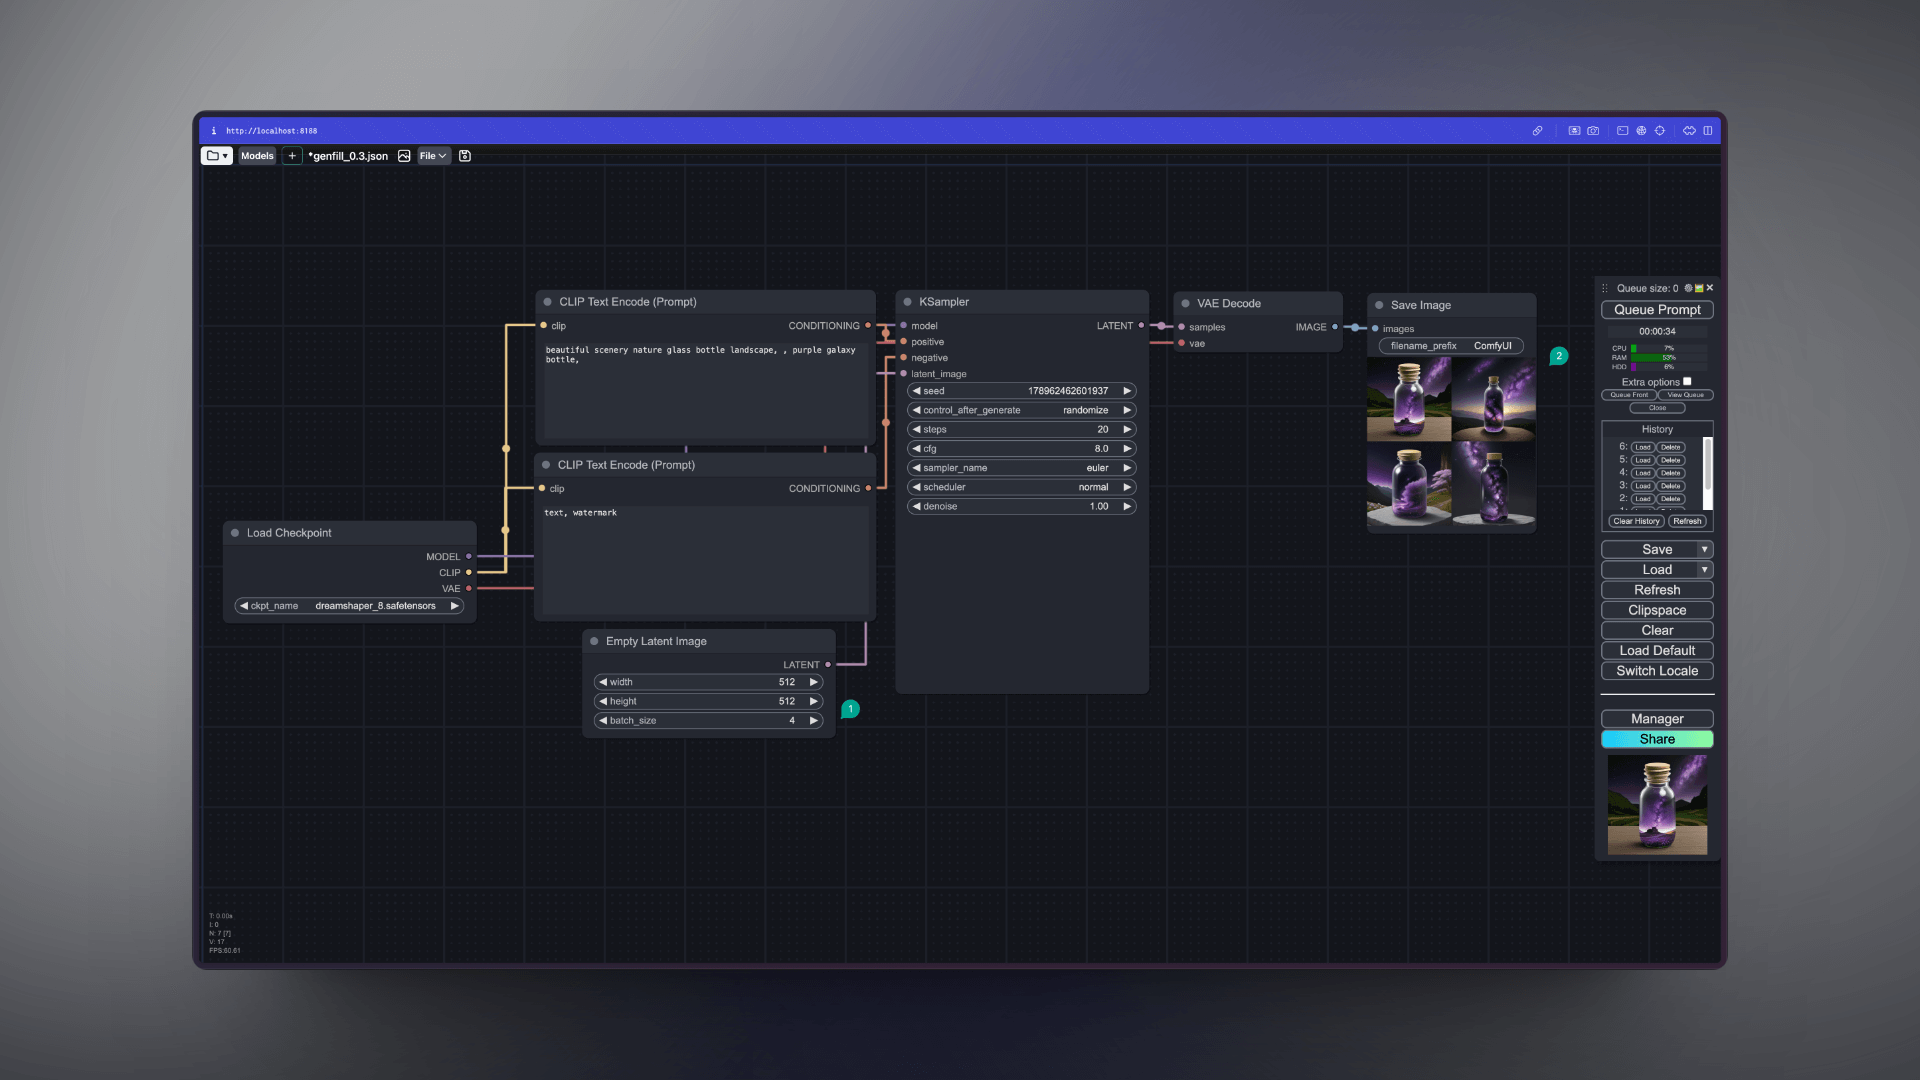
The fifth tip is about batch generation. Currently, there are three ways to perform batch image generation within ComfyUI. One of them is by setting a Batch (indicated by ① in the image below). For example, setting it to 4 will allow you to generate 4 images at once, similar to how Midjourney does (as shown by ② in the image below).
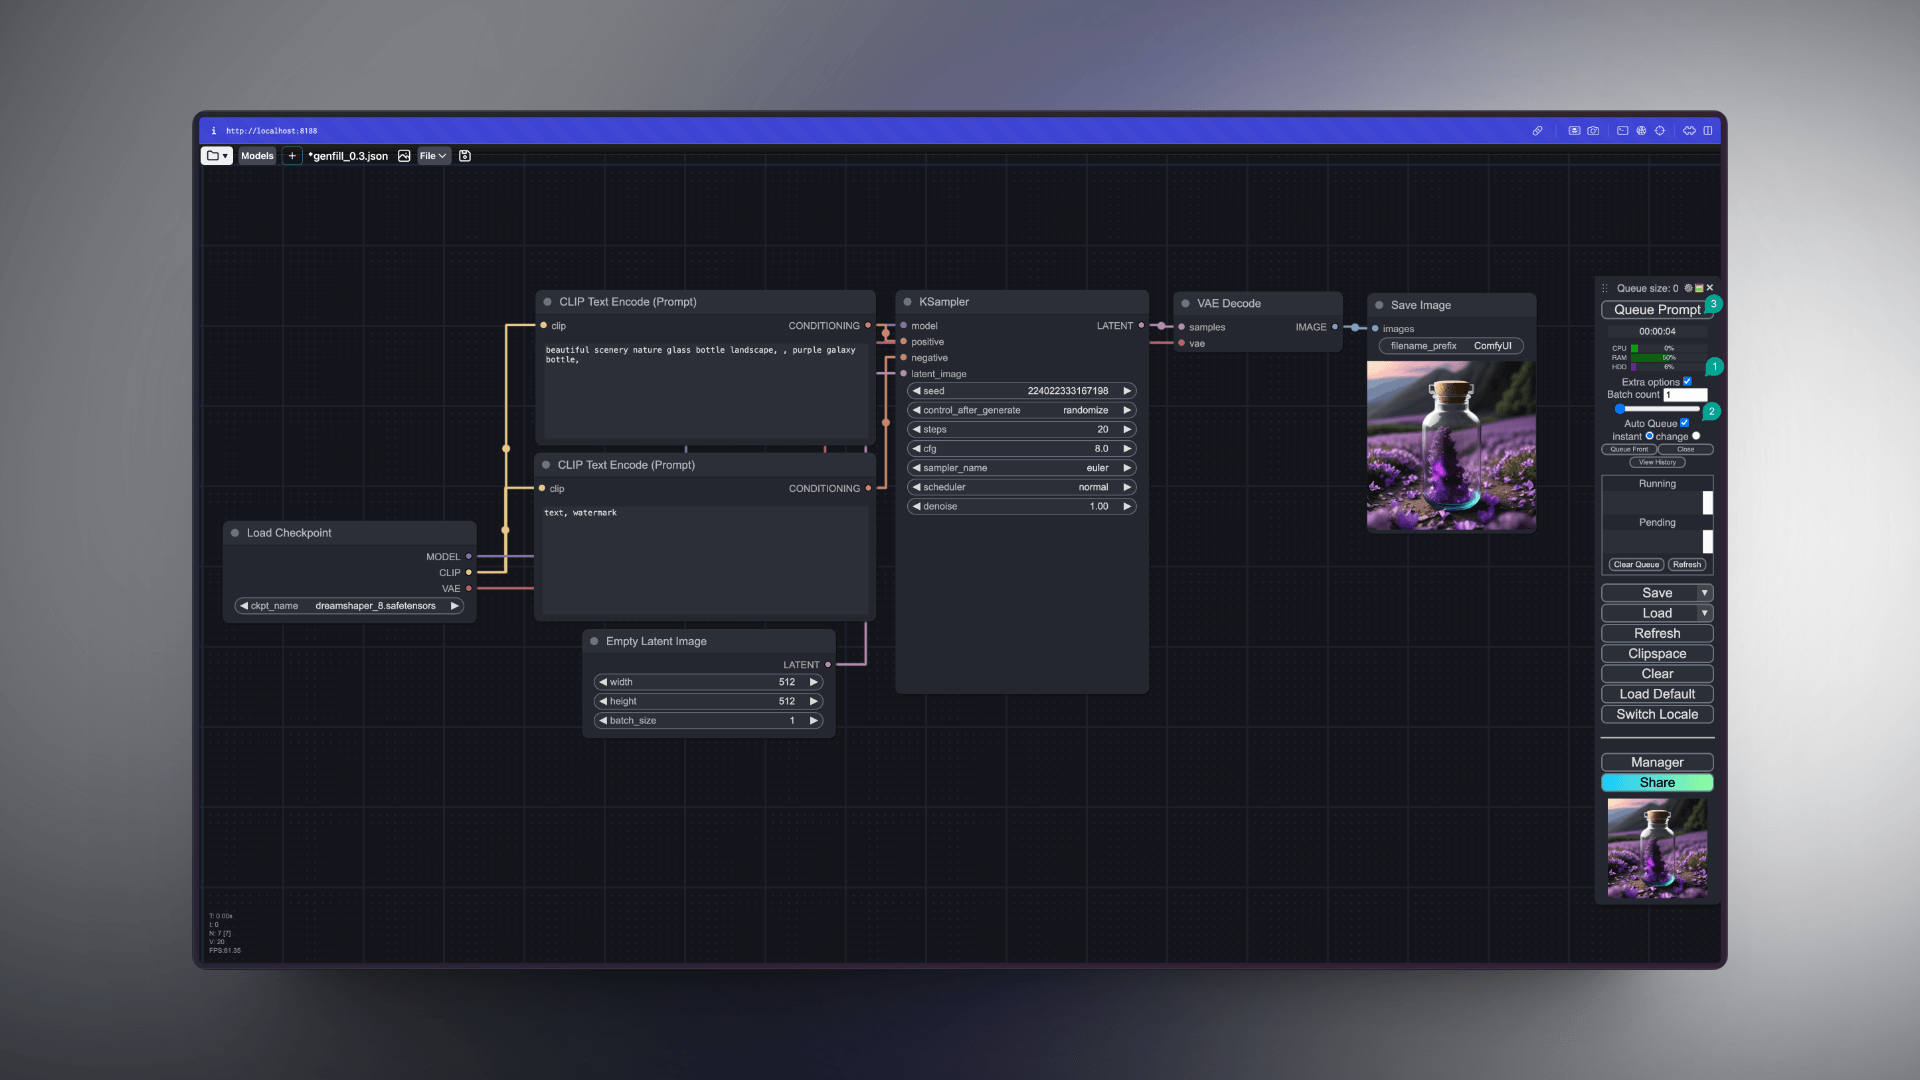
Another method is to use Auto Queue. First, you need to check the Extra Options box (indicated by ① in the image below). Then, check the Auto Queue box (as shown by ② below), and after that, click on Queue Prompt (marked as ③ below). This will set the workflow to automatically rerun upon completion, and it will continue to do so until you uncheck the Auto Queue option.
The last method is the most straightforward: simply click several times manually for continuous output. But this method isn't without its use cases. For example, if you're testing a particular parameter configuration, you could use this approach. Let's say you set the steps in KSampler to 20, then click Queue Prompt; at this point, the program will run a task with 20 steps for generating raw images. While the workflow is still running, you can change the steps parameter, say to 15, and click Queue Prompt again. After the task with 20 steps is completed, the next run will proceed with 15 steps. This method of continuous generation is quite suitable for testing scenarios.
⑥ Common Shortcuts
Lastly, here are some common keyboard shortcuts:
- Double-clicking on an empty space will bring up the search box.
- Holding down the space bar and moving the mouse allows you to move the view in all directions.
- To select multiple nodes, you can shift-click on the nodes.
- Moving a Group node will also move all the nodes it encompasses. If you only want to move the Group itself, first click and hold the title of the Group, then press and hold the control key; this will move only the Group. Remember, you must first click and move the title, then press control; reversing the order won't work.
- If you find that a node is taking up too much space, you can quickly resize it by clicking on the upper left corner of the node.
- Typing "Embedding" in the Prompt input box will prompt suggestions. If you have the ComfyUI-Custom-Scripts (opens in a new tab) plugin installed, it will also display LoRA suggestions.
Other Shortcuts
Below is the complete shortcut list:
| Keybind | Explanation |
|---|---|
| Ctrl + Enter | Queue up current graph for generation |
| Ctrl + Shift + Enter | Queue up current graph as first for generation |
| Ctrl + Z/Ctrl + Y | Undo/Redo |
| Ctrl + S | Save workflow |
| Ctrl + O | Load workflow |
| Ctrl + A | Select all nodes |
| Alt + C | Collapse/uncollapse selected nodes |
| Ctrl + M | Mute/unmute selected nodes |
| Ctrl + B | Bypass selected nodes (acts like the node was removed from the graph and the wires reconnected through) |
| Delete/Backspace | Delete selected nodes |
| Ctrl + Delete/Backspace | Delete the current graph |
| Space | Move the canvas around when held and moving the cursor |
| Ctrl/Shift + Click | Add clicked node to selection |
| Ctrl + C/Ctrl + V | Copy and paste selected nodes (without maintaining connections to outputs of unselected nodes) |
| Ctrl + C/Ctrl + Shift + V | Copy and paste selected nodes (maintaining connections from outputs of unselected nodes to inputs of pasted nodes) |
| Shift + Drag | Move multiple selected nodes at the same time |
| Ctrl + D | Load default graph |
| Q | Toggle visibility of the queue |
| H | Toggle visibility of history |
| R | Refresh graph |
| Double-Click LMB | Open node quick search palette |