ComfyUI Cloud Installation
If you're not very familiar with coding, I strongly recommend that you install and use ComfyUI locally. Additionally, if you're interested in the cloud version but don't know much about coding, you might want to try Comflowy's cloud version (opens in a new tab). All it takes is registration to get started.
Step one, register for cloud services
You can install ComfyUI on various cloud platforms, such as Kaggle, Google Colab (currently, running Stable Diffusion models may not be allowed), Paperspace, etc.
We recommend using Kaggle (opens in a new tab) because their free version offers up to 30 hours of free GPU usage per week, which is a great value. If you haven't registered for Kaggle, you can click here (opens in a new tab) to sign up.

Step two, notebook duplication
After registration, you can visit the ComfyUI's Kaggle page by clicking here (opens in a new tab). Click the Copy and Edit button in the upper right corner to clone the ComfyUI Notebook to your Kaggle account.
Step three, execute notebook
Setting notebook options
After navigating to your Notebook page, click to expand the Notebook Options panel on the right:
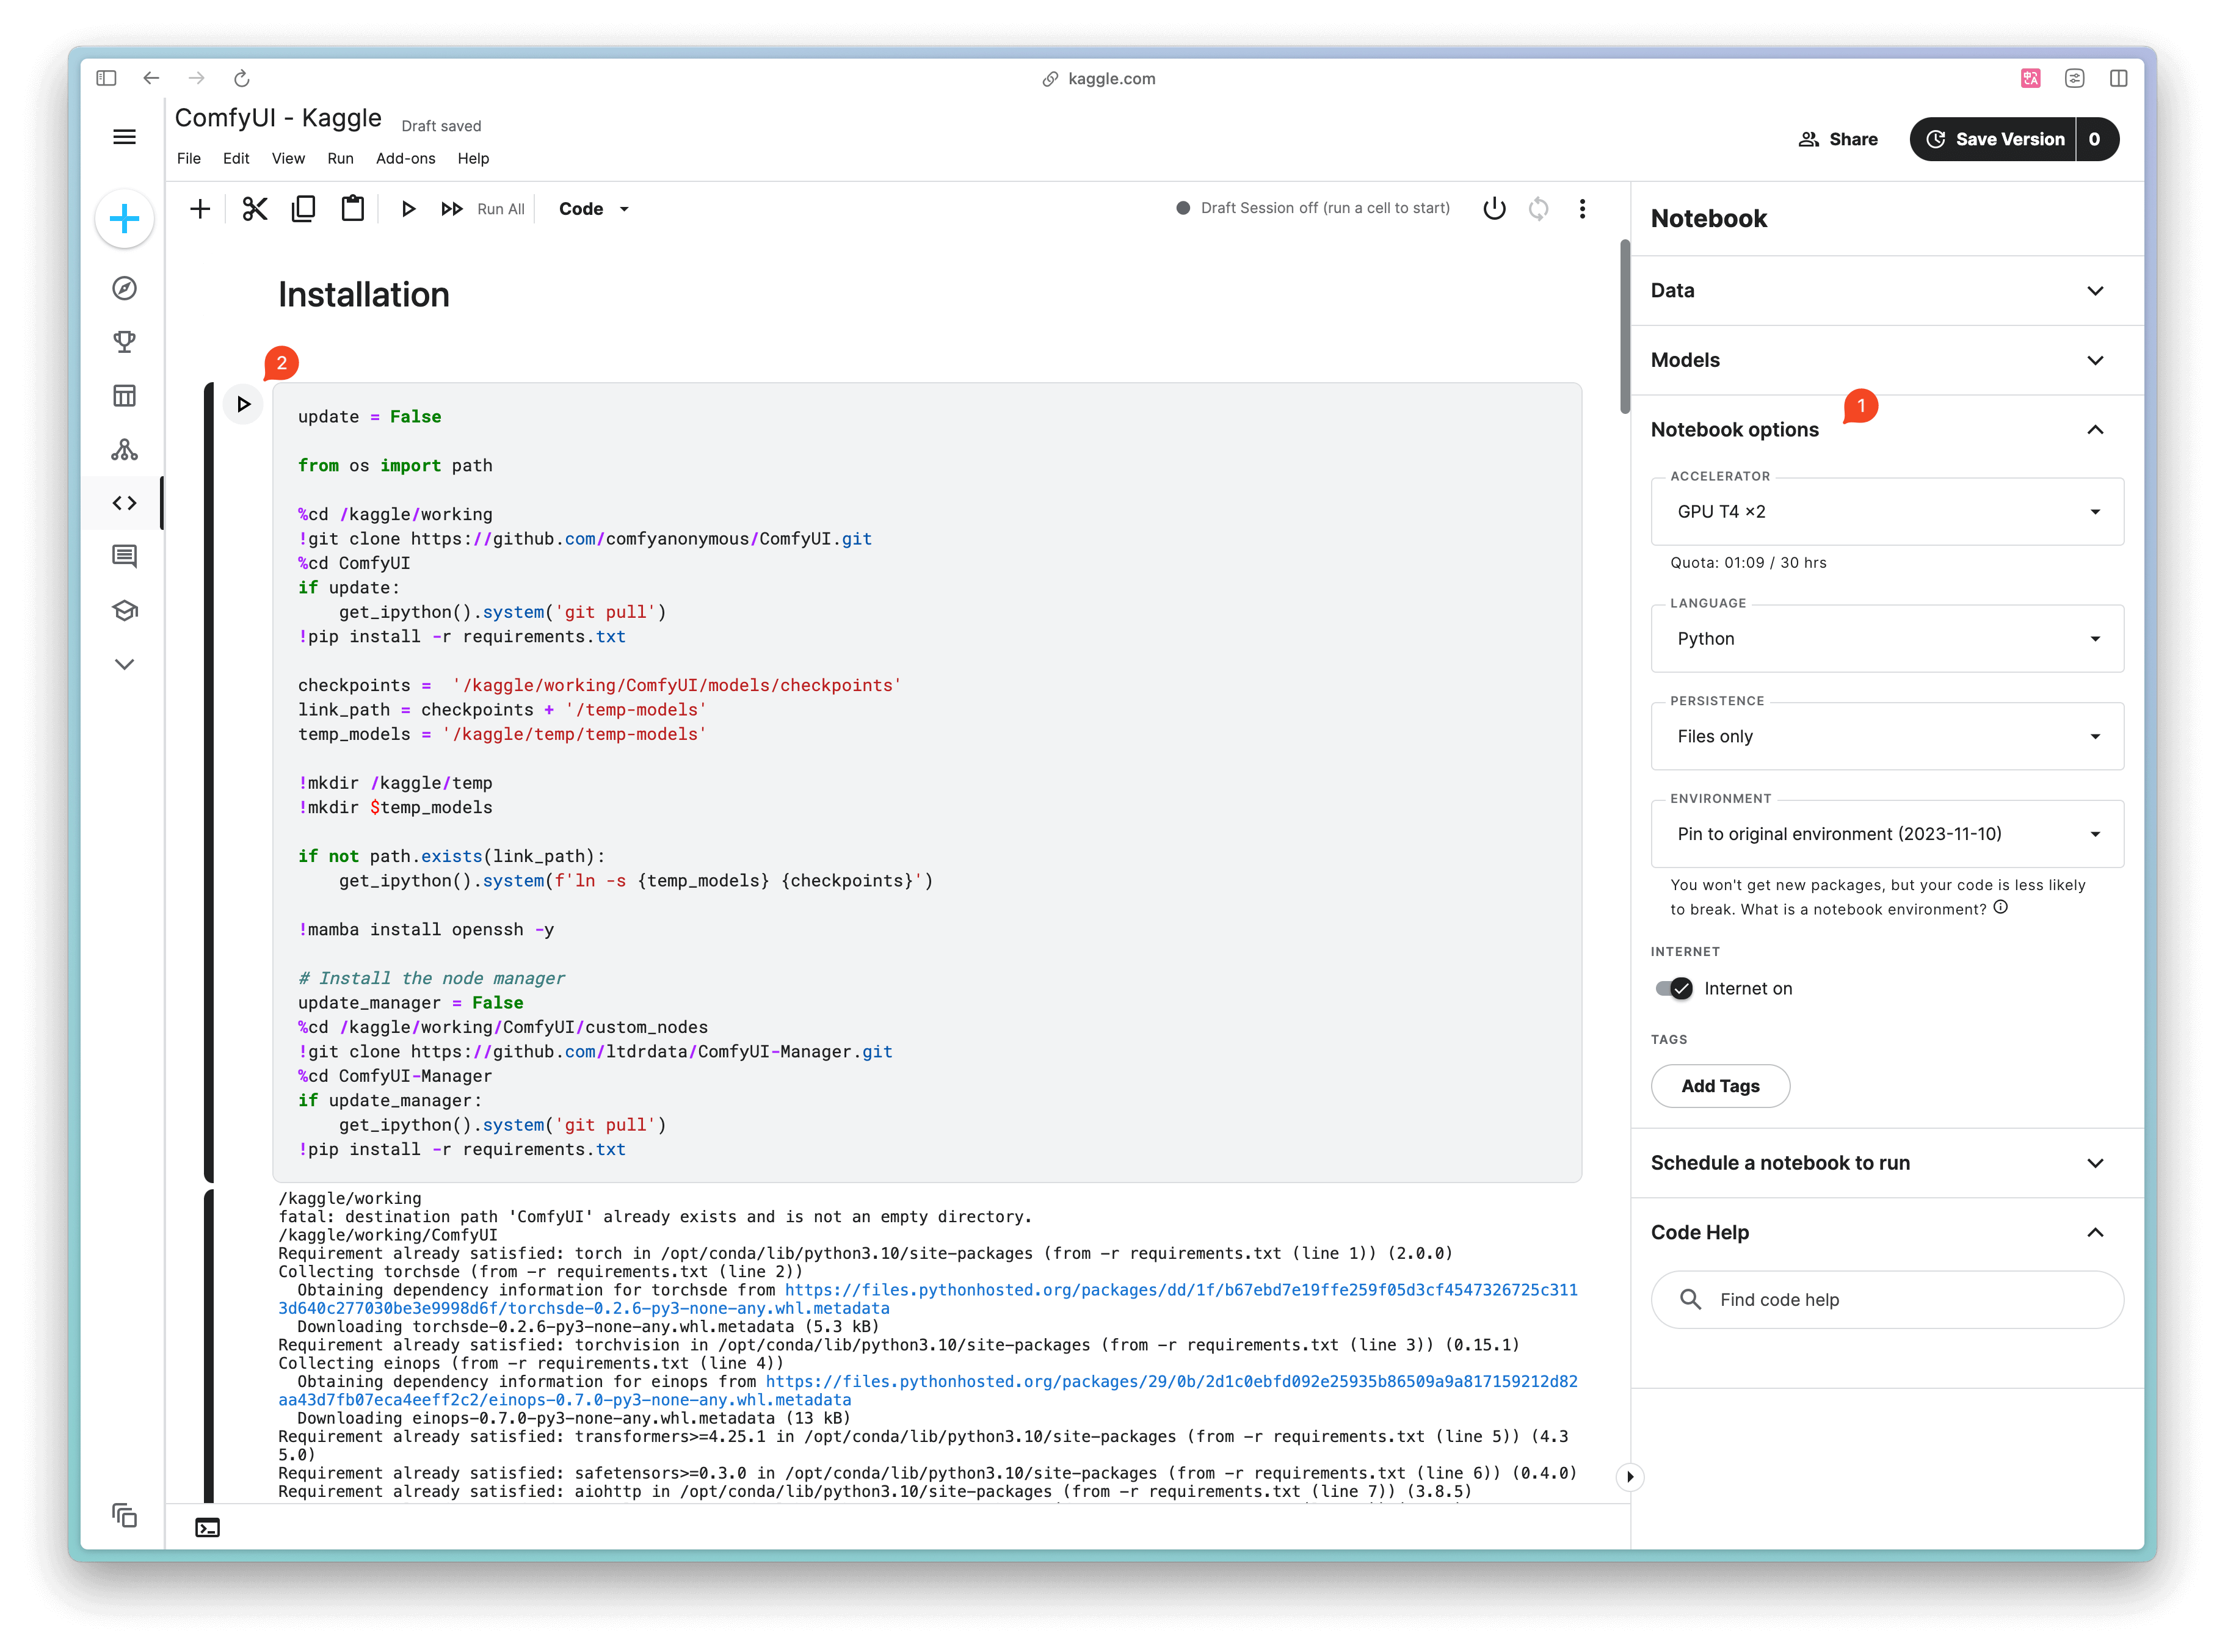
Then do the following:
- Change the Accelerator to a faster GPUT4X2 or P100.
- Set Persistence to Files only.
- Set Environment to Pin to original (this ensures that subsequent code runs won't fail due to environmental changes. If you are familiar with Python, you can set it to Always use latest environment).
- Enable Internet.
Note: The Internet option must be set to open. If it is not open, the subsequent code will not run. If you don't see the Internet option, your Kaggle account may need to verify your phone number in order to use this function.
Execute the Installation code
Click the code under the Installation title, then you'll see a Run button on the left. Click on it to initiate executing code, at this point, you'll notice Run turns into to a Stop button. Wait for awhile; once it displays the following code, that means the installation is complete:
Successfully installed matrix-client-0.4.0Or when you see the Stop button change back to a Run button, that also means that the code has finished execution.
Execute the Install a Model code
Next, skip over the Start the WebUI section and first execute the install a model code. This way, after running the Start code, you can immediately generate graphs, saving some time. Click the code under the Install a model title. Again, you'll see a Run button on the left. Click on it to start executing code. Wait for awhile; once it displays the following code, that means the model installation is complete:
‘JuggernautXL.safetensors’ savedExecute the Start the WebUI Code
Lastly, execute the Start the WebUI code. During the execution, you should see a link ending with "moe", similar to:
http://ssshdiosaoshagohdaoghdoa.remote.moe/Click the link to access the ComfyUI WebUI page.
Note: After executing the Start the WebUI code, it will continuously consume GPU time.
Q&A
Getting an OpenSSL error when starting the webui
Error code as follows: OpenSSL version mismatch. Built against 30000020, you have 30100040 rm: Cannot remove '/root/.ssh/id_rsa': No such file or directory OpenSSL version mismatch. Built against 30000020, you have 30100040 OpenSSL version mismatch. Built against 30000020, you have 30100040. This issue is from Discord user designwill.
Answer from Jimmy: This situation occurs when you pause the service and then try to restart it by just rerunning the start the webui code. You need to run the Installation code again before rerunning the start the webui code to avoid this error.