Installing ComfyUI Manager
If you are using our Comflowy (whether it's the cloud version or the open-source local version), there is no need to download and install this plugin, as its core functions are already integrated within the product.
Once the model is installed, you can actually start learning the basics, but I also want to teach you how to install plugins. ComfyUI has a number of useful plugins that can significantly increase your efficiency. In this chapter, I will use ComfyUI Manager as an example to show you how to install plugins.
If you are technically proficient, you can directly view the official documentation (opens in a new tab) of ComfyUI Manager.
Installation
There are two installation methods. One is using VS Code or Terminal for installation, and the other is manual import. If you're familiar with command-line tools, I would recommend the first method. If you don't want to use the command line, consider the manual way.
Open the ComfyUI project using VS Code / Terminal
If you have installed Github Desktop, you can directly click the "Open in Visual Studio Code" button in the application. If not, find the ComfyUI project folder and drag the entire folder into VS Code.
Enter Commands
If you are using VS Code, click the second icon in the top right corner of VS Code, and you will see a command input interface at the bottom of the software similar to what you saw before in Terminal. Enter the following command and press Enter. If you're using Terminal, directly enter the following command:
cd custom_nodesThen:
git clone https://github.com/ltdrdata/ComfyUI-Manager.gitStart ComfyUI
At this point, we need to start ComfyUI. It's important to note that you cannot directly enter the start command, but you need to first cd back to the previous directory (which is the ComfyUI directory) in Terminal.
The simplest method is to click on the small trash can in the upper right corner of the Terminal in VS Code. Then click the second icon in the upper right corner, and you'll be back in the ComfyUI directory.

Finally, enter the following command to start ComfyUI:
python main.py --force-fp16 Unexpected situations
Unexpectedly, it's possible that after you start, you don't see the ComfyUI Manager panel. Meanwhile, you'll see something like the following in your Terminal:
Cannot import /Users/jimmywang/Documents/GitHub/ComfyUI/custom_nodes/ComfyUI-Manager module for custom nodes: No module named 'torchvision'This means you need to install torchvision. First, you need to close the ComfyUI service (by clicking Ctrl+C in the Terminal panel). Then, enter the following in the Terminal:
pip install torchvisionAfter completing the installation, restart ComfyUI.
ComfyUI Manager Feature Introduction
There are two functions of the plugin that I frequently use. I'll introduce the remaining features in the subsequent chapters.
Download Model
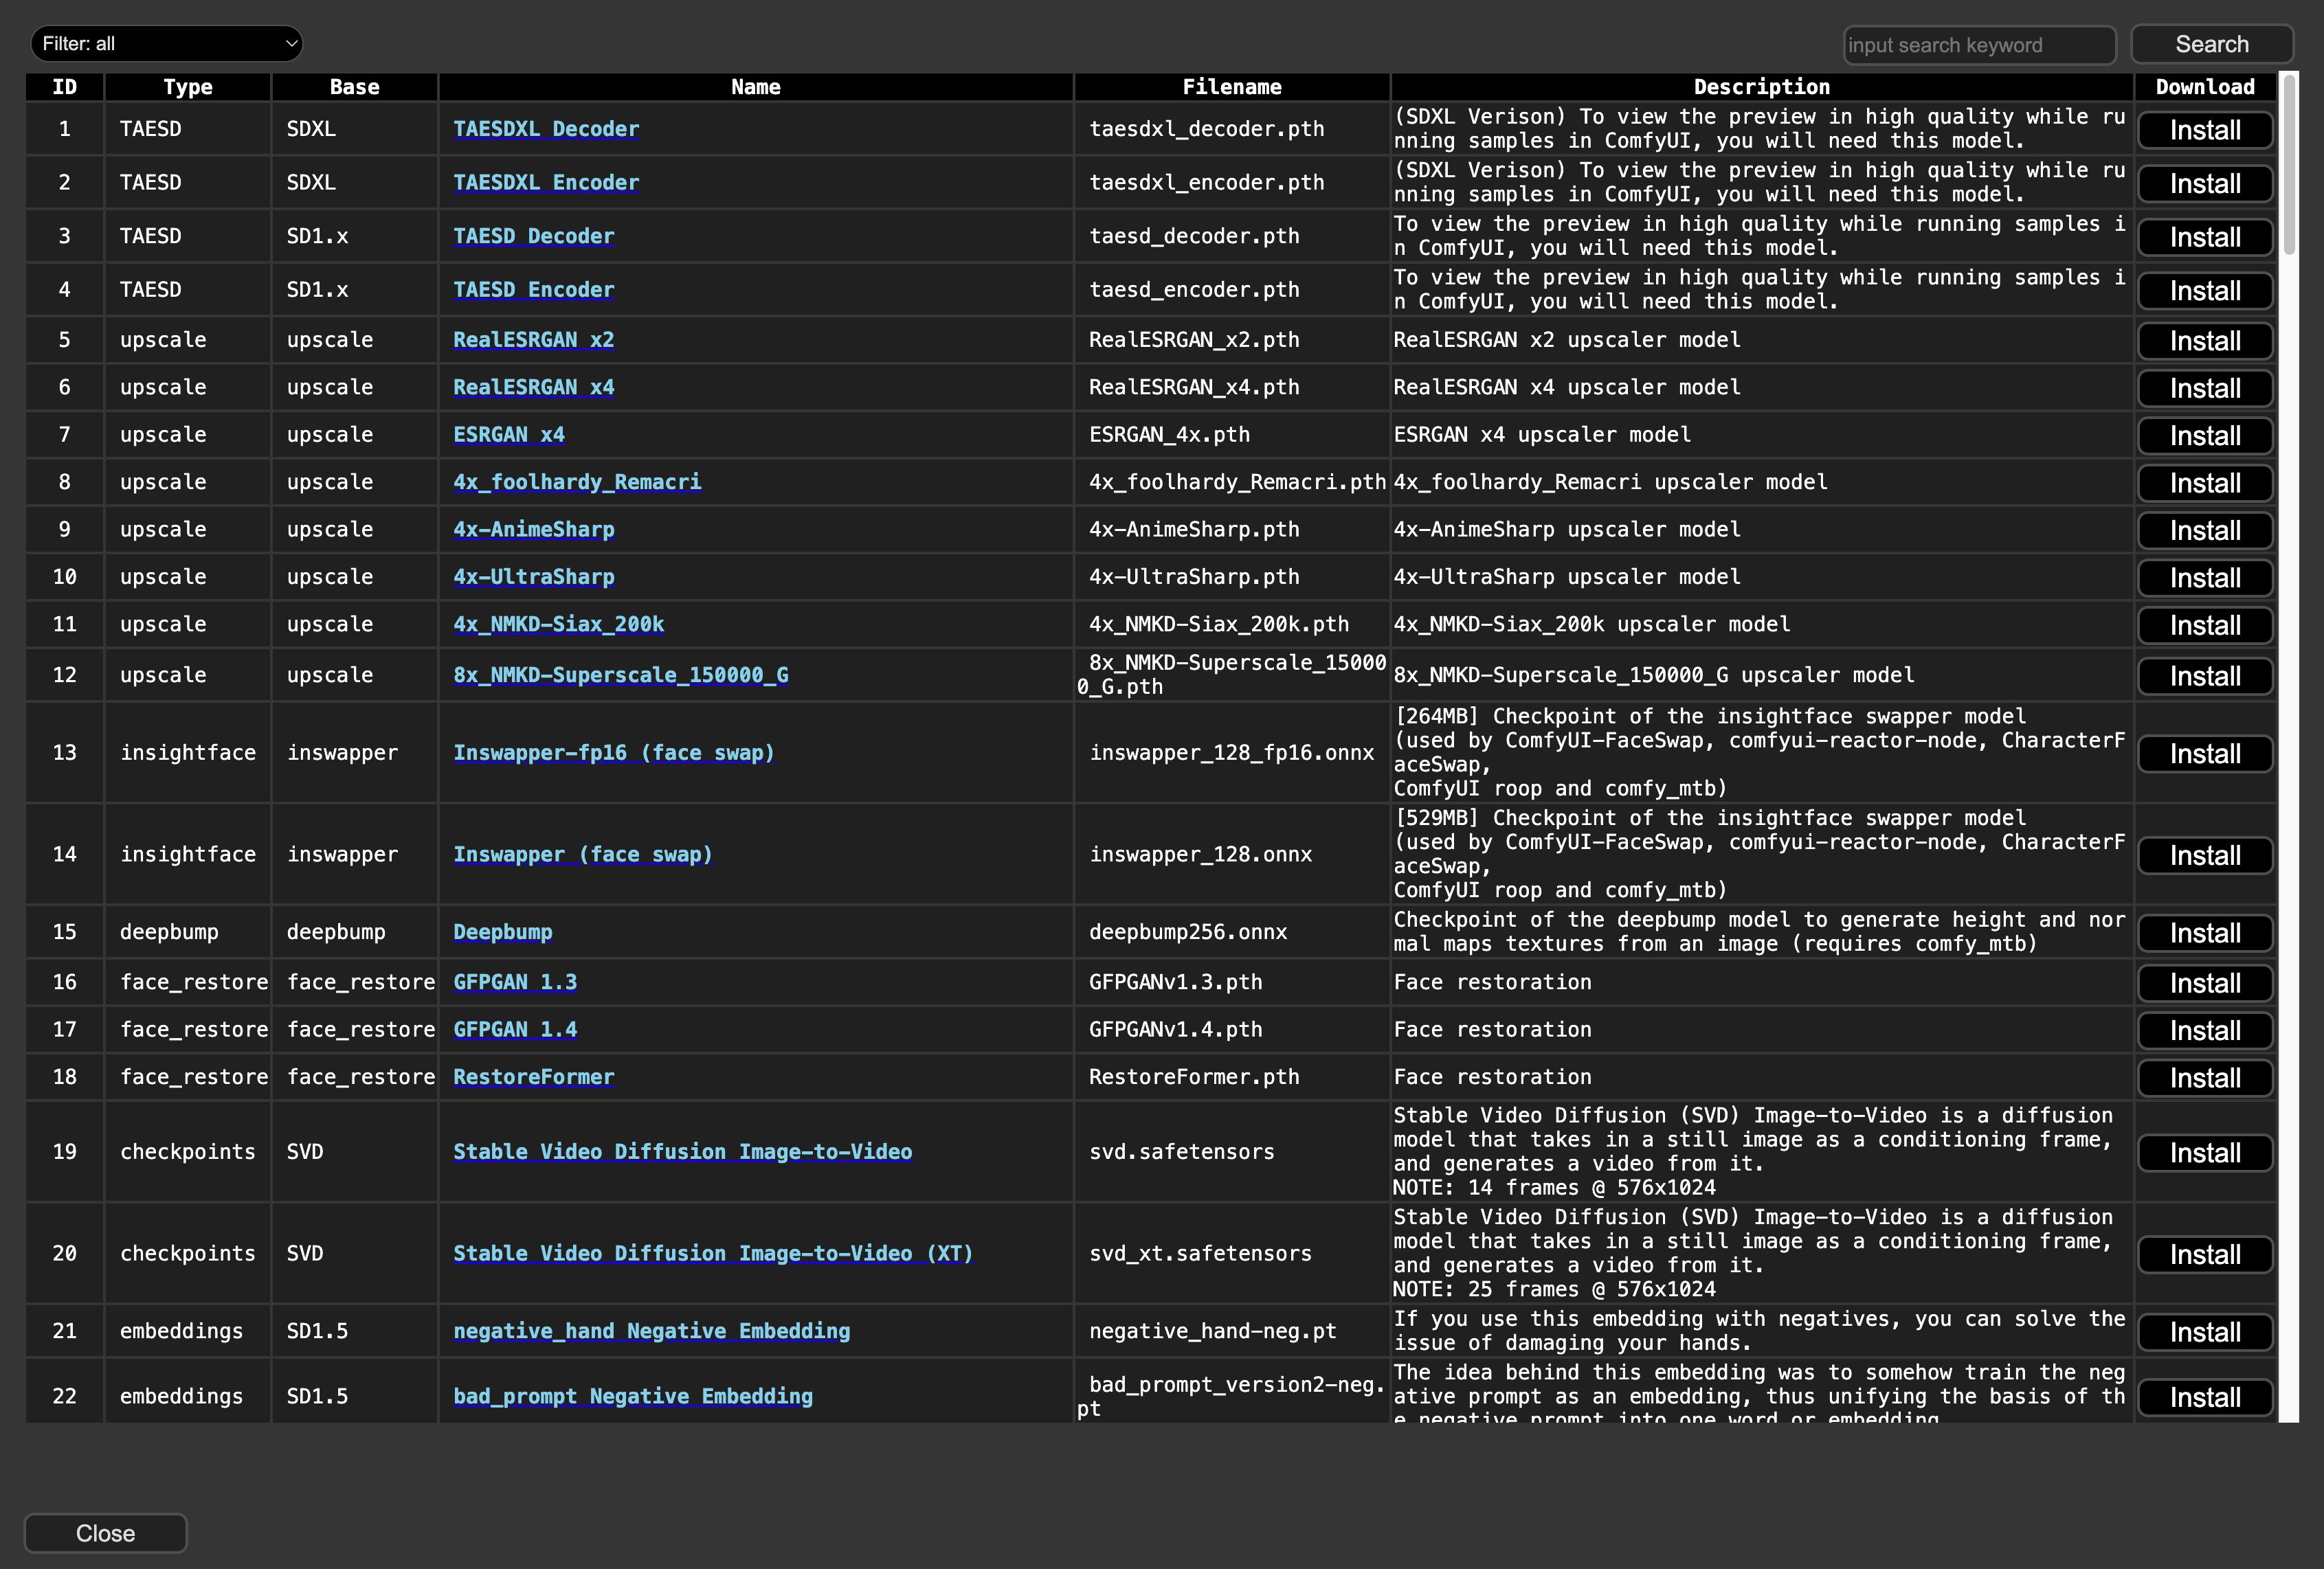
First, click the Manager button on the right panel, and a dialog box like this will appear. Then, click the "Install Models" button in the middle.
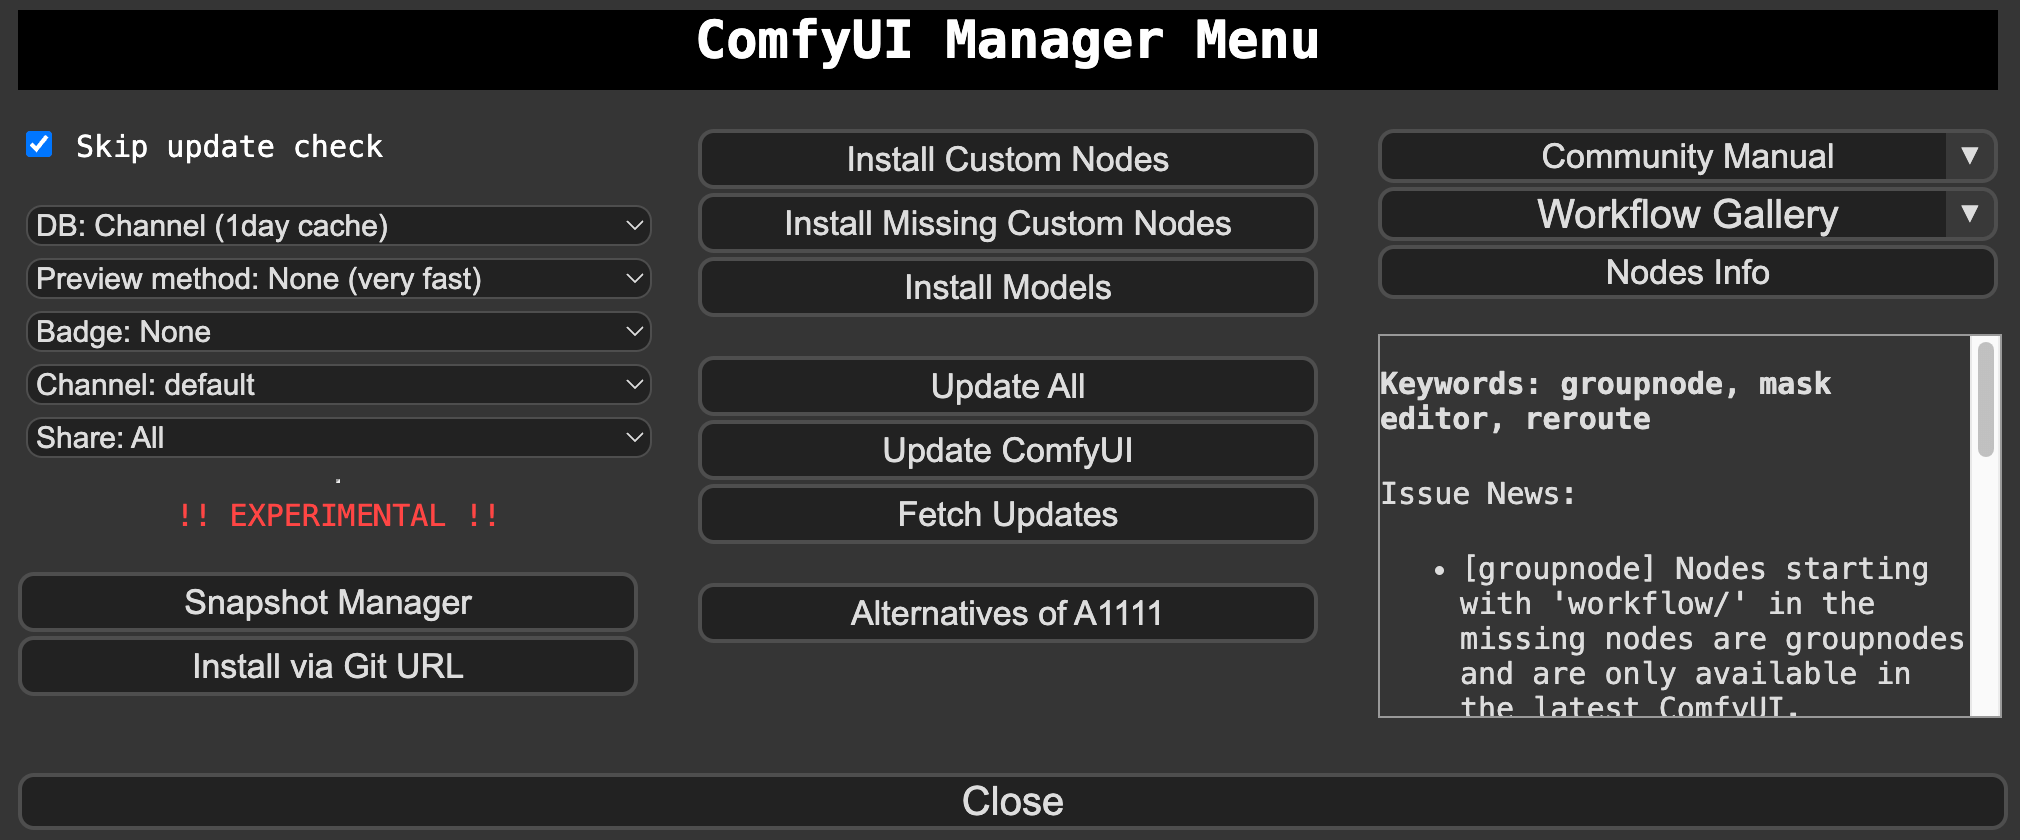
Then, a pop-up window like this will appear. The first column represents the type of node this model is used on. You can click the Install button on the right, according to your needs, to download and install. Once downloaded, the plugin will automatically place the model in the corresponding folder. You don't need to move it manually. But please note, you cannot generate images while downloading.
Downloading and Installing Plugins
Another feature I often use is plugin installation. Many developers have created a variety of plugins for ComfyUI, greatly enhancing its functionality. For example, the LLM Text Prompt plugin enables the LLM model to generate prompts without any need for manual input.
Clicking on the Manager button on the right side panel will bring up a box. Next, click on the 'Install Custom Nodes' button in the middle, leading you to this interface:
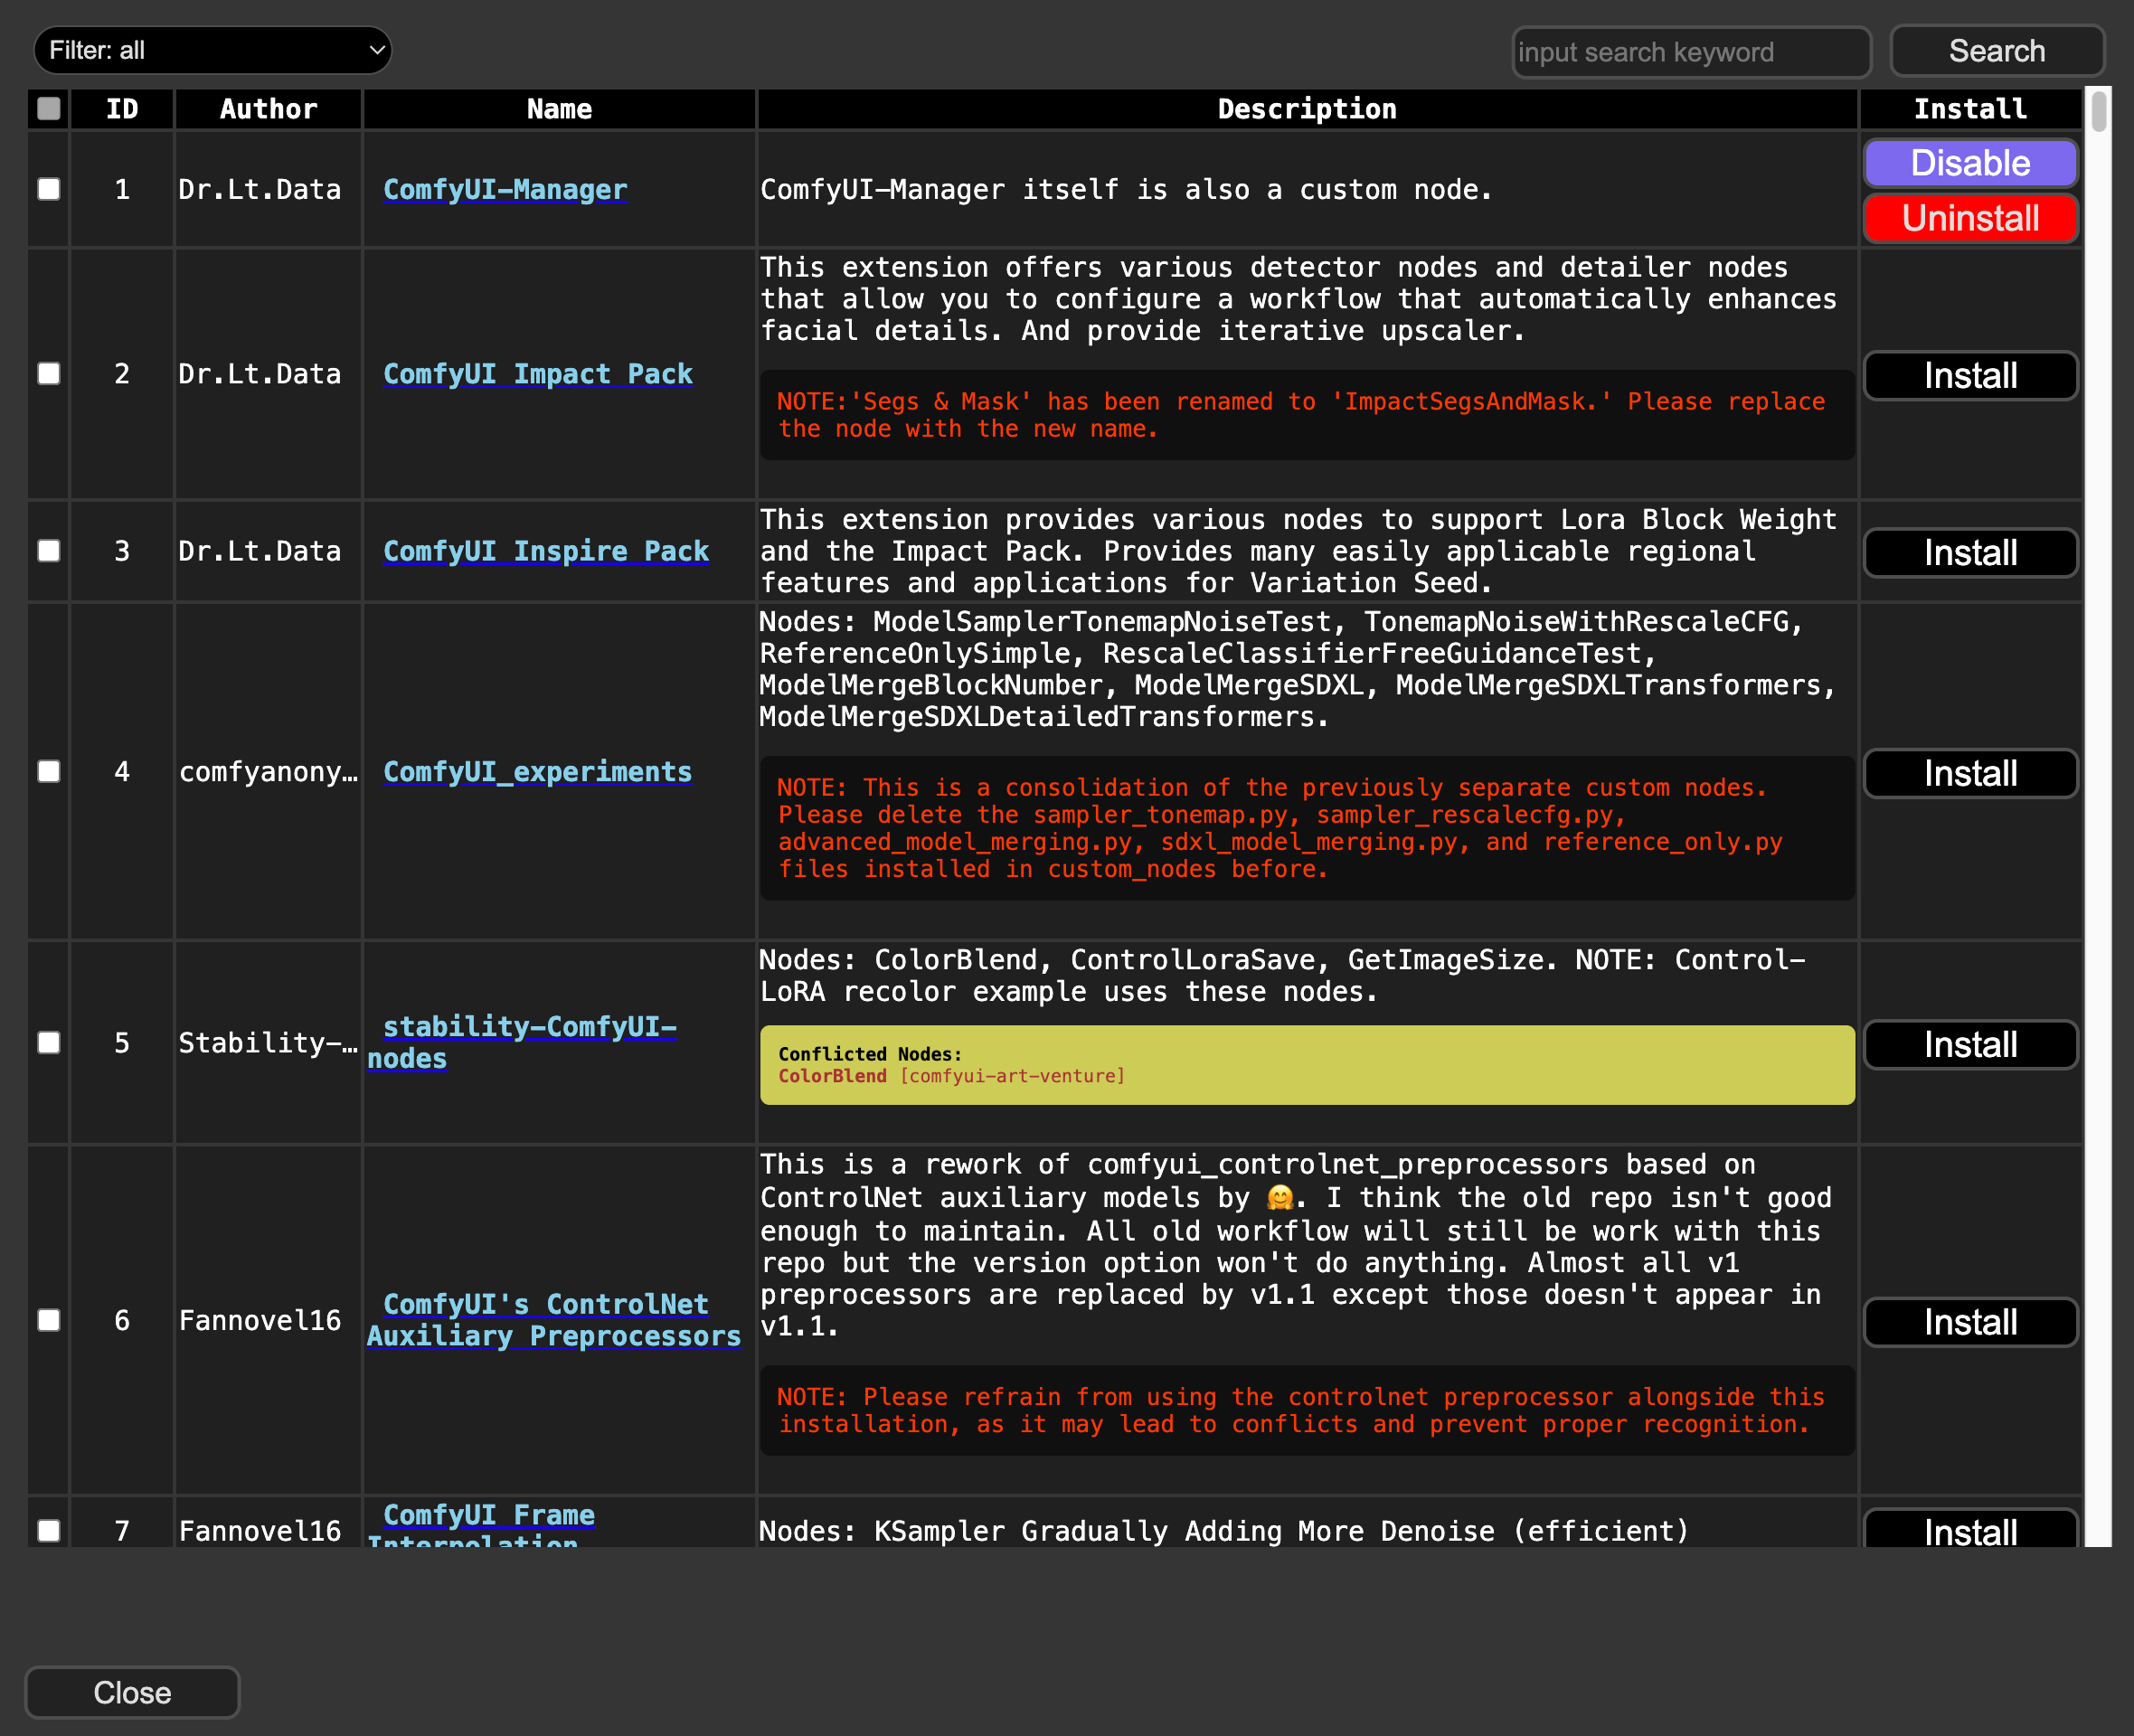
You can use the search function at the top right to look for the desired plugin. Then click on the Install button on the right to complete the installation. After your installation, you'll need to restart ComfyUI to see the installed plugin.
Please note that after restarting ComfyUI, you can double-click on the blank space and enter the nodes' name from the plugin. If the search yields results, it means the installation has been successful. If you can't find it, return to the Install Custom Nodes list in the ComfyUI Manager, search for the plugin, and check if its status is installed. If it is marked as installed, try refreshing the browser page, or close and reopen the browser page, and then search again.
Complete Missing Nodes
There is a Load button on the right panel of ComfyUI. By clicking this button, you can import other people's workflows into ComfyUI, but sometimes, the workflow you import uses some plugins that you haven't installed. In this case, ComfyUI will pop up a prompt to tell you that some nodes are not installed.
This is when you can use another common function of the ComfyUI Manager, Install Missing Custom Nodes.
After clicking this feature, the plugin will automatically search for nodes that you haven't installed, and then load a list. Click the install button on the right side of the list to complete the installation. Of course, you can click Install Custom Nodes in the ComfyUI Manager menu to search and install by yourself.
Finally, if you are still unable to complete the missing nodes using the above plugin function, you can also search for the corresponding nodes on Github to see if you can find them.