Embedding
Before officially starting this chapter, please download the following models and place the model files in the corresponding folders:
- Tom Cruise embedding (opens in a new tab): Put it in the models/embeddings folder in ComfyUI.
- BadDream (opens in a new tab): Put it in the models/embeddings folder in ComfyUI.
If you want to use the workflow from this chapter, you can either download and use the Comflowy local version or sign up and use the Comflowy cloud version (opens in a new tab), both of which have the chapter's workflow built-in. Additionally, if you're using the cloud version, you can directly use our built-in models without needing to download anything.
In the chapter "Stable Diffusion Basics," I have explained why a machine can recognize what a Cat looks like. The key is that the Text Encoder turns the natural prompt into an Embedding of a word feature vector. For example, when Cat is turned into a word feature vector, it may include:
- Morphological features: The vector representation may capture the morphological characteristics of a Cat, such as its body shape, the shape of its head, the location of its limbs, etc. These features can help distinguish a Cat from other animals or objects.
- Visual features: The vector representation may contain visual characteristics of a Cat, such as its color, pattern, shape of eyes, etc. These features can help identify the appearance of a Cat.
- Semantic meaning: The vector representation may contain semantic meanings related to a Cat, such as it being a pet, being an independent animal and having a close relationship with humans. These meanings can help understand the role and significance of a Cat in human culture and society.
So, following this principle, could we adjust this mapping technique and thus generate specific content through the input of a particular word?
For example, we can map S* to the visual features of Garfield Cat so that whenever we input O_Cat in a prompt in the future, the generated picture would be of Garfield.
Principle Introduction
So, how is this mapping achieved?
As mentioned before, we can specifically train the CLIP model on the mapping process from prompt to vector, and adjust its mapping relationship. This is to achieve goals like changing the final input image style or even appearance. The visualization process might look like this:

When a user inputs "A photo of S*," each word will be separated into specific word vectors, represented by the gray squares in the picture. Some basic words have no effect on the image, so we can disregard them (the locked parts), and then we can train a new word and map it to special word vectors.
These vectors may contain various visual features of Garfield Cat. In this way, when we input S* in the prompt in the future, the generated image would be of Garfield.
That's why we can change the image style by inputting a Style word in the prompt, or even generate a specific character's image by inputting a name (Of course, this is not solely the credit of the CLIP model, the Diffusion model also plays a significant role).
Postive embedding workflow
So can we do these things in ComfyUI? Unfortunately, we cannot train the CLIP model in ComfyUI. However, we can use ones trained by others.
Since the Stable Diffusion model can take both forward and reverse Prompts, this means you can use Embedding in both places. Let's talk about forward Embedding first.
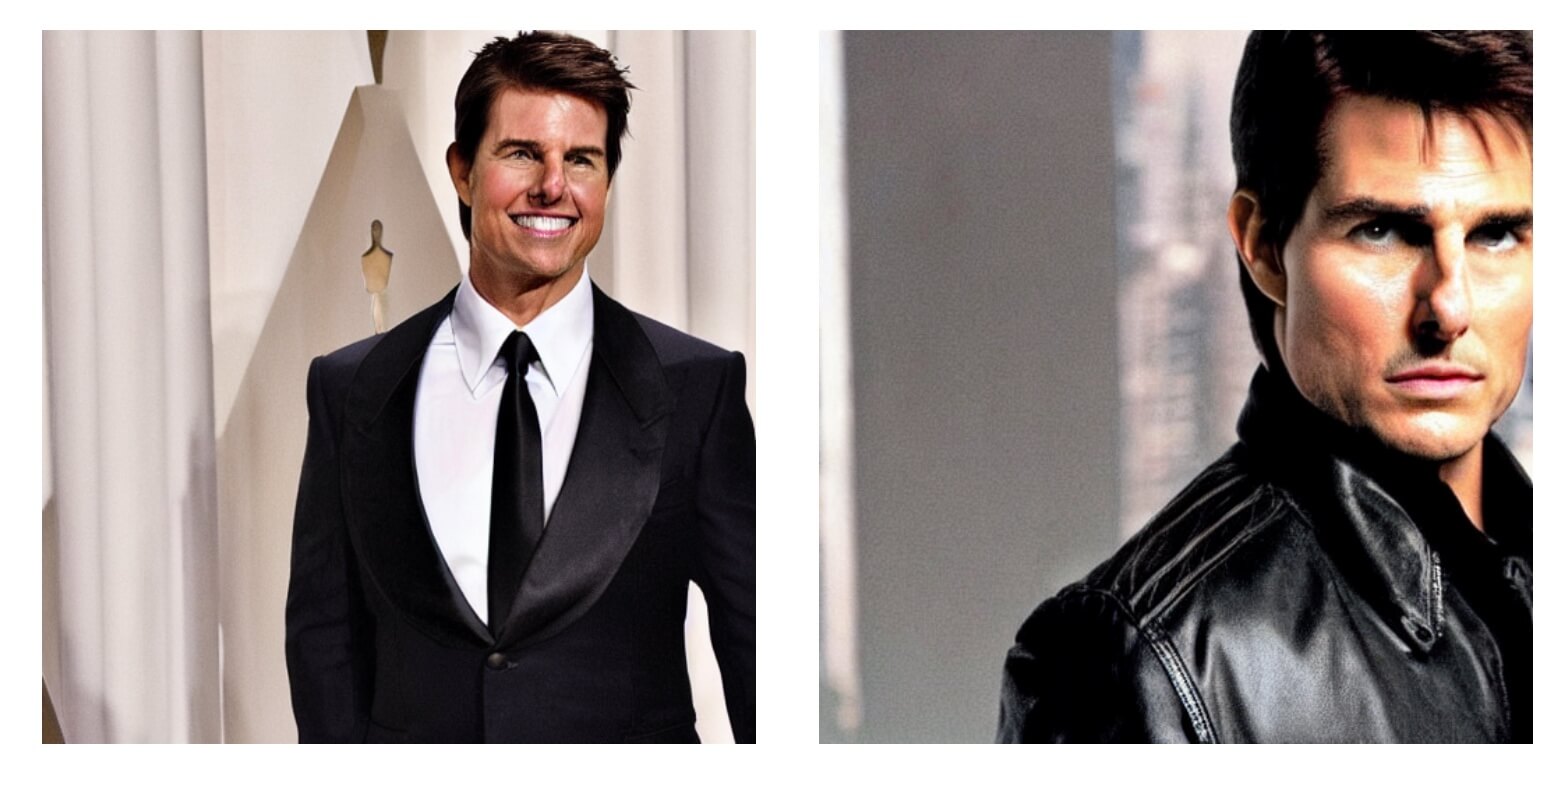
Suppose we want to generate a picture of Tom Cruise. We can directly input "Tom Cruise" into the prompt. But the generated picture (shown on the left) is rather generic, and the face might even be distorted. If we use Embedding, we can produce a picture that looks more like Tom Cruise (shown on the right).
So how do you use Embedding in ComfyUI?
Download the Embedding model
The first step is to download the Embedding model you need. You can find a variety of Embedding models on Civitai (opens in a new tab). What I'm using here is the Tom Cruise embedding (opens in a new tab). After downloading, put it in the models/embeddings folder in ComfyUI.
Use Embedding in Positive Prompt
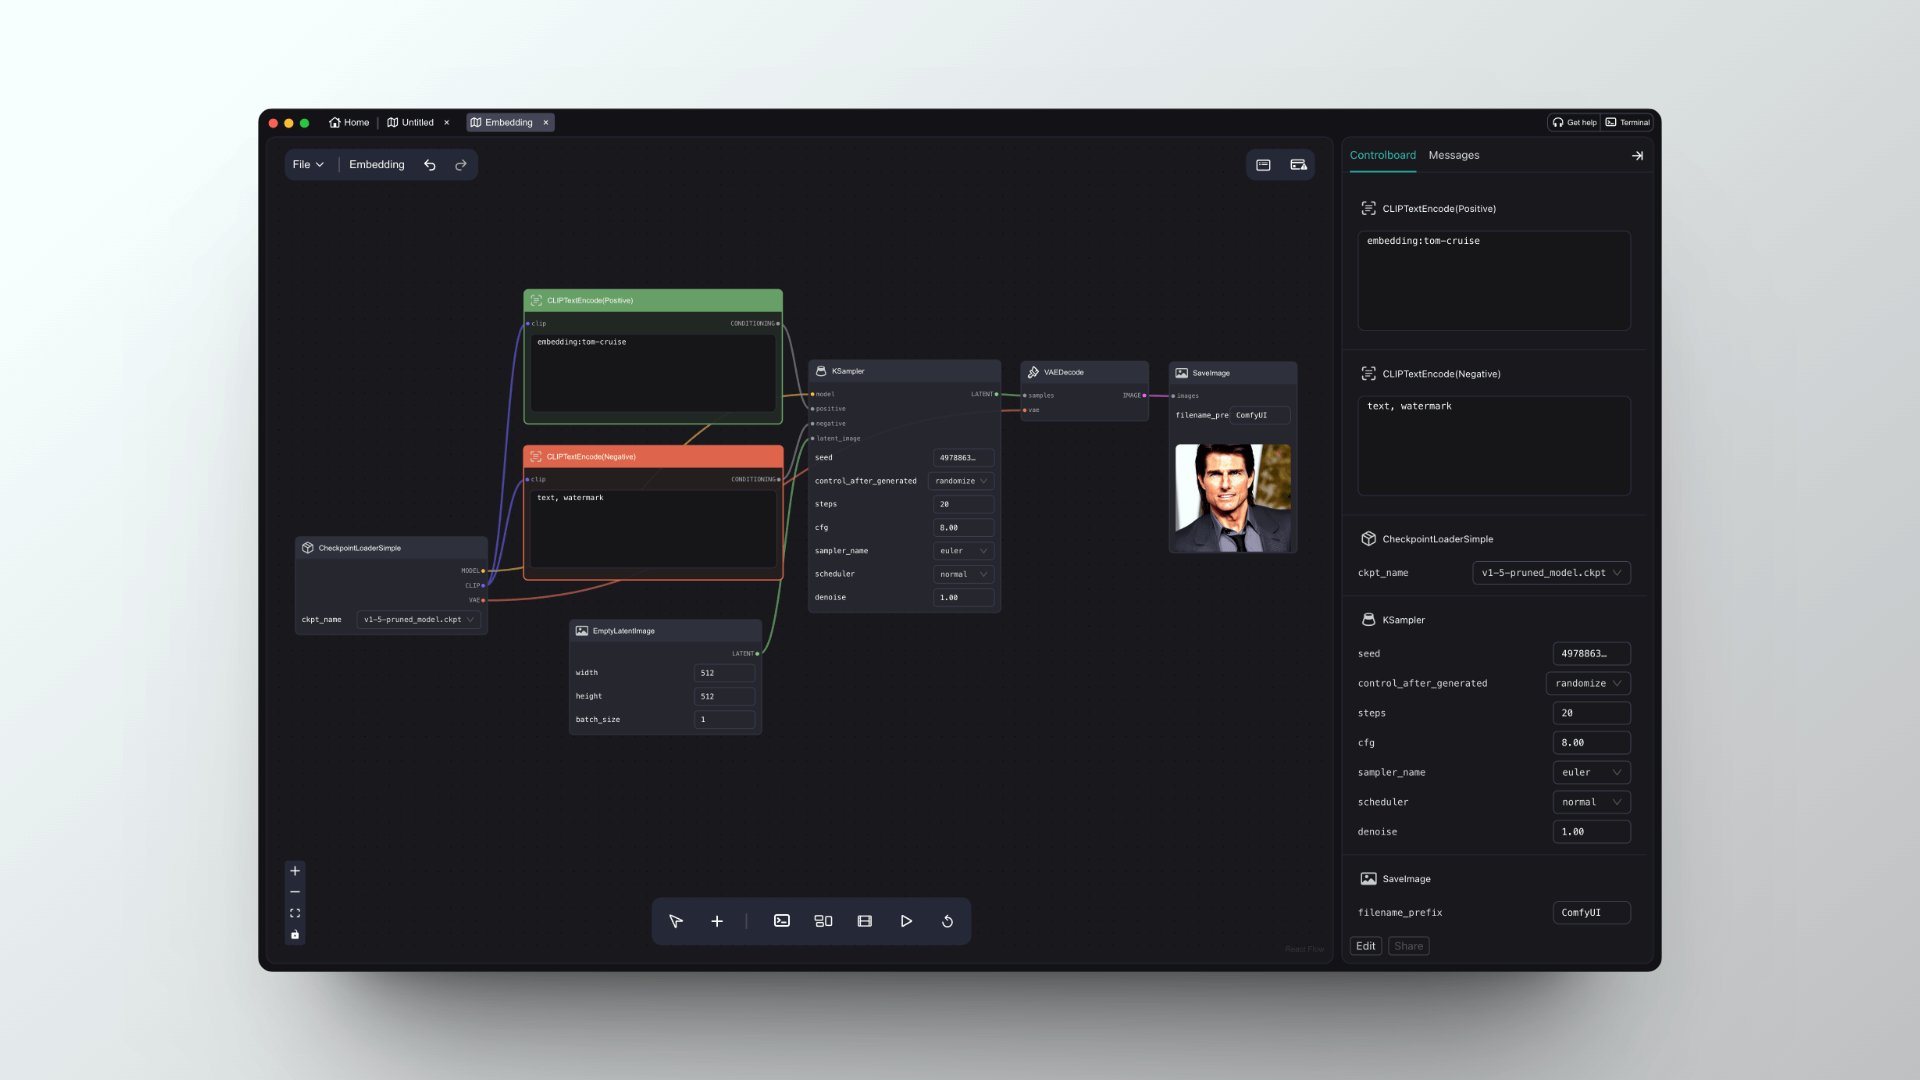
Click the 'load default' button on the right panel. Once loaded, enter the following prompt into the positive prompt:
embedding:tocru69Please note:
- After the first step of import is complete, it's best to click the refresh button to ensure the model has been loaded successfully.
- Furthermore, after Embedding, you should enter the name of the Embedding file. For example, in the image below, I have renamed the embedding file to tom-cruise, so the input here should not be embedding:tocru69 but rather embedding:tom-cruise.
Negative embedding workflow
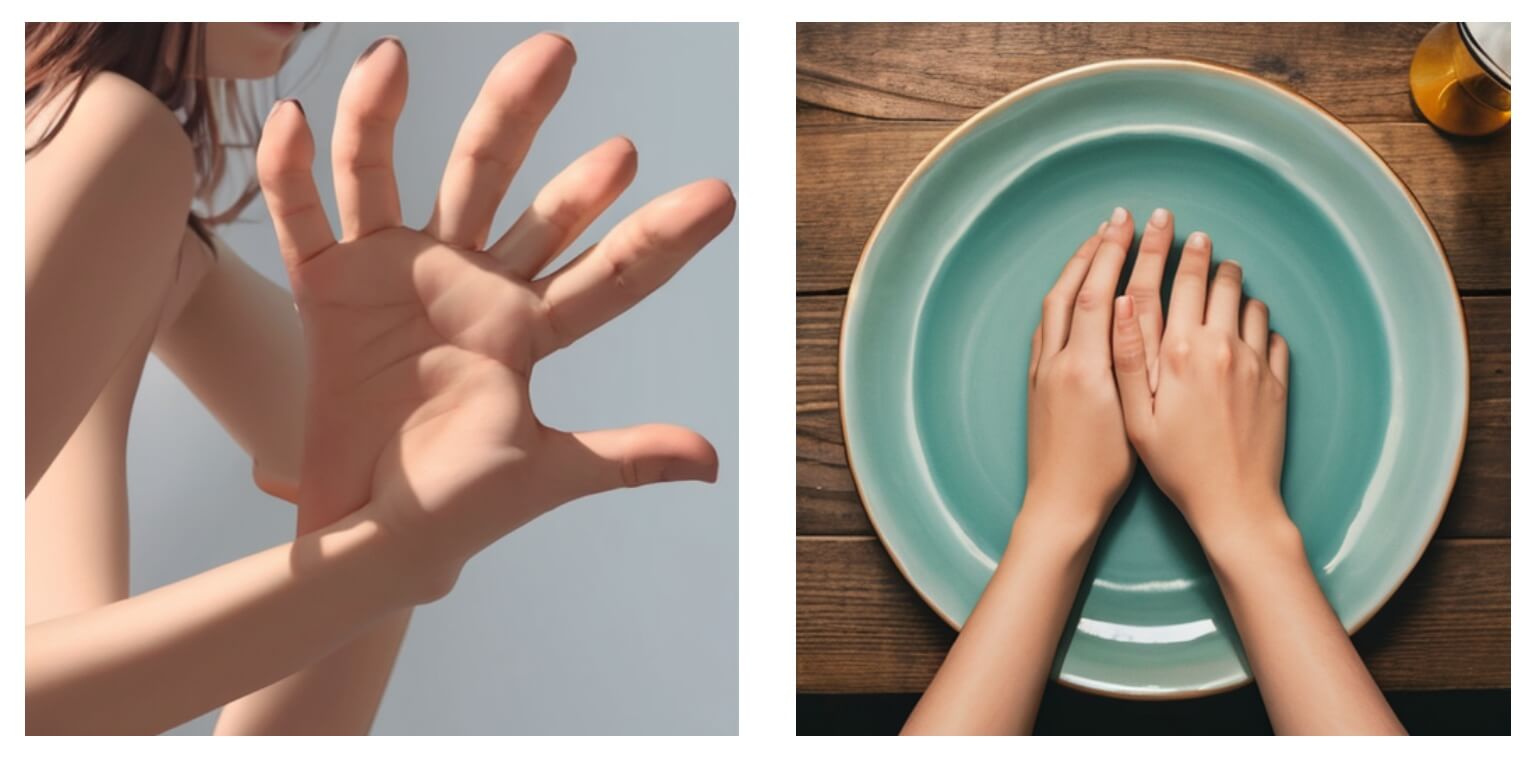
Another common use case for Embedding is in the negative prompt, which can decrease the probability of certain special situations occurring, such as generating a palm with six fingers. The left image below is a hand I generated with DreamShaper, and you can see it's quite peculiar, with two hands merging together and a palm with six fingers.
Then, after adding the Embedding of BadDream and UnrealisticDream in the negative prompt, the generation of the hand part was significantly improved, as shown in the right image below. Of course, these two embeddings are not only limited to this. If you like to use the DreamShaper model for image generation, adding these two embeddings in the negative prompt will significantly improve the quality of the generated images.
Adding negative embedding does not mean that the generated images will certainly be without issues. It merely increases the likelihood of producing good images but it's not absolute. You still need to solve any issues regarding image quality by adjusting the prompt and generating images several times.