How to install ComfyUI extension?
If you frequently encounter issues with extensions not working, consider signing up for the Comflowy cloud version (opens in a new tab). It comes with over 50 popular extensions built-in, ready to use upon registration.
ComfyUI's extension functionality is extremely powerful, but installation can be rather complex; it's even possible that everyone's installation method will be different. This article will teach everyone some common solutions, hoping to provide some ideas for problem-solving.
Step 1: Download extension
Comflowy Space
If you are using our Comflowy, then you can directly click on the Extension Tab on the left side in Comflowy and find the plugin you want to download through a search. Then click to download and install it.
ComfyUI
If you're using ComfyUI, there are two methods for installing plugins: one is through using VS Code or the Terminal, and the other is by manual import. If you're comfortable with command line tools, I recommend the first method. However, if you prefer not to use the command line, the manual method is also an option.
Let's take the installation of the ComfyUI InstantID (opens in a new tab) plugin as an example to explain these two installation methods.
Open the ComfyUI Project in VS Code / Terminal
If you have installed GitHub Desktop, you can directly click the 'Open in Visual Studio Code' button in the app. If not, find the ComfyUI project folder and drag the entire folder into VS Code.
Enter Commands
If you're using VS Code, click the second icon in the top right corner of VS Code, and you will see a command input interface similar to what you saw in Terminal at the bottom of the software. Enter the following command and press enter. If you're using Terminal, enter the following command directly:
cd custom_nodesThen enter:
git clone https://github.com/cubiq/ComfyUI_InstantID.gitIf you want to install a different plugin, simply replace the above link with the git link of the plugin you wish to install.
Launch ComfyUI
At this point, you need to start ComfyUI. Be aware that you cannot directly enter the command to launch; instead, you must first cd back to the previous directory (i.e., the ComfyUI directory).
The simplest method is to click the small trash can icon in the top right corner of Terminal in VS Code. Then click the second icon in the top right corner to return to the ComfyUI directory.

Next, enter the following command to launch ComfyUI:
python main.py --force-fp16 Step Two, Install Dependencies
Generally, after downloading a plugin and launching ComfyUI, you should be able to use it. However, some plugins may require additional dependencies to be installed, which means that even if you have installed the plugin, you still might not be able to use it.
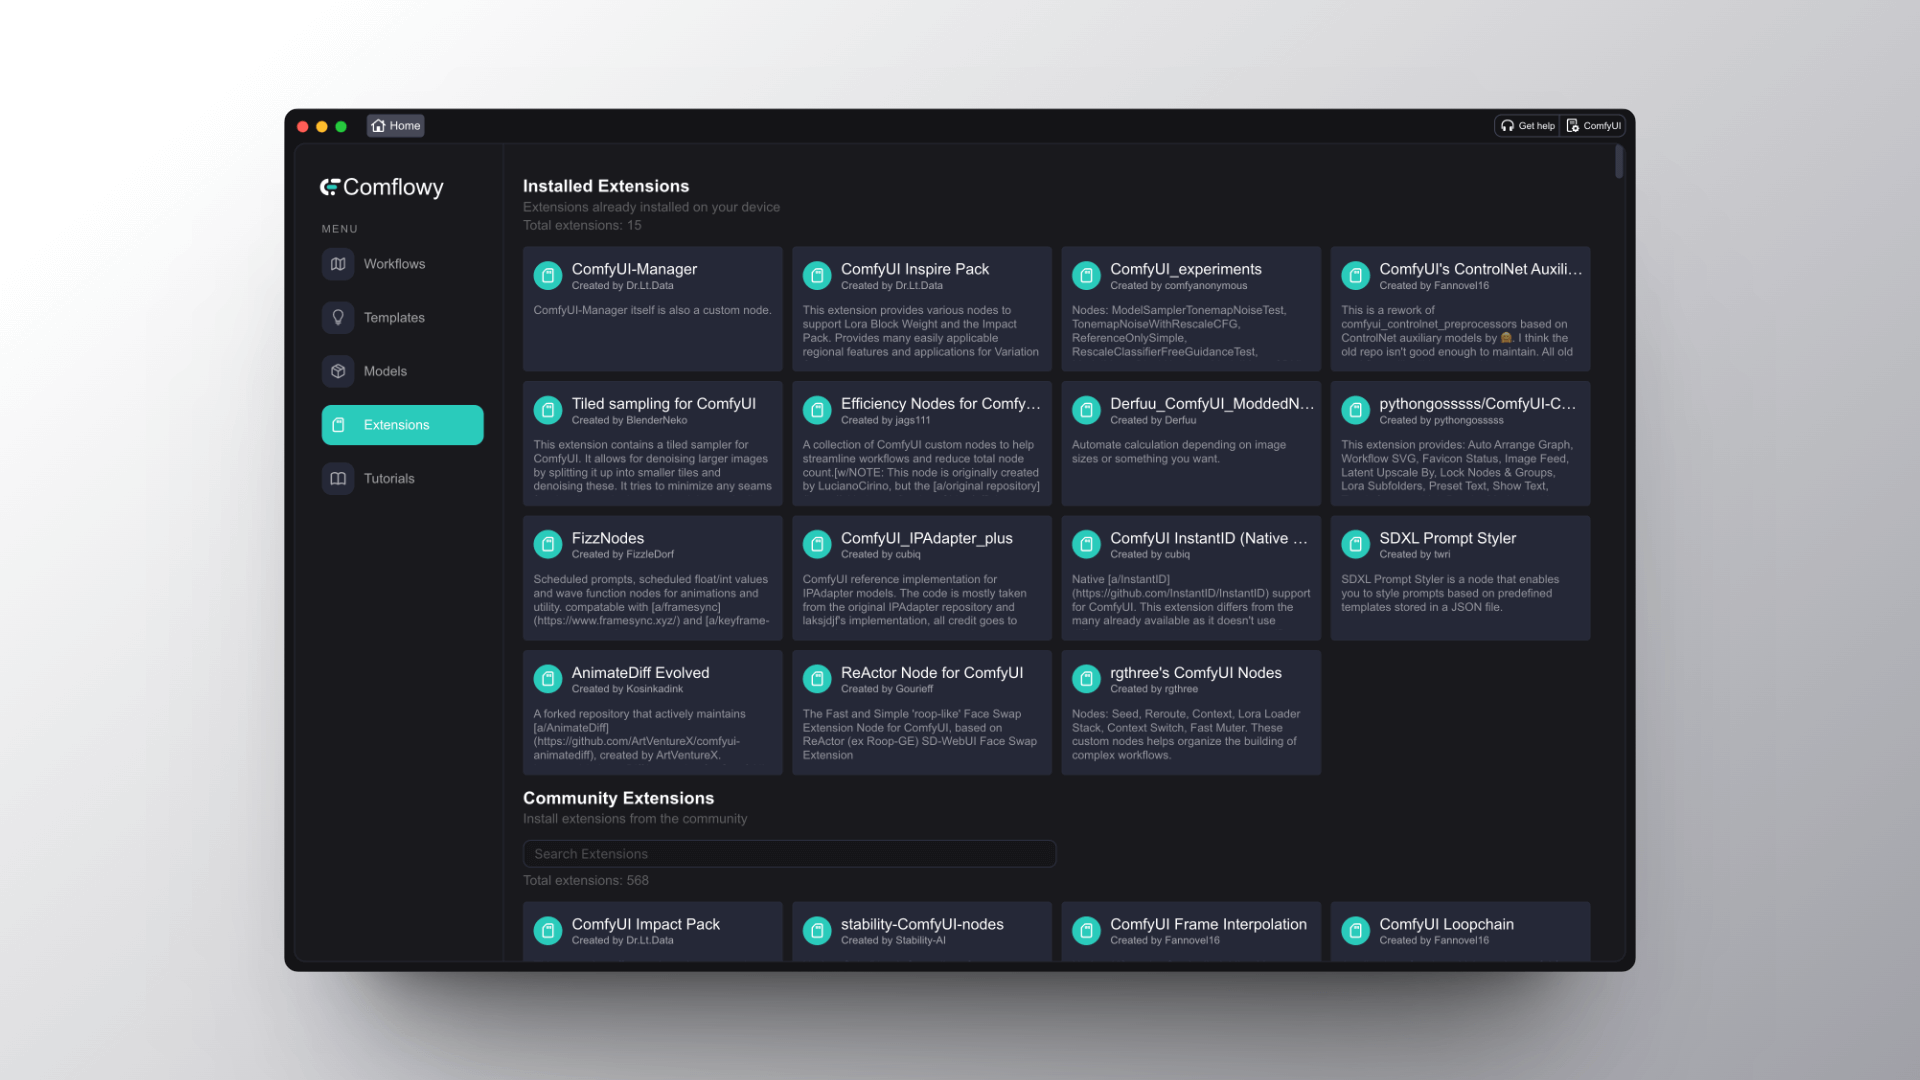
If you're using Comflowy, you will see that the nodes for the plugin may prompt that they are not installed, or ComfyUI might display the nodes as red blocks. This indicates that you need to install certain dependencies to run these plugins, which you can find in the README file of the plugin. But be aware, even after installing the dependencies listed in the README of the plugin, you may still be unable to use it.
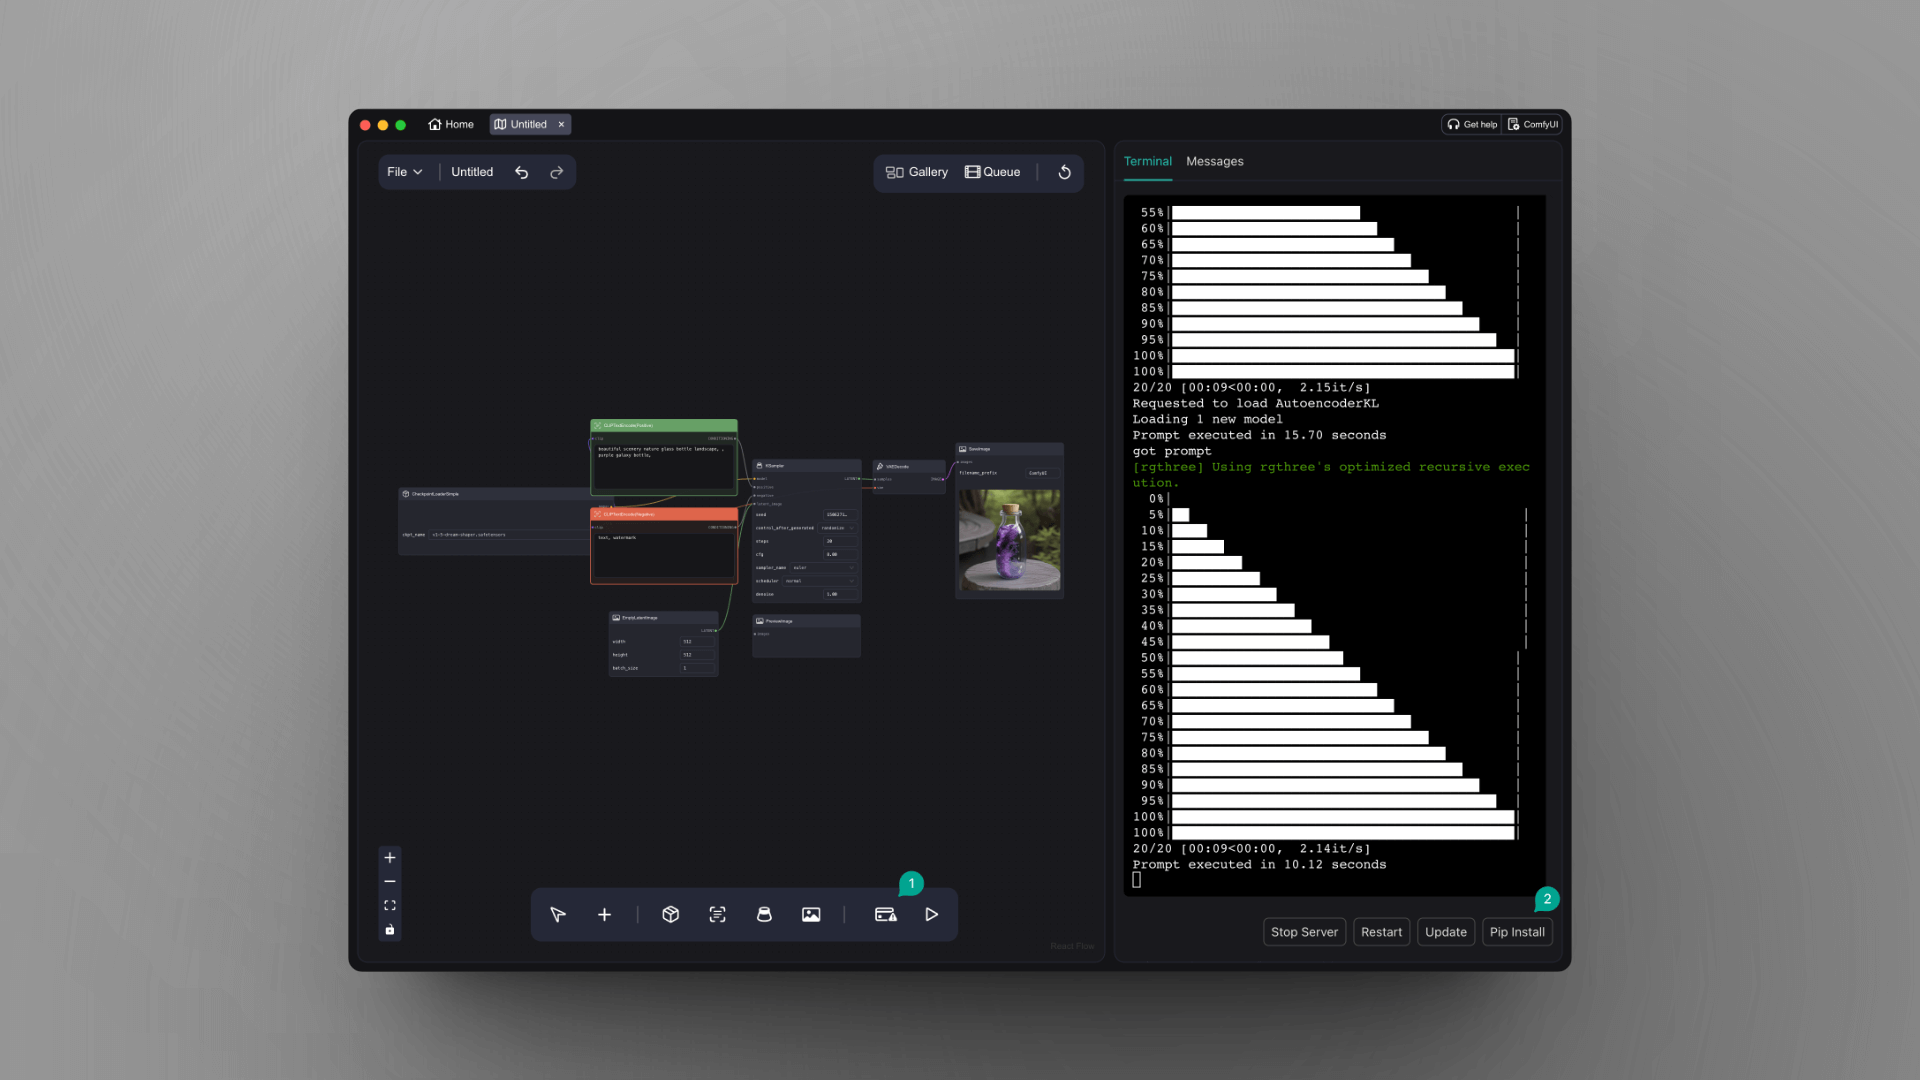
It is possible that your computer lacks other dependencies. If you're using Comflowy and need to check what dependencies are missing, you just need to click the 'Terminal' button in the lower toolbar (see image ① below), and through this Terminal interface, you may see some error messages. For example, when I installed InstantID, I got the following error message:
Cannot import D:\Program\ComfyUI\custom_nodes\ComfyUI_InstantID module for custom nodes: module 'cv2.gapi.wip.draw' has no attribute 'Text'So, I went on to ask the author of InstantID for help here (opens in a new tab) and also searched on Google. Eventually, I found out that I was missing the opencv-python dependency and had to install version 4.7.0.72.
If you are using Comflowy but need to install dependencies, you just need to click pip install (see image ② below), and enter the required dependency packages to complete the installation.
Step Three, Download Models
In addition to installing dependencies, some plugins also require you to manually download the corresponding models to use them. For instance, for the ComfyUI IPAdapter plus (opens in a new tab) plugin, besides installing dependencies, you need to download the related models to use it.
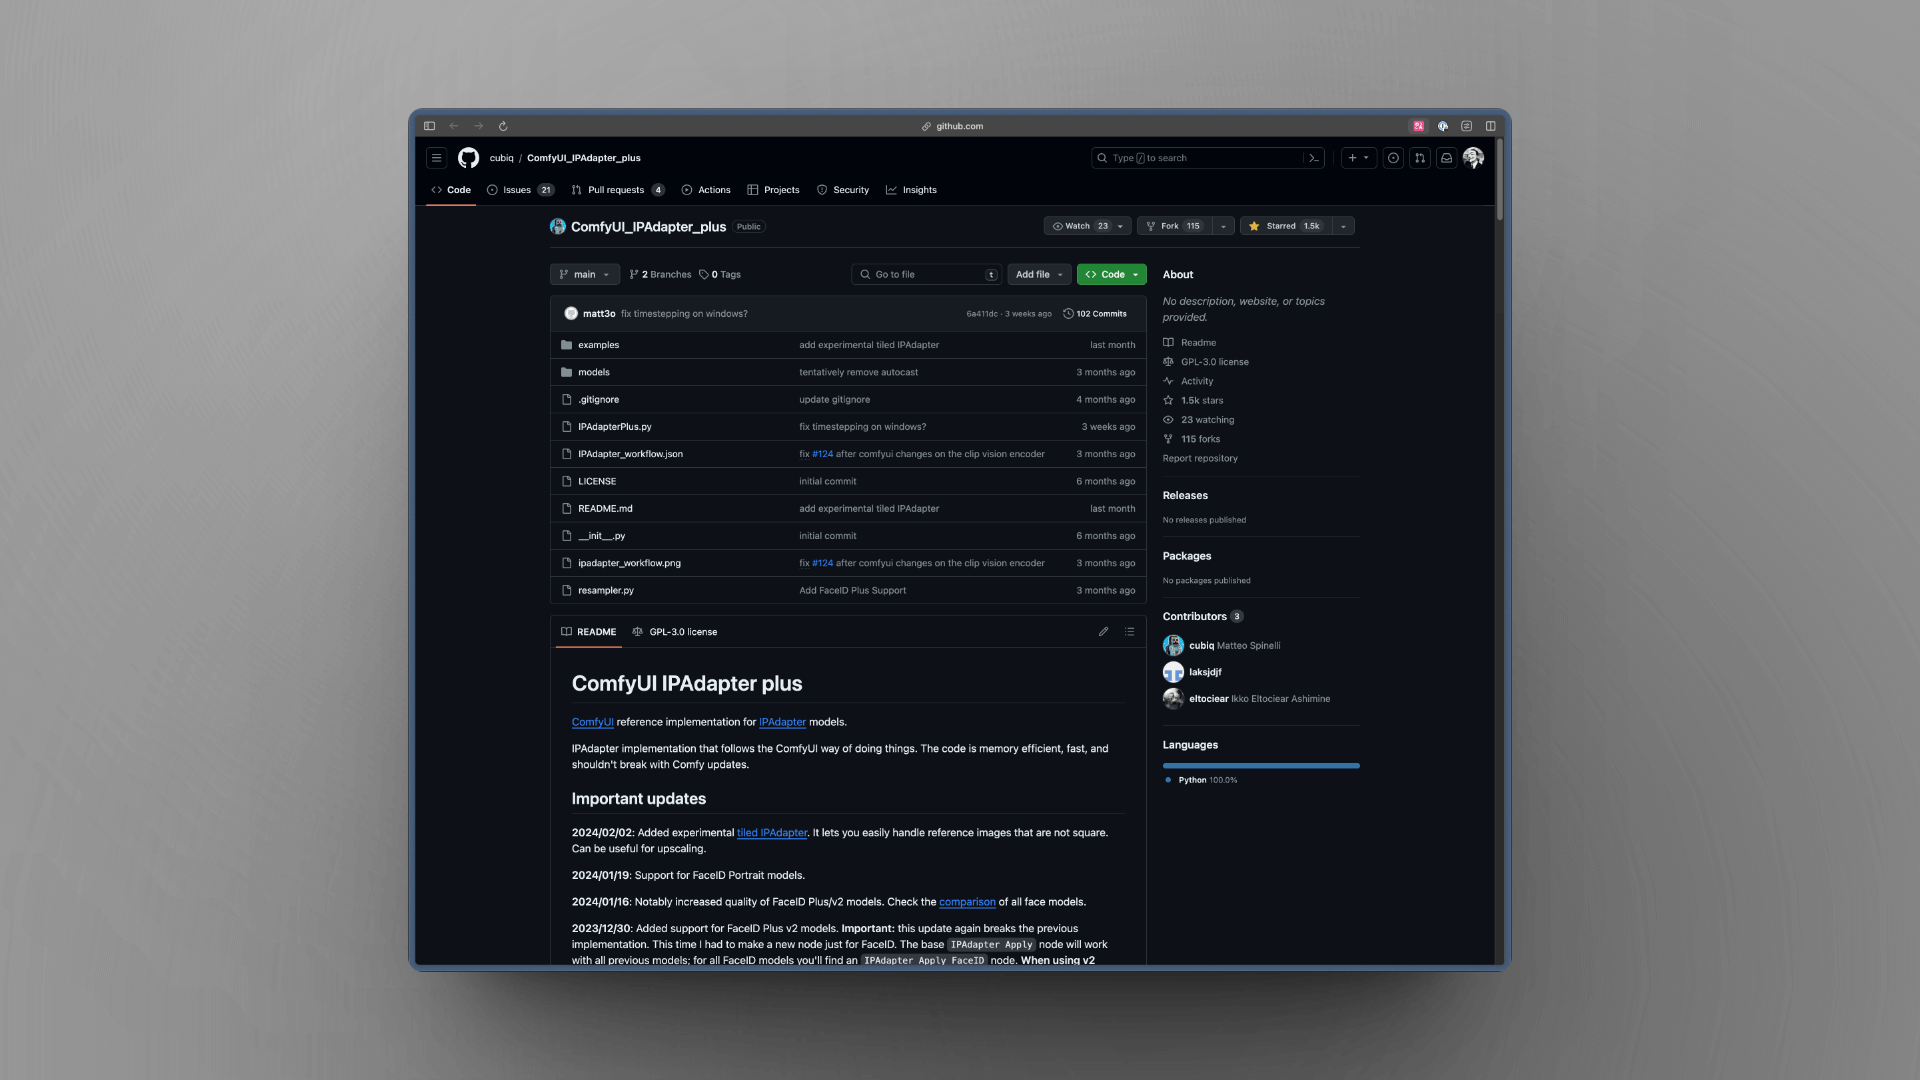
Typically, the Readme will list the model's download address, as well as the directory where the models should be placed:
The pre-trained models are available on huggingface, download and place them in the ComfyUI/models/ipadapter directory (create it if not present). You can also use any custom location by setting an ipadapter entry in the extra_model_paths.yaml file.
All you need to do is click the link to download, or search for the models, and then place the model files in the specified folder.